What is Always On VPN?
Always On VPN is a security feature that ensures a VPN connection is used to access the internet. If the VPN connection drops, the device is automatically restricted from internet access until a VPN connection is restored.
Always On VPN is a must for securing remote workers and those employees that travel frequently and connect to unsecured Wi-Fi networks. The feature prevents any potential leaks and makes sure company — and personal — resources are kept safe and secure.
To better understand how Always On VPN works, we invite you to watch this explainer video:
Who can enable Always On VPN?
Both Organization Admins and Members can enable Always On VPN. On top of that, Organization Admins can enable Always On VPN for specific teams.
Here is how Organization Admins can deploy Always On VPN:
- Go to Control Panel → Settings → Security configurations.
- Switch the toggle next to Always On VPN to enable the feature for the entire organization.

- Upon enabling Always On VPN - the Auto-Connect feature will be automatically activated.
- If the owner enables Always On VPN in the Control Panel – users will not be able to toggle this feature off through the application settings.
- Organization Admins can enable Always On VPN for specific teams.
- The VPN connection will remain active at all times, regardless of whether the network is configured as trusted or untrusted.
- Always On VPN is currently supported only on Linux, Windows and macOS (downloaded directly from our website) applications.
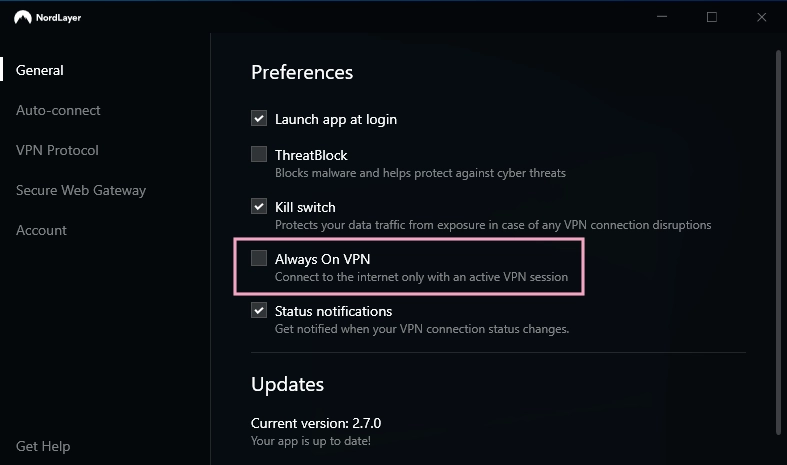
To configure Windows client for Always On VPN:
- Go to the NordLayer app → Settings → General.
- Tick the box next to Always On VPN.

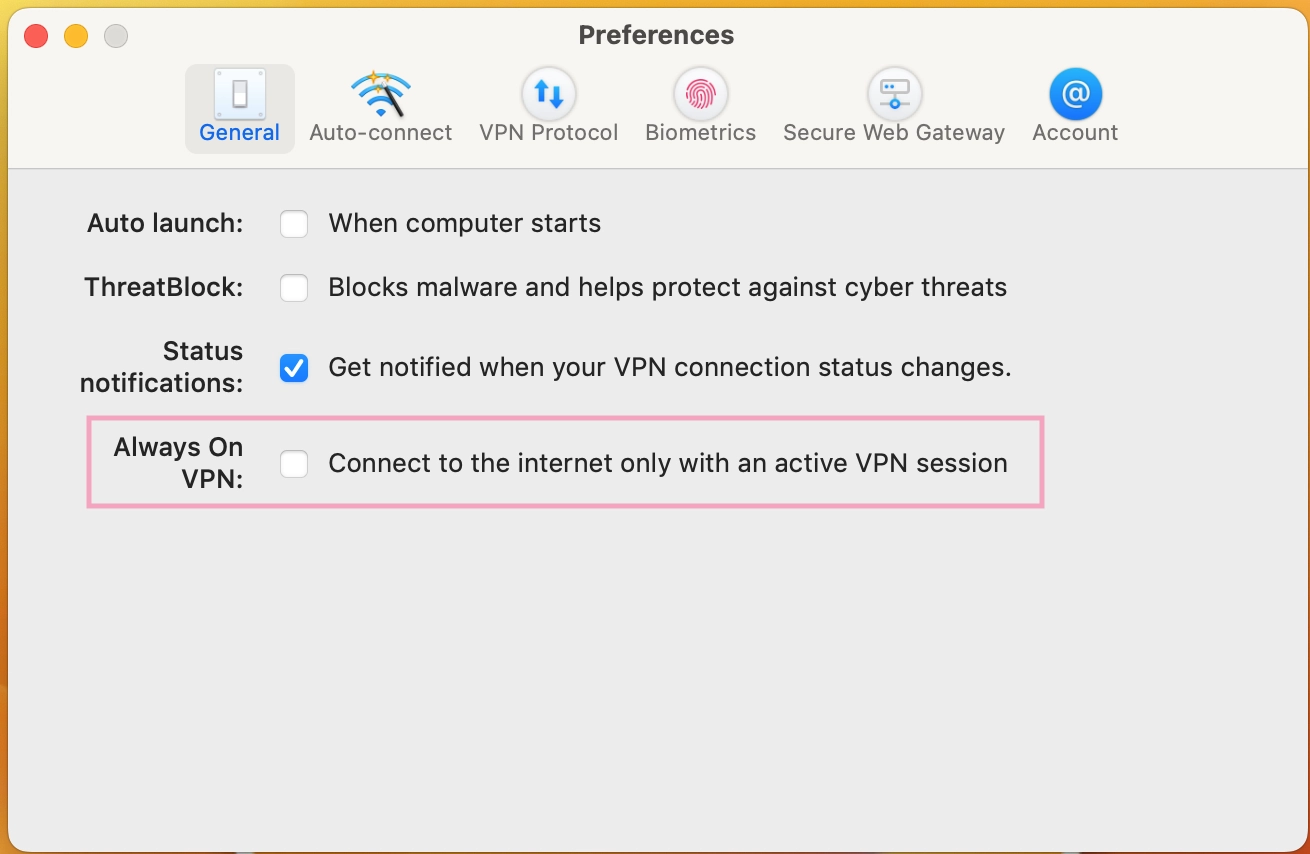
To configure macOS client for Always On VPN:
- Go to the NordLayer app → Preferences → General.
- Tick the box next to Always On VPN.

To configure Linux client for Always On VPN:
- Open Terminal and run these commands:
$ nordlayer settings set

Select setting to change:
1: VPN Protocol
2: Auto-connect
3: Always connect to
4: Web Protection
5: Always On

Select [number]: 5

Available values for Always On
1: Disabled
2: Enabled

Select [number]: 2
How to get temporary internet access?
Members might need temporary internet access to log in to the NordLayer app, handle captive portals when connecting to Wi-Fi in places like hotels and airports, and troubleshoot.
To get temporary internet access on macOS and Windows – click on the “Get internet access” button when logging in to the NordLayer application.
- If you are already logged in to the application – “Get internet access” access button can be found at the bottom of the gateways section.
To get temporary internet access on Linux, use the following command:
$ nordlayer alwaysonvpn
Available commands:
1: Enable Temporary Internet Access

Select [number]: 1

$ nordlayer status
Login: Not logged in
VPN: Disconnected
Current network: wired connection

Temporary internet access active.

Internet connection left: 00:02:56
Note: In case you have any questions or are experiencing any issues, please feel free to contact our 24/7 customer support team.