Enabling Okta single sign-on (SSO) allows users to authenticate their identity seamlessly when logging into the Service Management Portal.
To set up Okta SSO for your Service Management Portal, you'll need to navigate to your Okta dashboard and copy Client ID, Client Secret, Audience, and Issuer values.
You'll also need to Prepare the Base URL. It's formed like this:
https://your-okta-domain.okta.com/oauth2
Replace your-okta-domain with the Issuer value that you found on the Okta dashboard.
Follow these steps to obtain all the needed values for your Okta SSO integration:
- Sign in to your Okta dashboard
- Click on Admin in the top right corner
- Go to the Applications section and select Applications
- Select Create App Integration and choose OIDC - OpenID Connect option
- Pick Web Application at the bottom of the page and click Next
- In a New Web App Integration window set the application name as NordLayer
- In the Sign-in redirect URL field input this URL:
https://partner-api.nordlayer.com/v1/tokens/oauth/{partner-identifier}/resolution
where {partner-identifier} is organization identifier
8. Adjust the Assignments section as needed and click Save
9. After saving, you'll be redirected to the application's General page. Copy the Client ID and Client Secret values.
10. Click on the Sign On tab
11. Copy your Issuer and Audience parameter
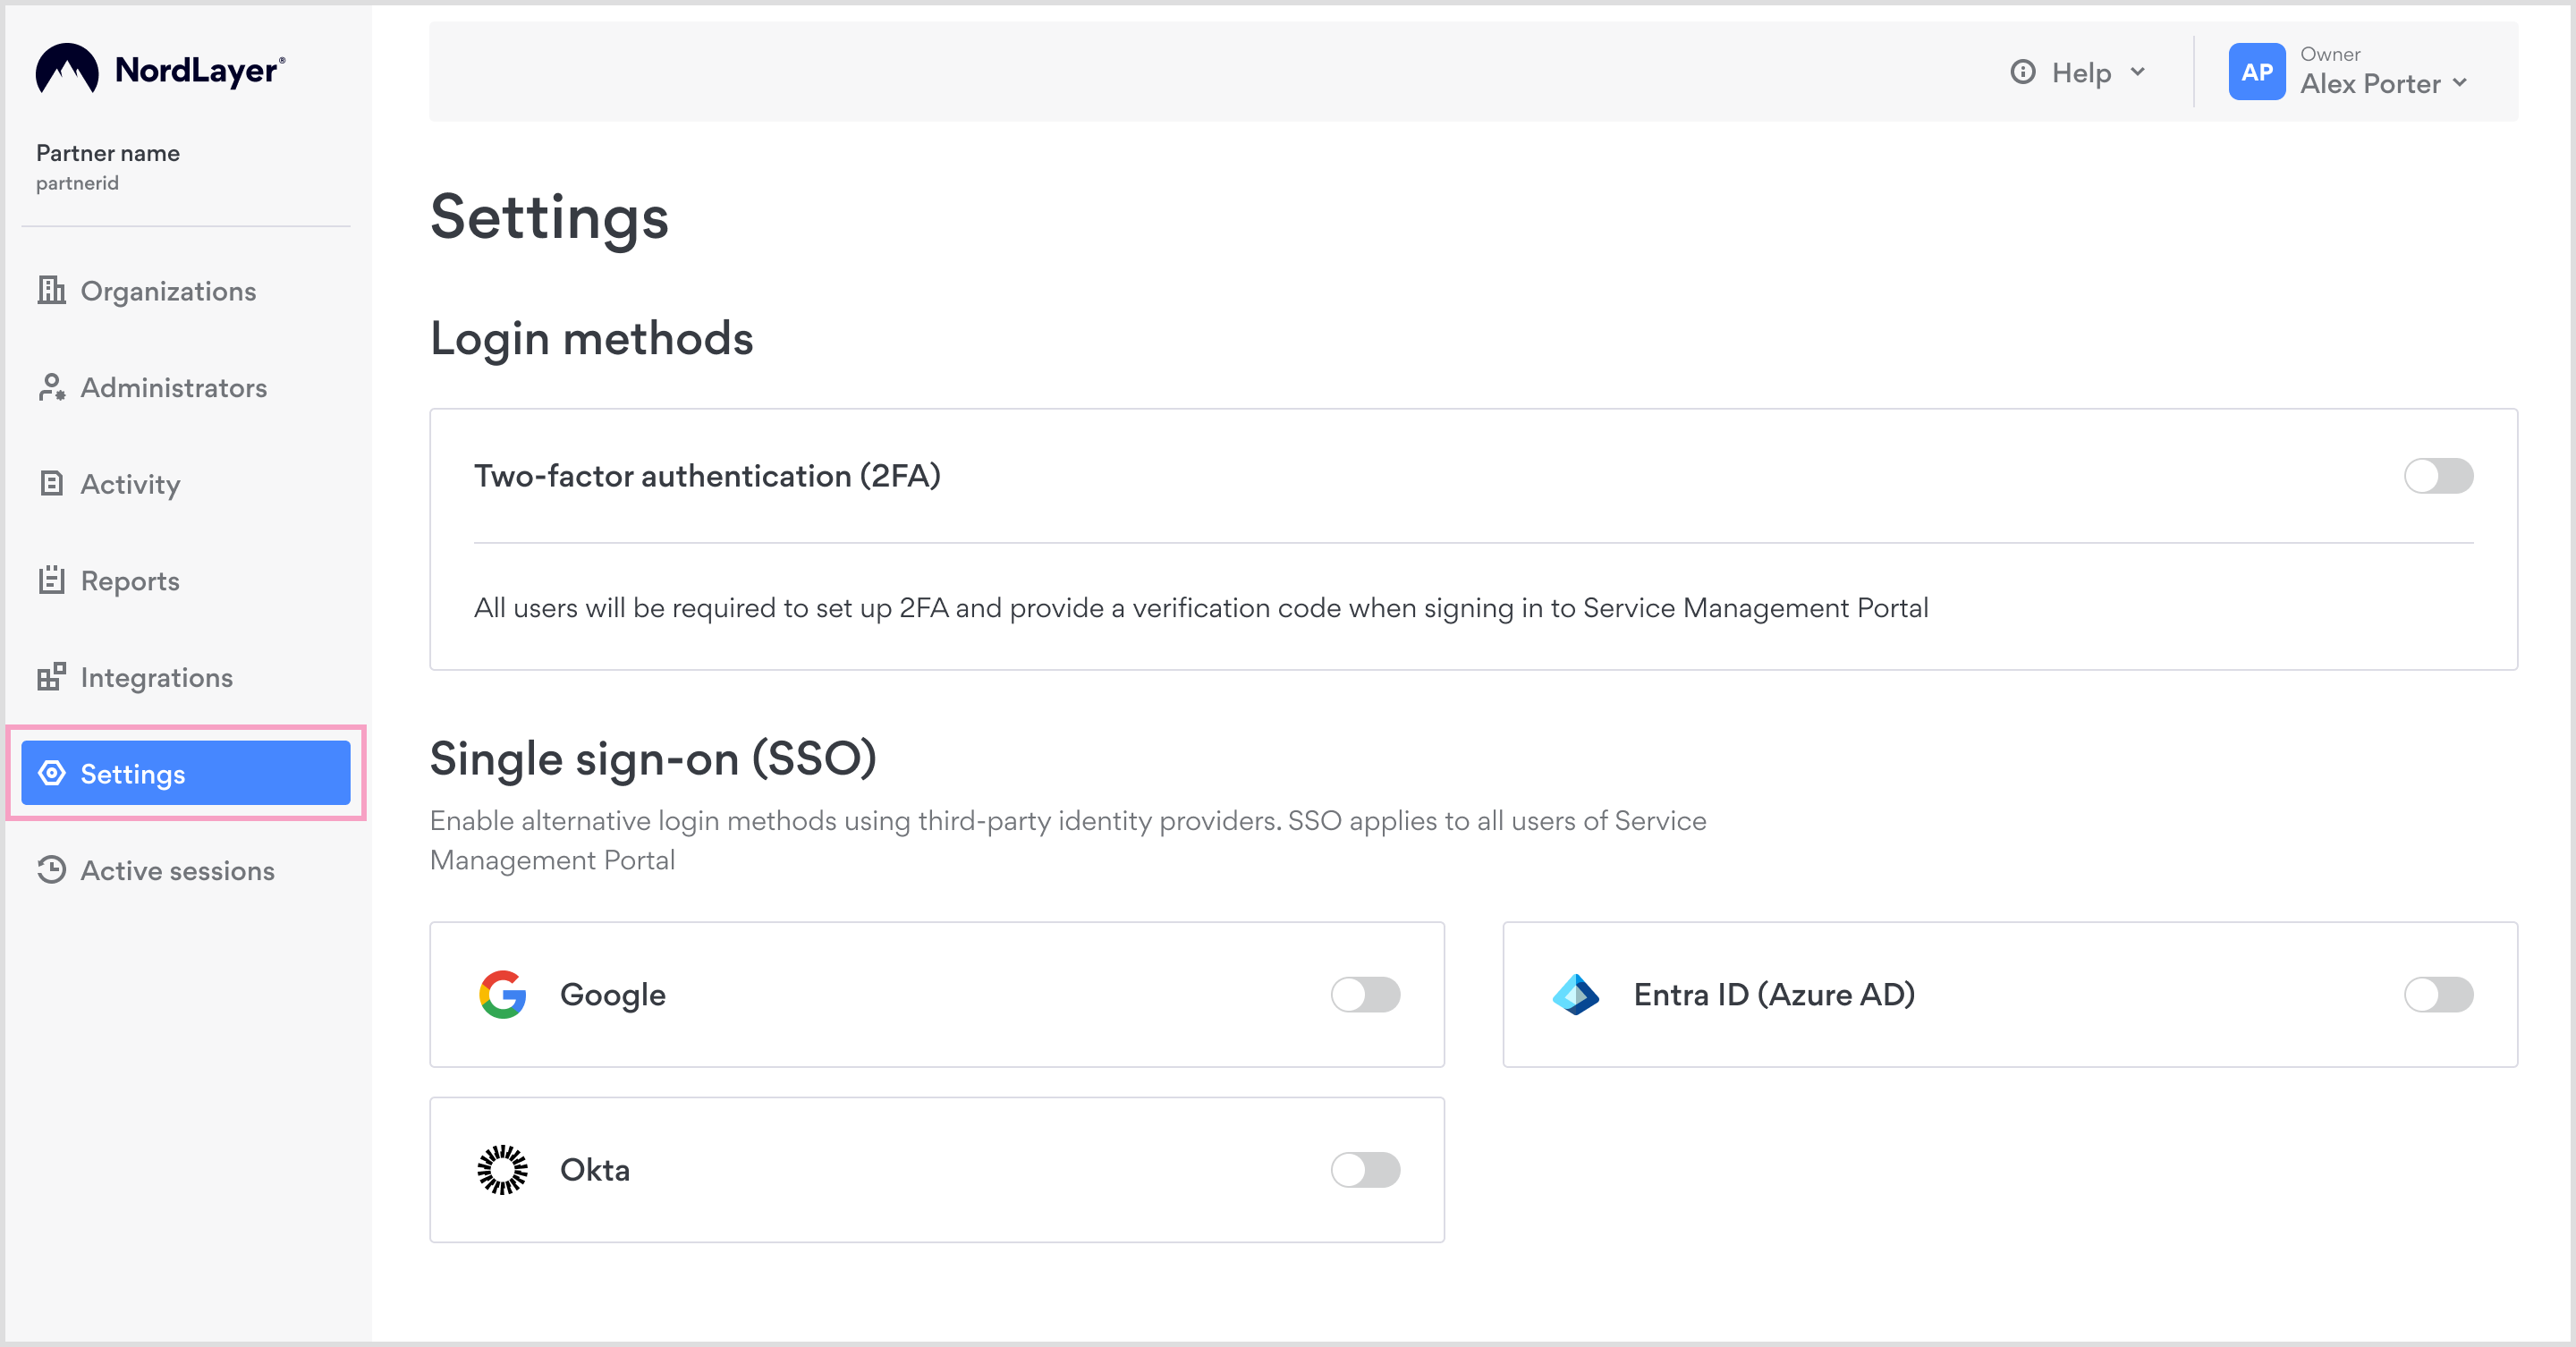
12. Configure Okta SSO on the Service Management Portal by logging in to the Service Management Portal and clicking Settings:

Select Okta

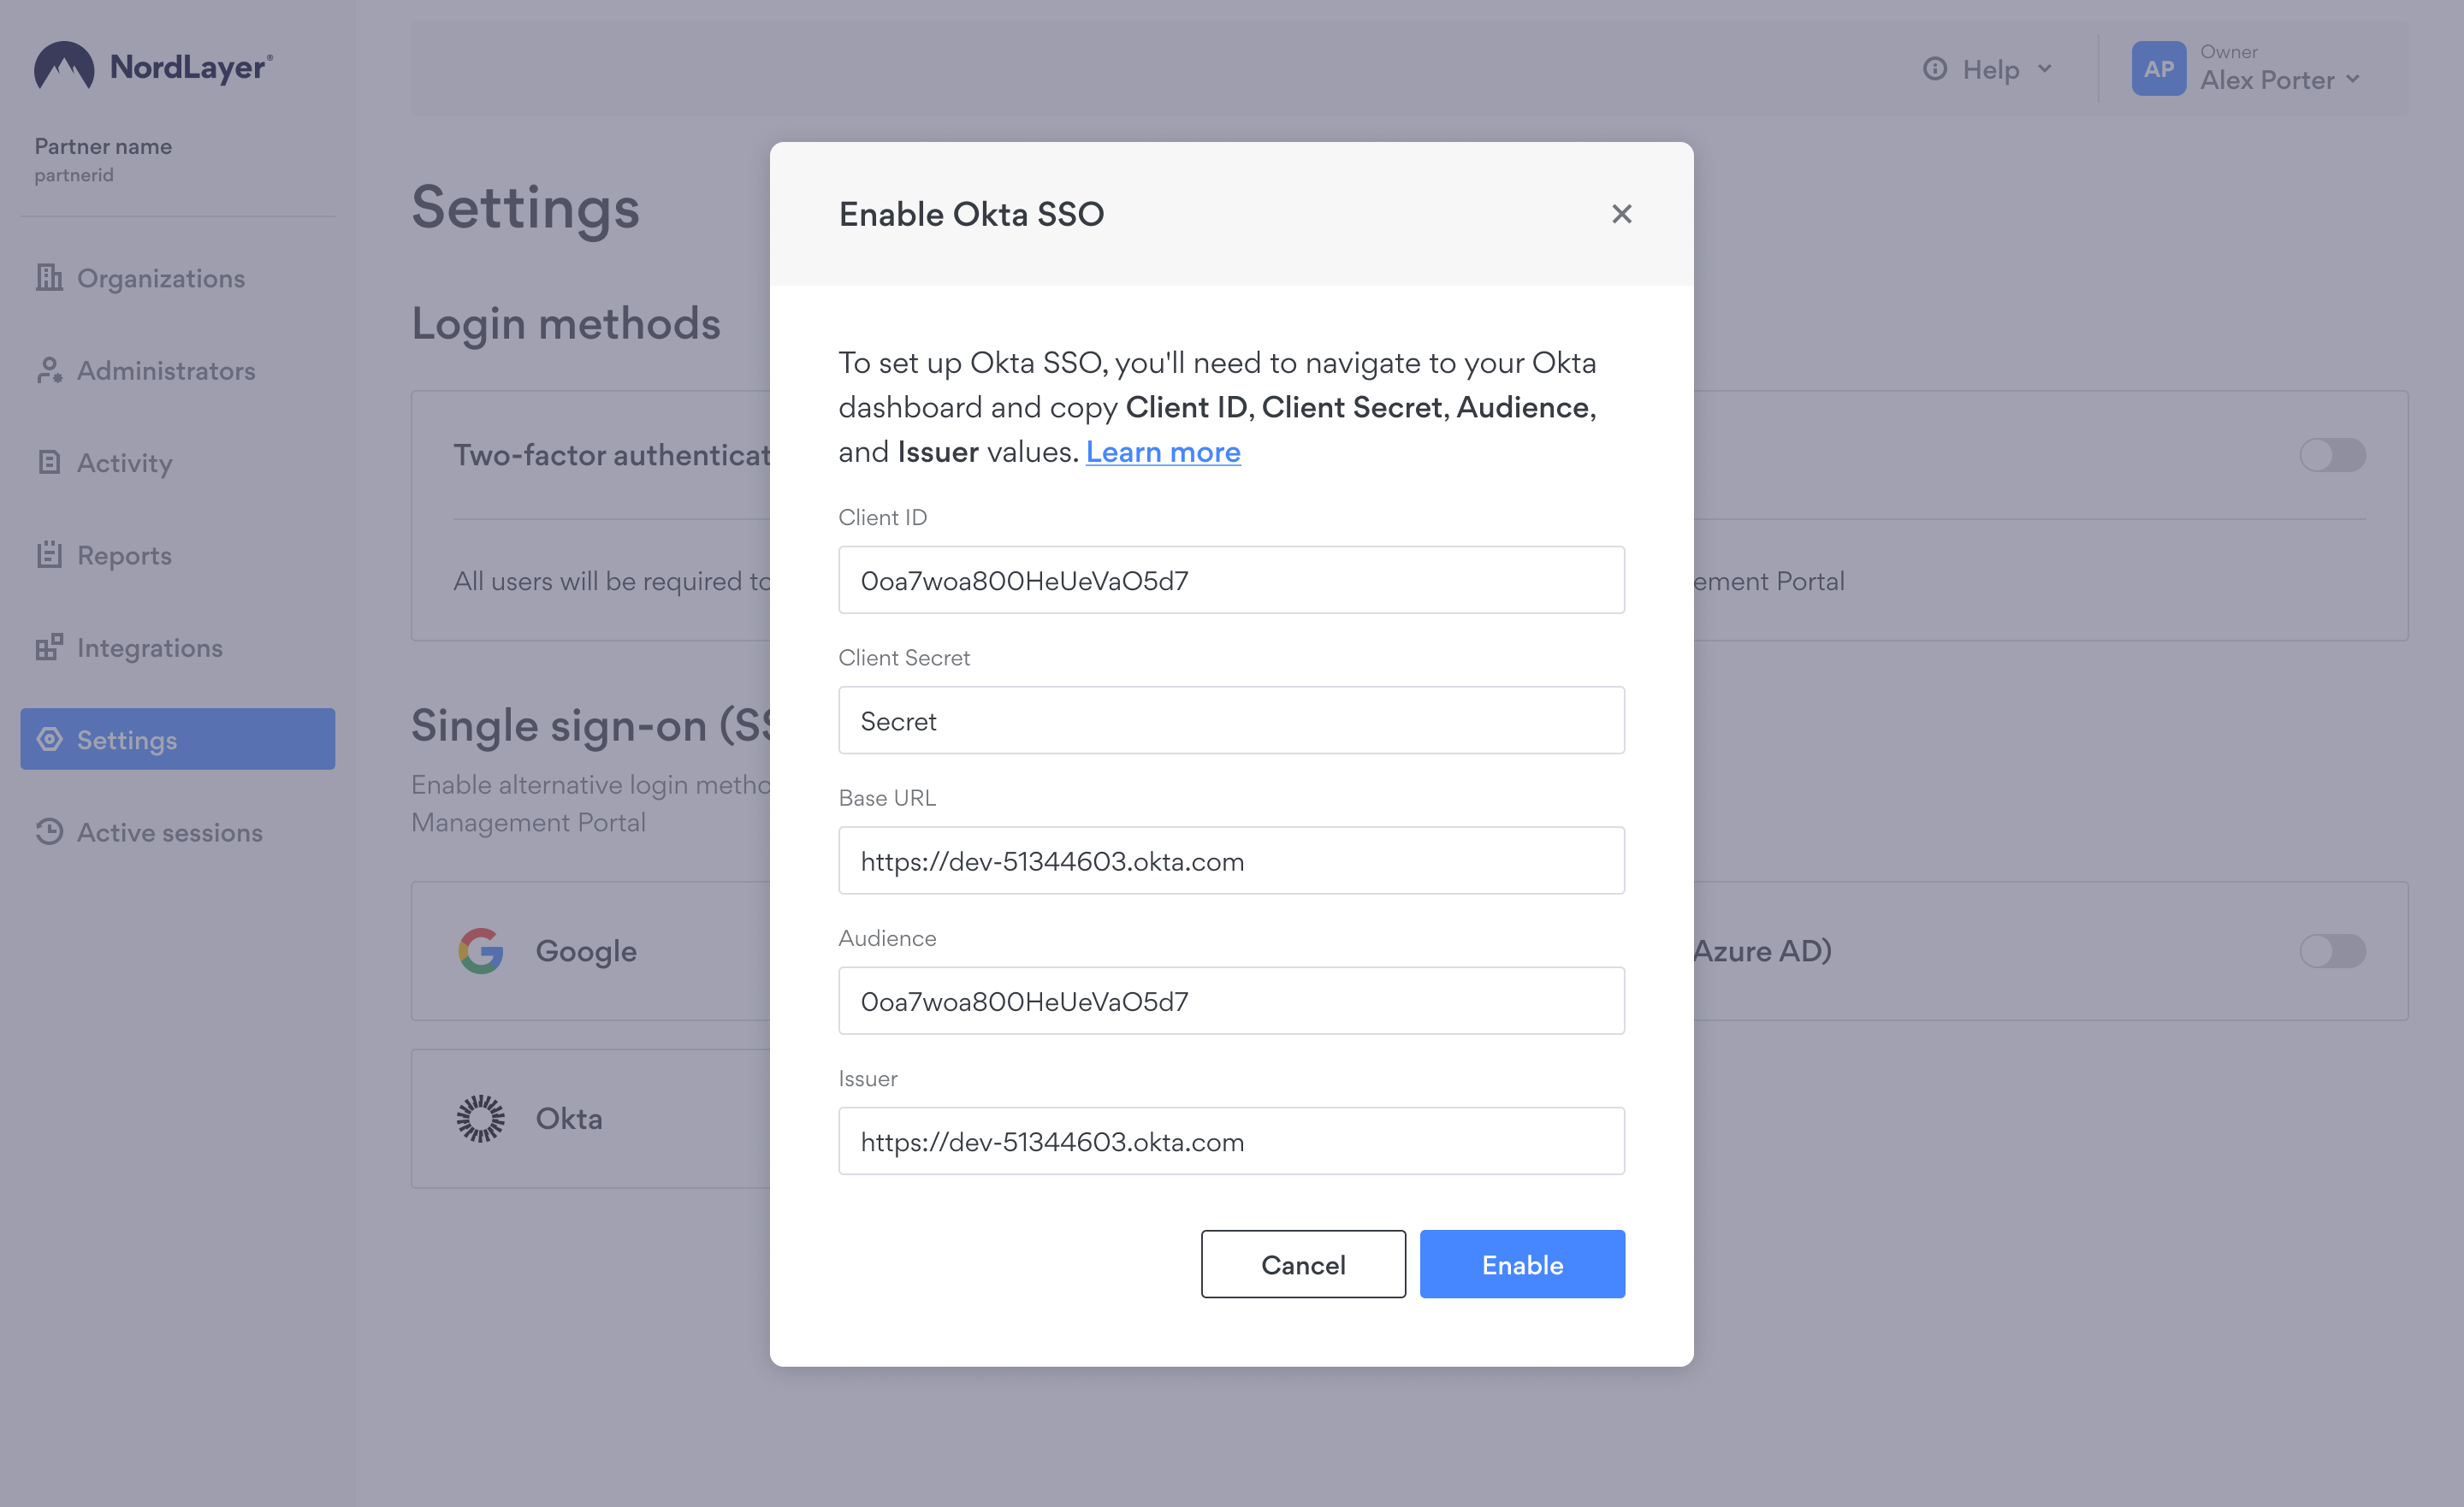
In a newly opened window enter the following details:
- Client ID (copied from the Okta dashboard)
- Client Secret (copied from the Okta dashboard)
- Base URL (replace 'your-okta-domain' in https://your-okta-domain.okta.com/oauth2 with the Issuer from the Okta dashboard)
- Audience (copied from the Okta dashboard)
- Issuer (replace your-okta-domain with the Issuer from the Okta dashboard)
https://your-okta-domain.okta.com
Submit the information and click Save. Your organization members will be able to log into the Service Management Portal using Okta SSO.
Note: It's possible to have multiple SSO methods enabled concurrently.
In case you have any questions or are experiencing any issues, please feel free to contact our 24/7 customer support team.