This guide will show you how to edit, add, or remove the DNS settings on your macOS device.
This method can be helpful if you are looking to improve the connection quality and in some cases - the speed.
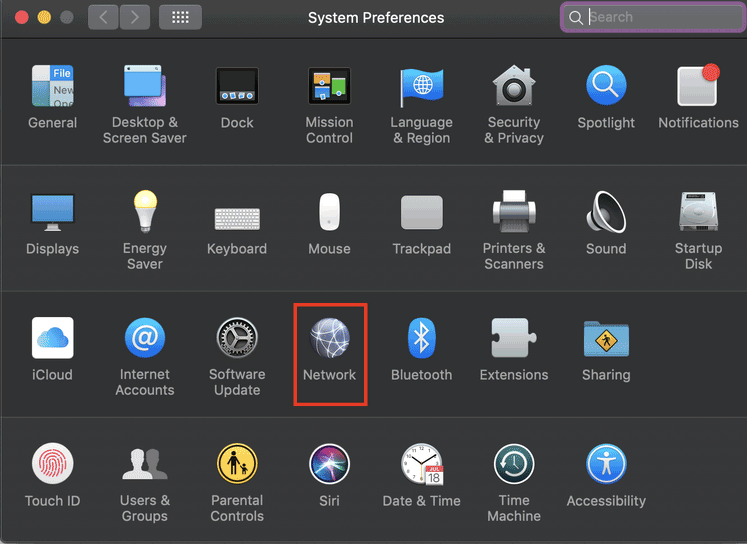
- Click the System Preferences icon in the Dock, or choose Apple menu > System Preferences.

Then navigate to the Network section.

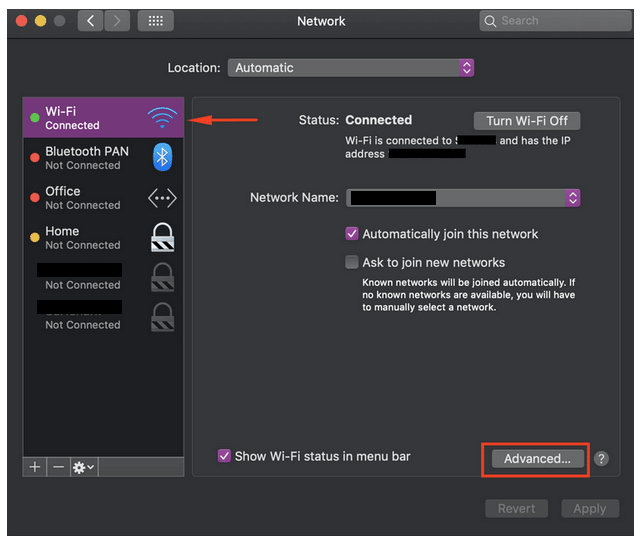
- Select the network you wish to configure your DNS on. In this case, you will be configuring the main Wi-Fi networks' DNS. After selecting the network, click on Advanced...

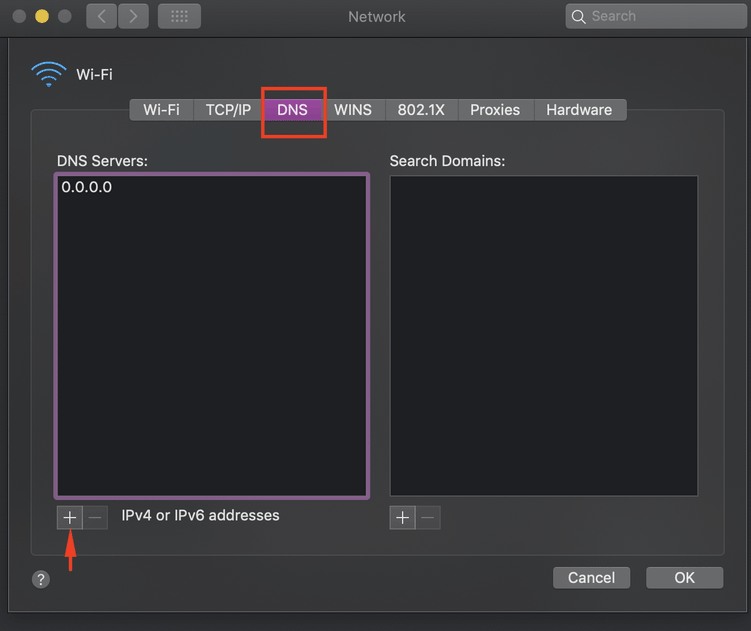
- In the new window, select the DNS section. After that you will be able to add ( + ) or remove ( - ) DNS entries. Click on + to add your DNS entries.

- To edit a DNS entry, double click on the DNS address and you will be able to change it. If you want to remove it, select the DNS address by clicking on it once and then clicking the - sign.

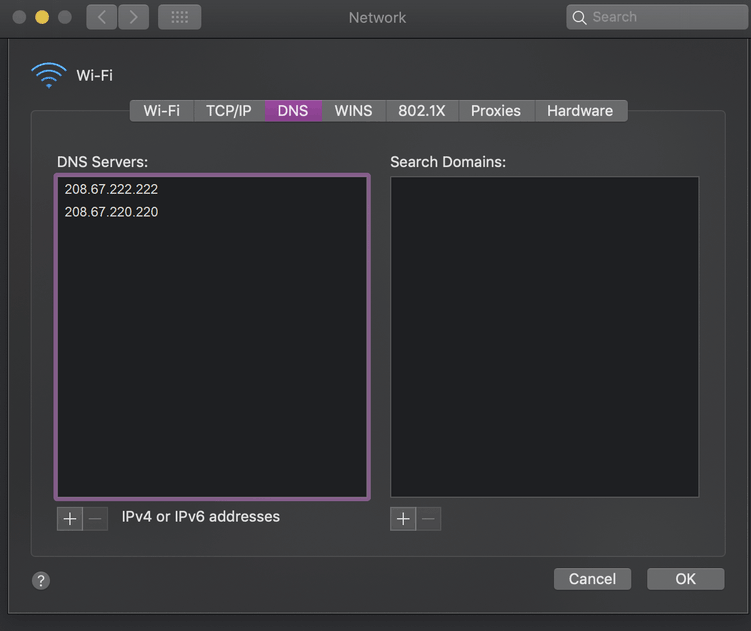
Here are the DNS addresses you can try:
- 208.67.222.222
- 208.67.220.220
- Now click OK in the Network window and then click Apply.

Note: In case you have any questions or are experiencing any issues, please feel free to contact our 24/7 customer support team.