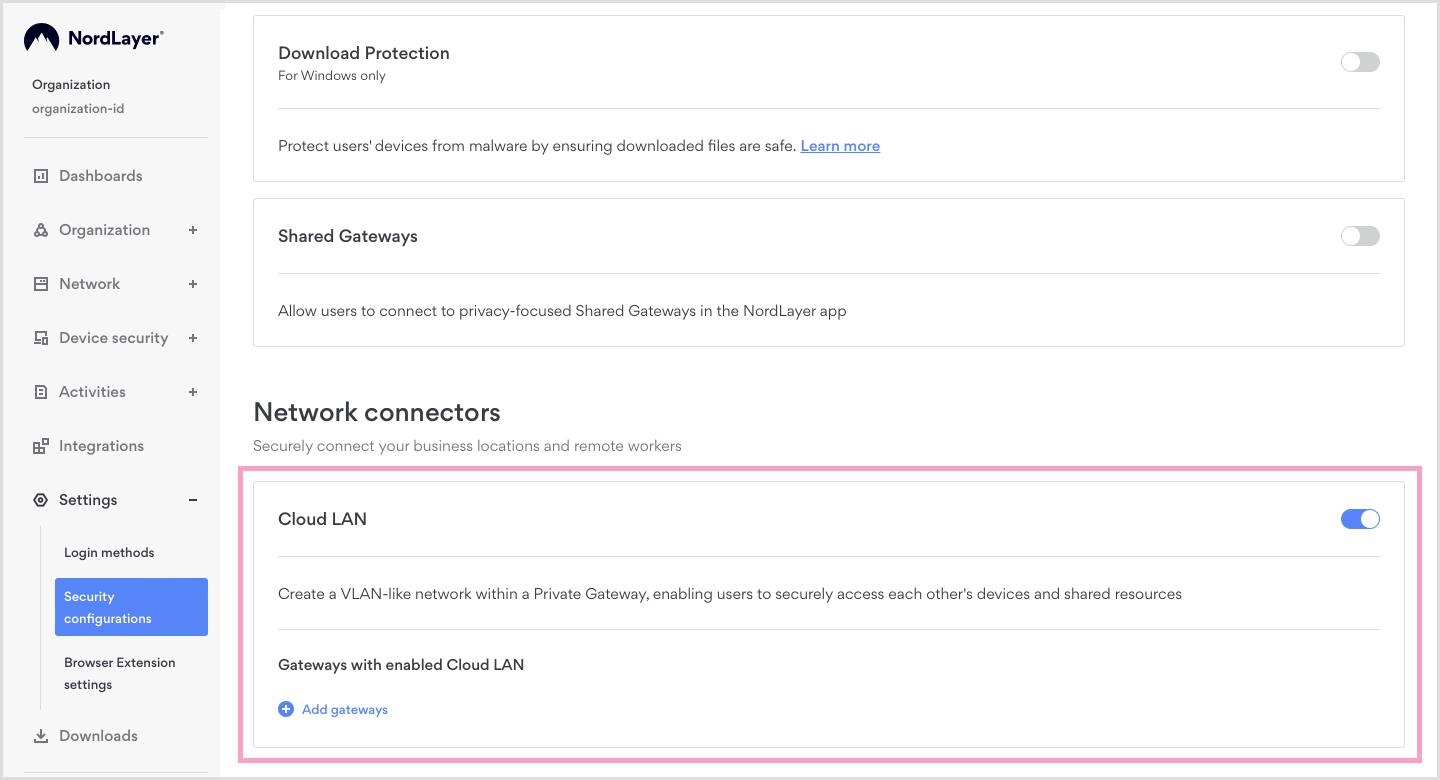
The Cloud LAN network connector enables administrators to create a virtual LAN connecting user devices to establish remote device-to-device connectivity. It provides a secure method of remote device access, ideal for secure file sharing, remote control, or scenarios where remote devices are required for work-related purposes. Each connection is secured through a Virtual Private Gateway featuring quantum-safe encryption, ensuring maximum security of data in transit.
1. Enabling Cloud LAN in Control Panel
Note: In order to configure this feature, make sure you have Virtual Private Gateway created.
-
Log into the Control Panel as an administrator, navigate to the main menu on the right, and click Settings → Security Configurations.
-
Under the Security Configurations page, find the Cloud LAN section and click the "Add Gateways" button.

- In the window that appears, select one or more gateways you wish to enable for the Cloud LAN feature, then confirm your selection.
Once the feature is enabled for your Virtual Private Gateway – a local network (LAN) will be created between all the devices connected to the same private gateway.
2. Enabling Cloud LAN on members device
Once you have enabled Cloud LAN via the Administrator's Control Panel and added your gateways, the next step is to configure each device you wish to remotely access by assigning it a device name within the NordLayer application.
To complete this setup, please follow the instructions specific to the operating system used by each device—Windows, macOS, Linux, iOS, or Android.
Detailed instructions for each operating system can be found in the following article: "Setting up the device name for Cloud LAN".
Note: In case you have any questions or are experiencing any issues, please feel free to contact our 24/7 customer support team.