Setting up manual IKEv2 connection on Windows 8/10
- 3 Minutes to read
Setting up manual IKEv2 connection on Windows 8/10
- 3 Minutes to read
Article Summary
Share feedback
Thanks for sharing your feedback!
The IKEv2/IPsec connection is one of the alternative methods to connect to NordLayer private gateway(s) on your Windows PC. This is the preferred connection method among privacy enthusiasts, as the IKEv2/IPsec security protocol is currently one of the most advanced on the market. That said, this manual setup lacks the additional features of the native NordLayer app and is a bit more complicated to set up.
Disclaimer: This connection method will require you to add the certificate to Trusted Root Authorities, which will apply to all certificates. This might potentially put your system at risk of a MITM attack if someone gets the private key of that certificate. While our private keys are completely secure and the chances of anything bad happening are very small, we recommend this connection method only if you cannot connect using our native app or any other alternative way.
To use this connection method, the only file you need to download and install is the NordLayer digital certificate. The connection application itself is already in-built on Windows.
- Download the certificate: https://downloads.nordlayer.com/certificates/root.der
Note: Your browser may try to save the file in its own certificate location or open it immediately. Make sure to download the file instead of just opening it. On Firefox, right-click the link above and select "Save Link As...". On Internet Explorer, select "Save" instead of "Open". Chrome will download the file correctly.

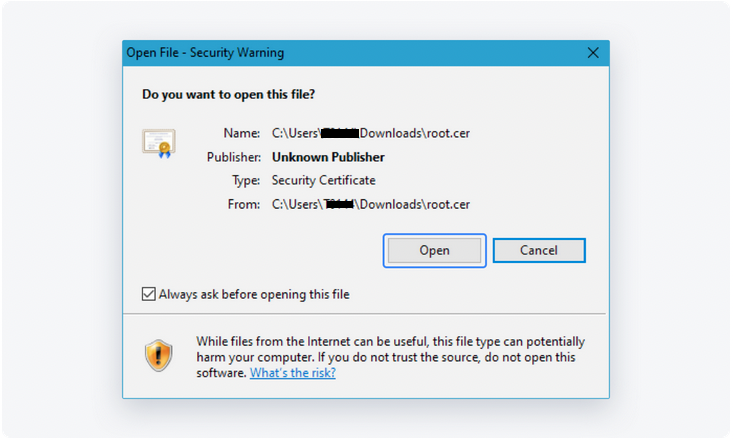
Double-click the root.der file you have just downloaded.
- Click Open
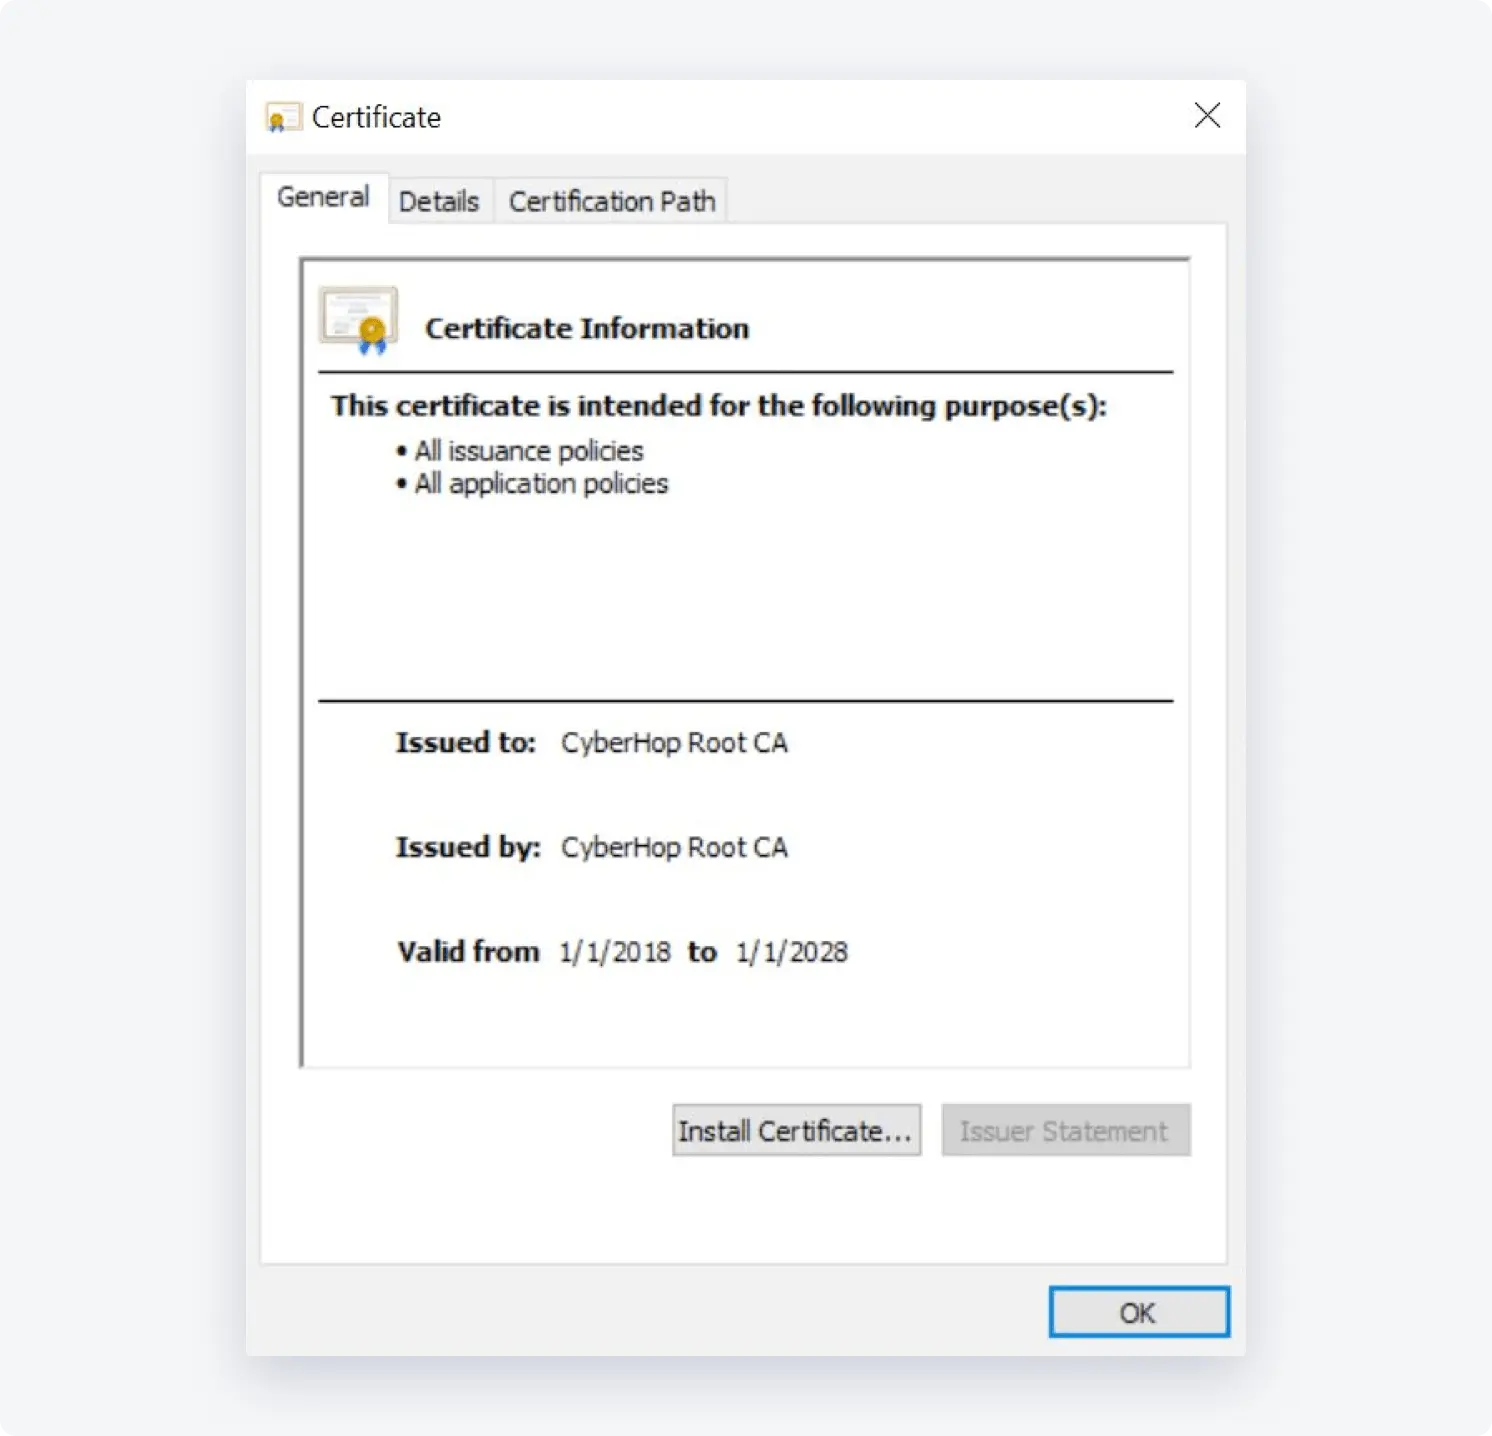
- Click Install Certificate…
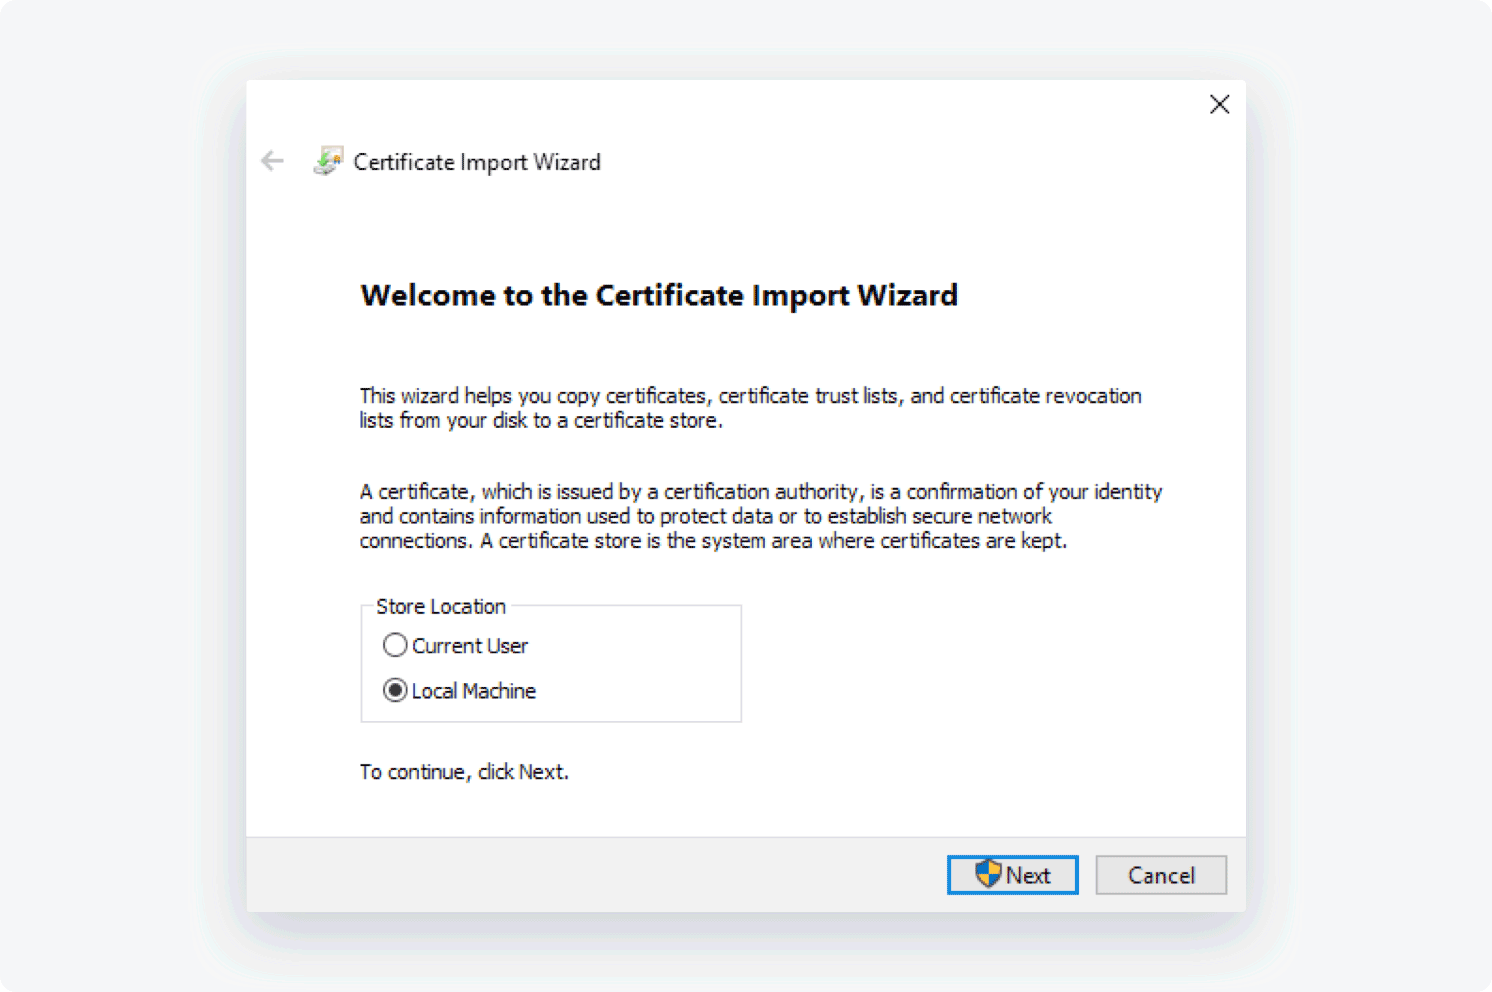
- Select Local Machine and click Next
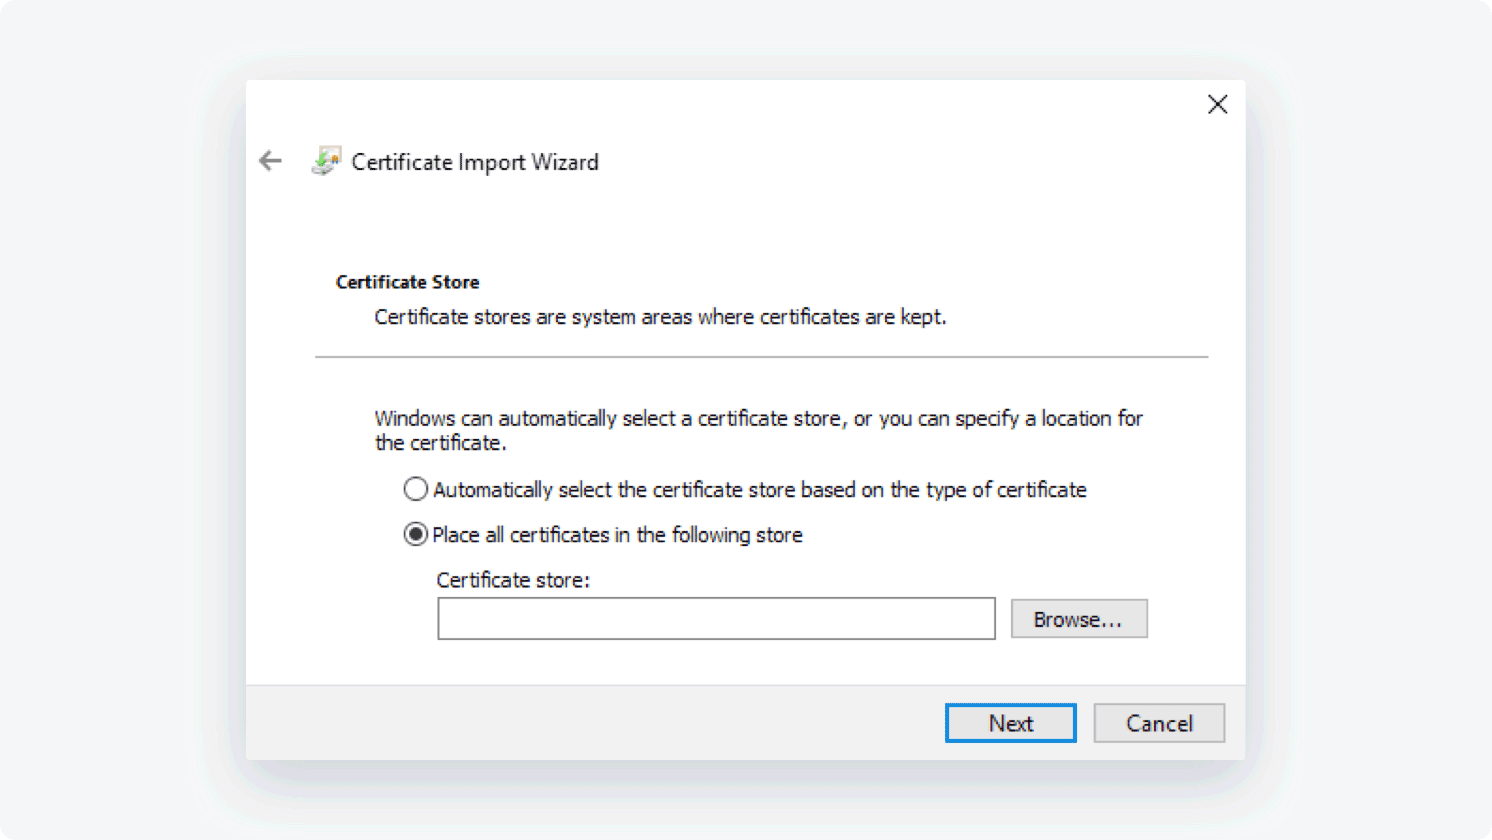
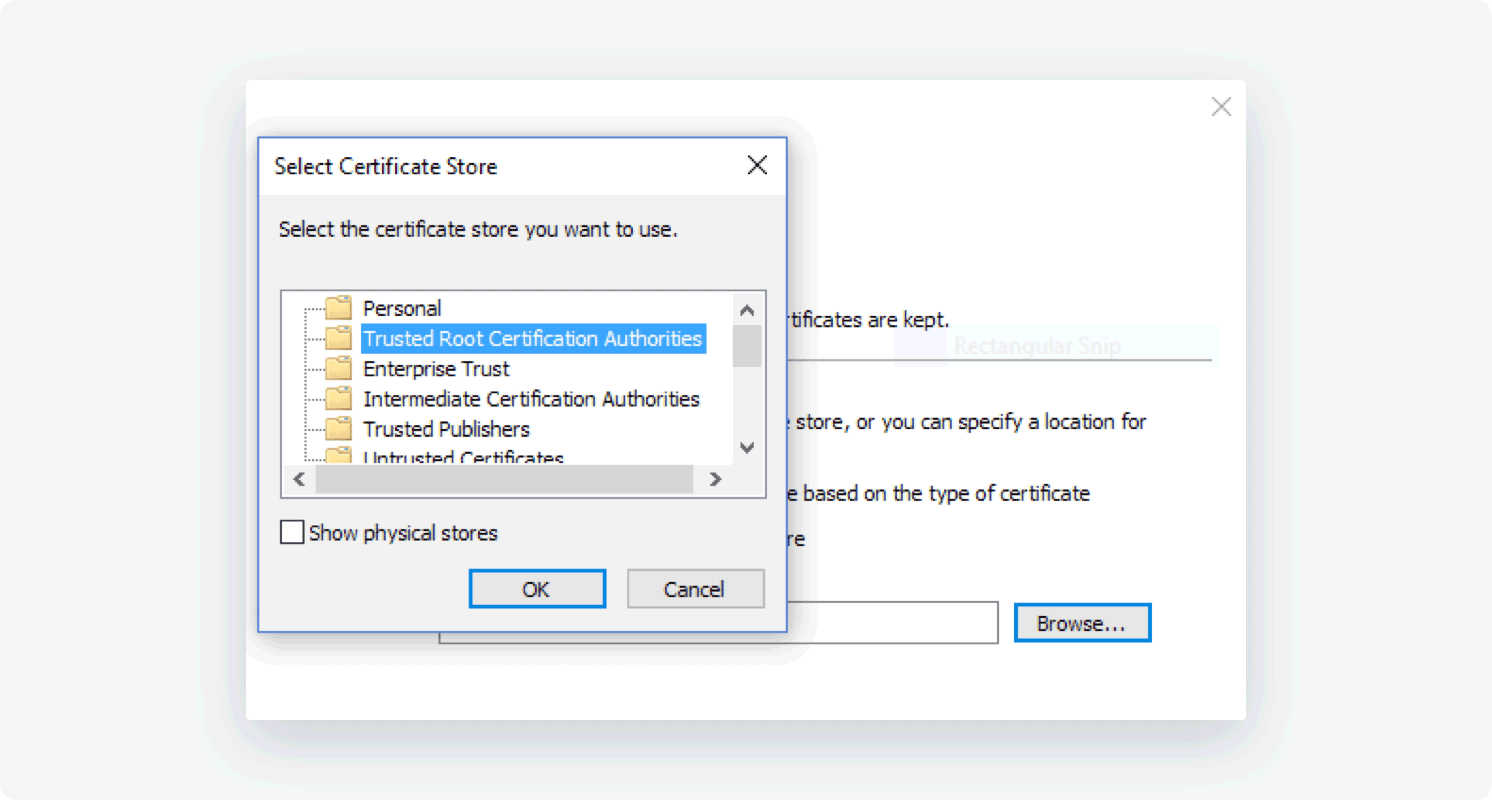
- Select Place all certificates in the following store and click Browse...
- Select Trusted Root Certification Authorities
Click OK and then Next.
Click Finish
Click OK on both windows
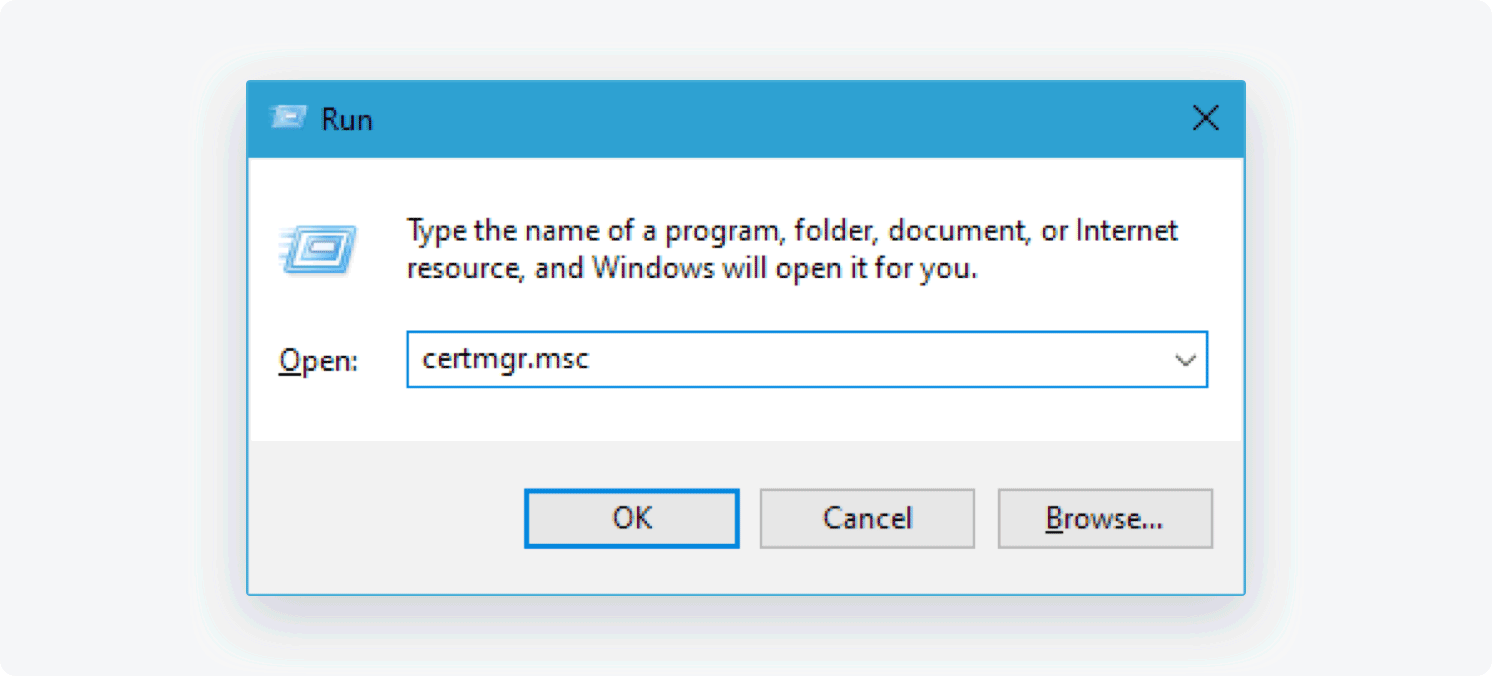
Open the Run box by pressing the Windows + R key combination on your keyboard
Type certmgr.msc in the Run box to open the certificates management tool.
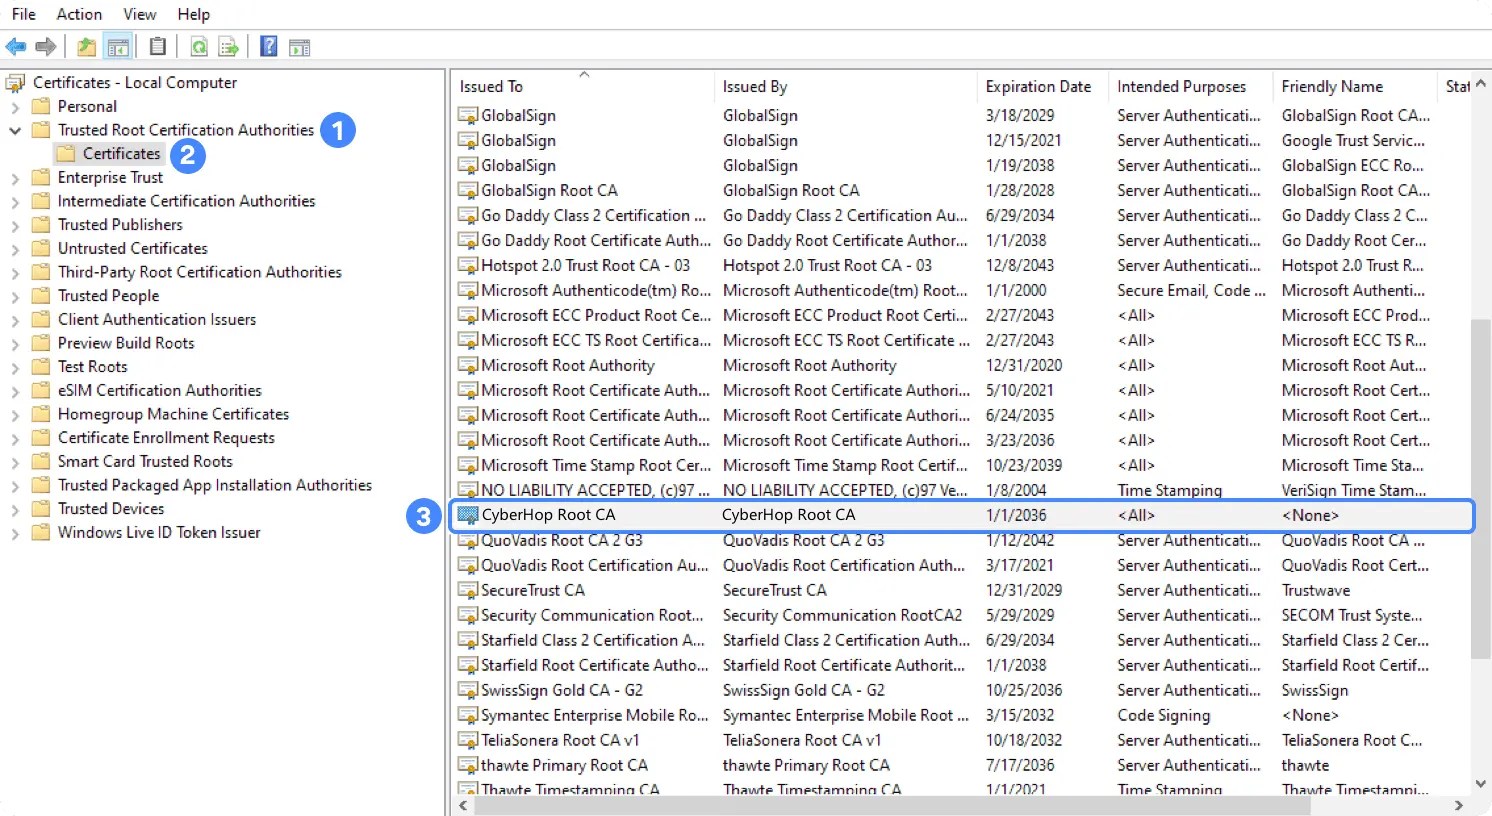
- Navigate to Trusted Root Certification Authorities > Certificates and find CyberHop Root CA
- Right-click on CyberHop Root CA and select Properties
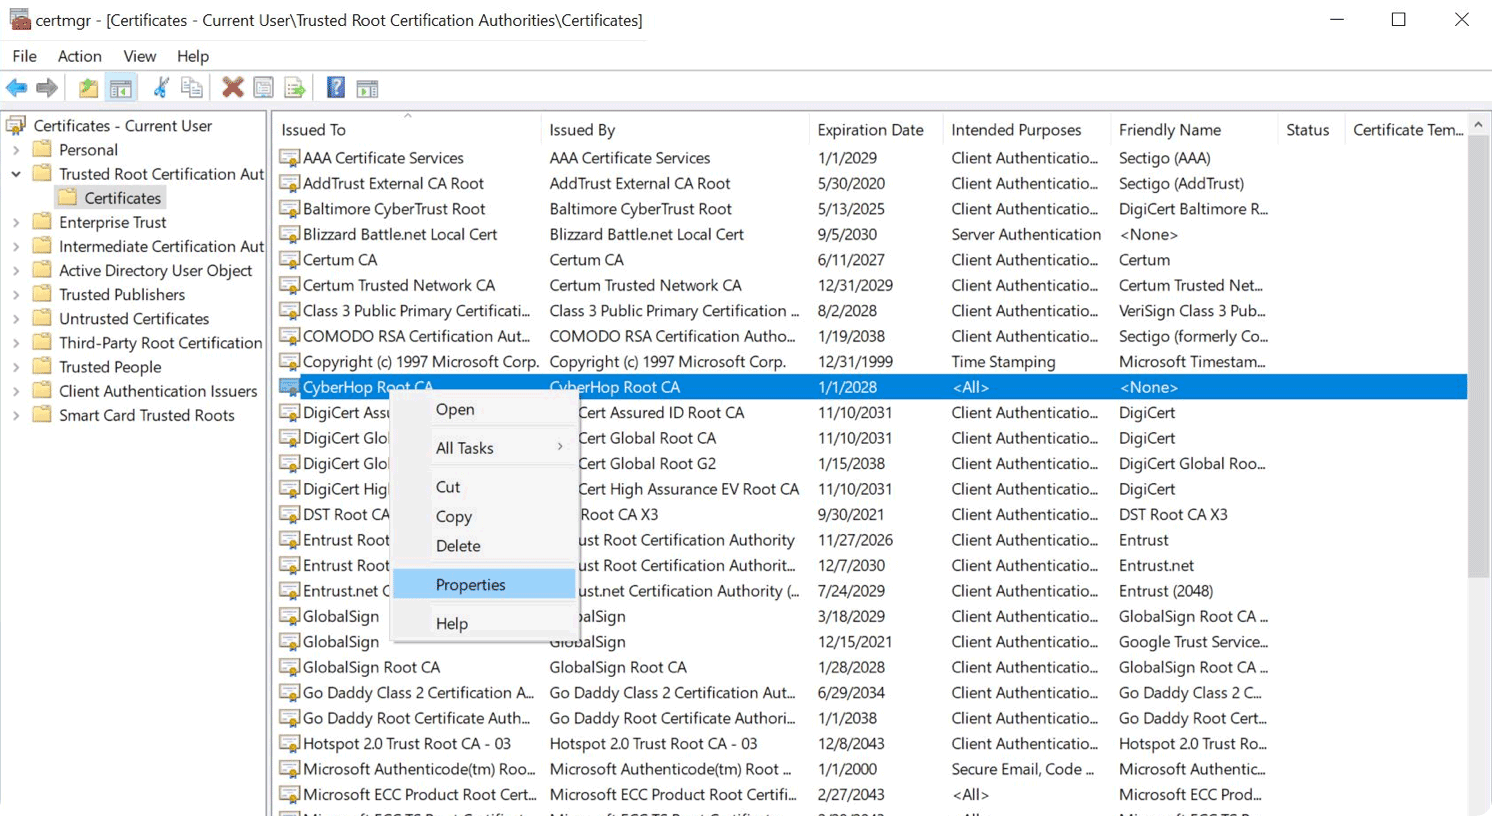
- Check the Enable only for the following purposes option and uncheck all the boxes except the Server Authentication box
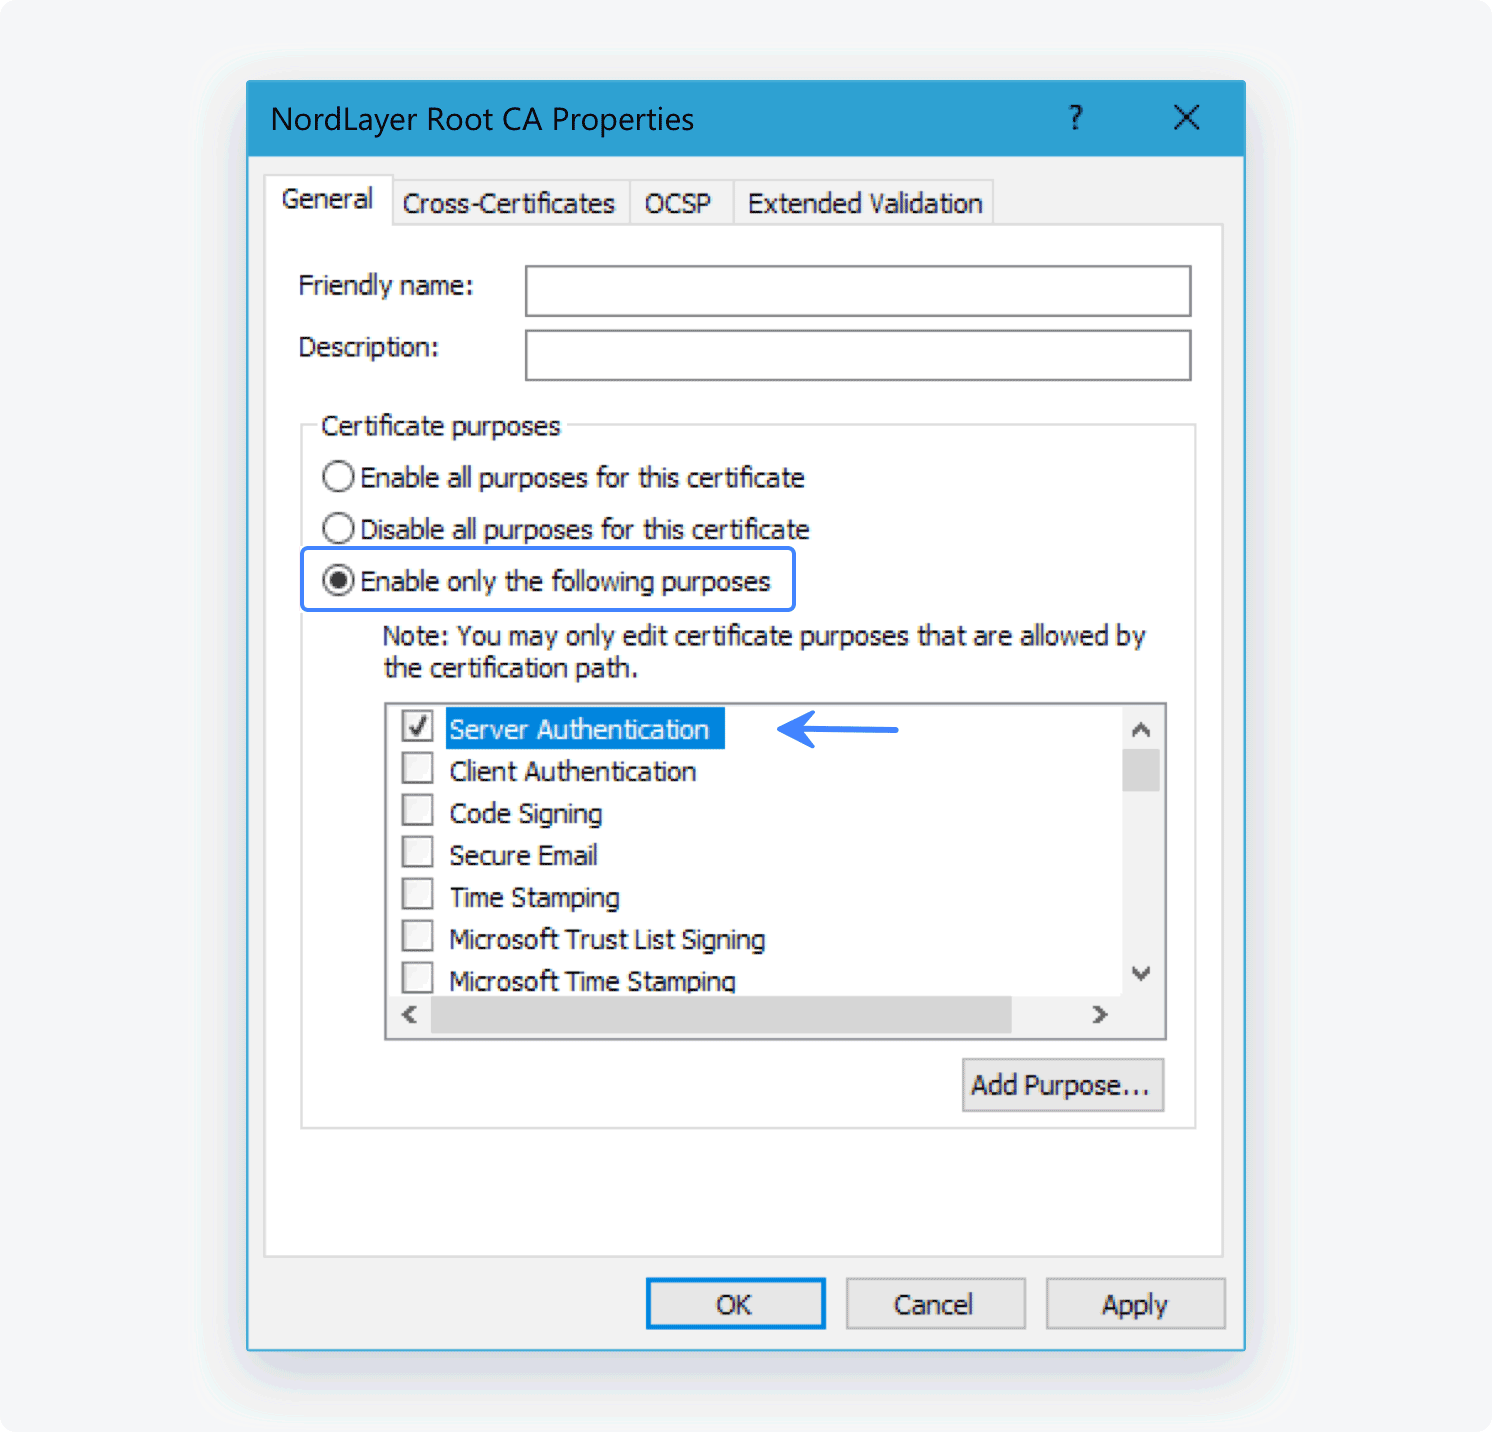
- Click OK and Apply
Set up a VPN connection:
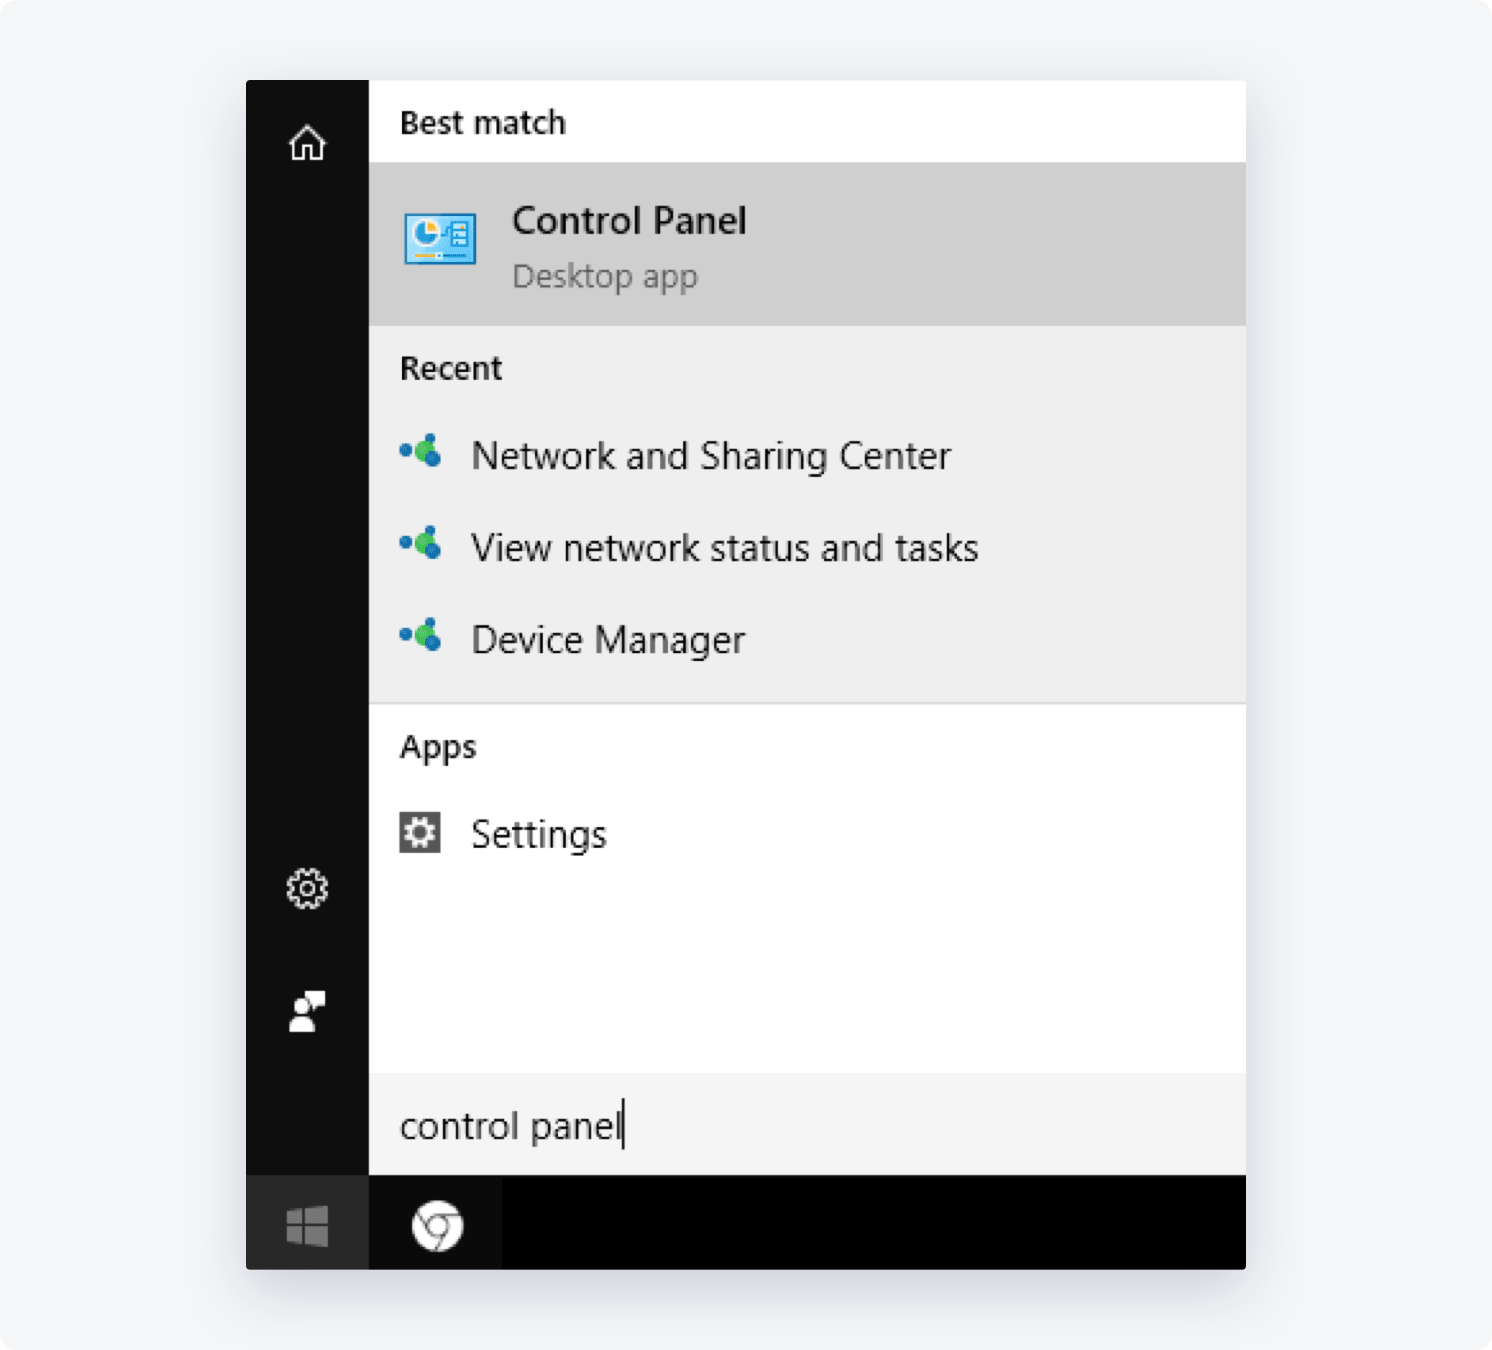
- Open the Windows Start Menu and type control panel in the search bar. In the search results, click on Control Panel
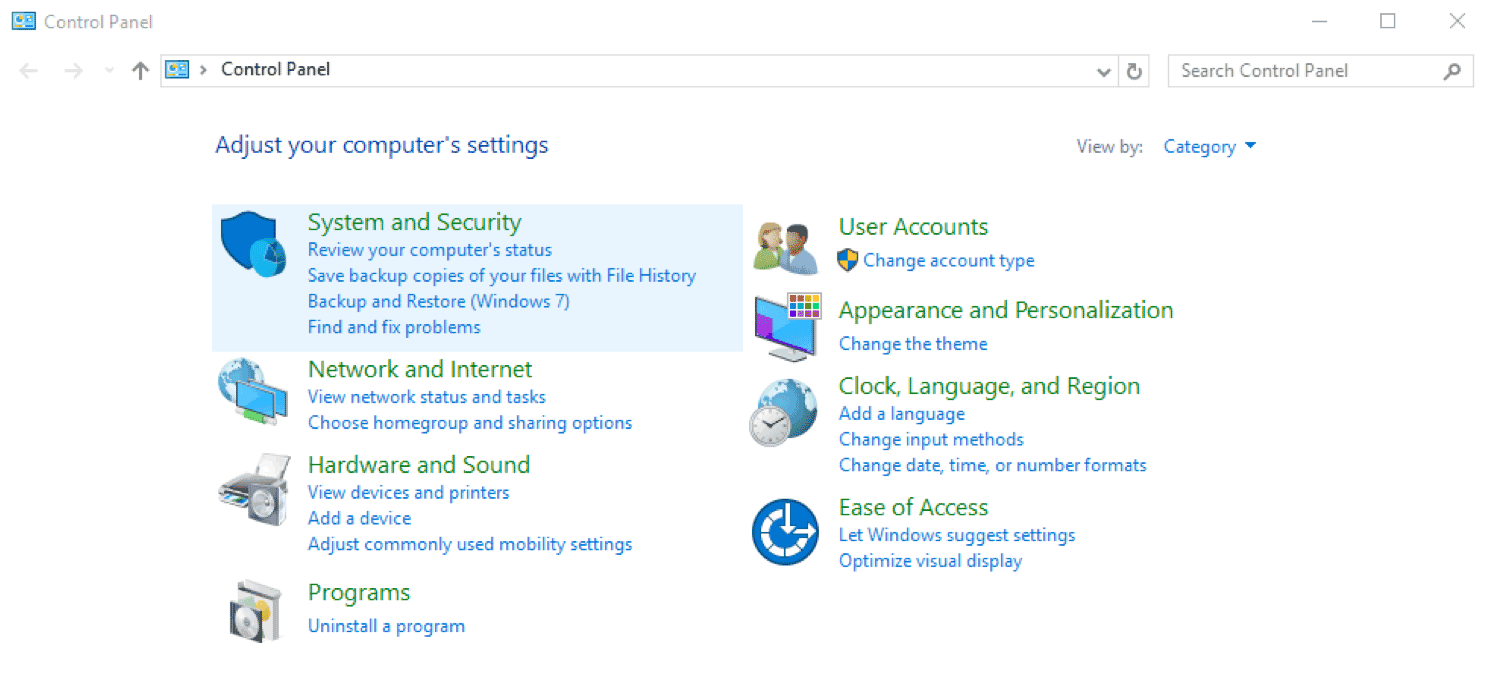
- Open Network and Internet
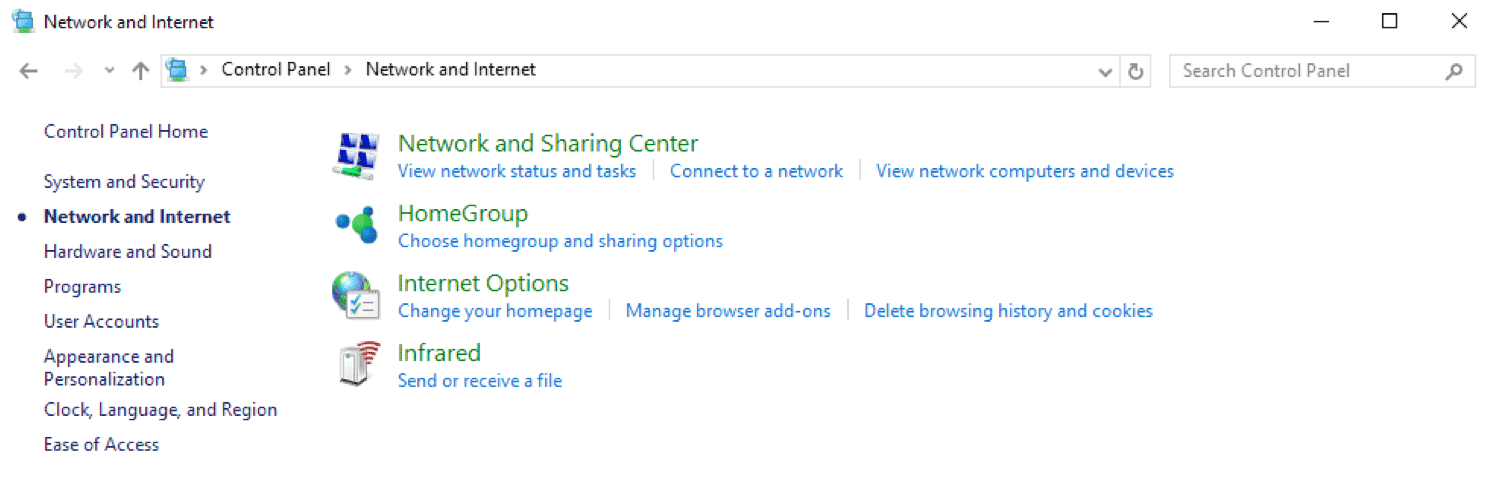
- Click on Network and Sharing Center
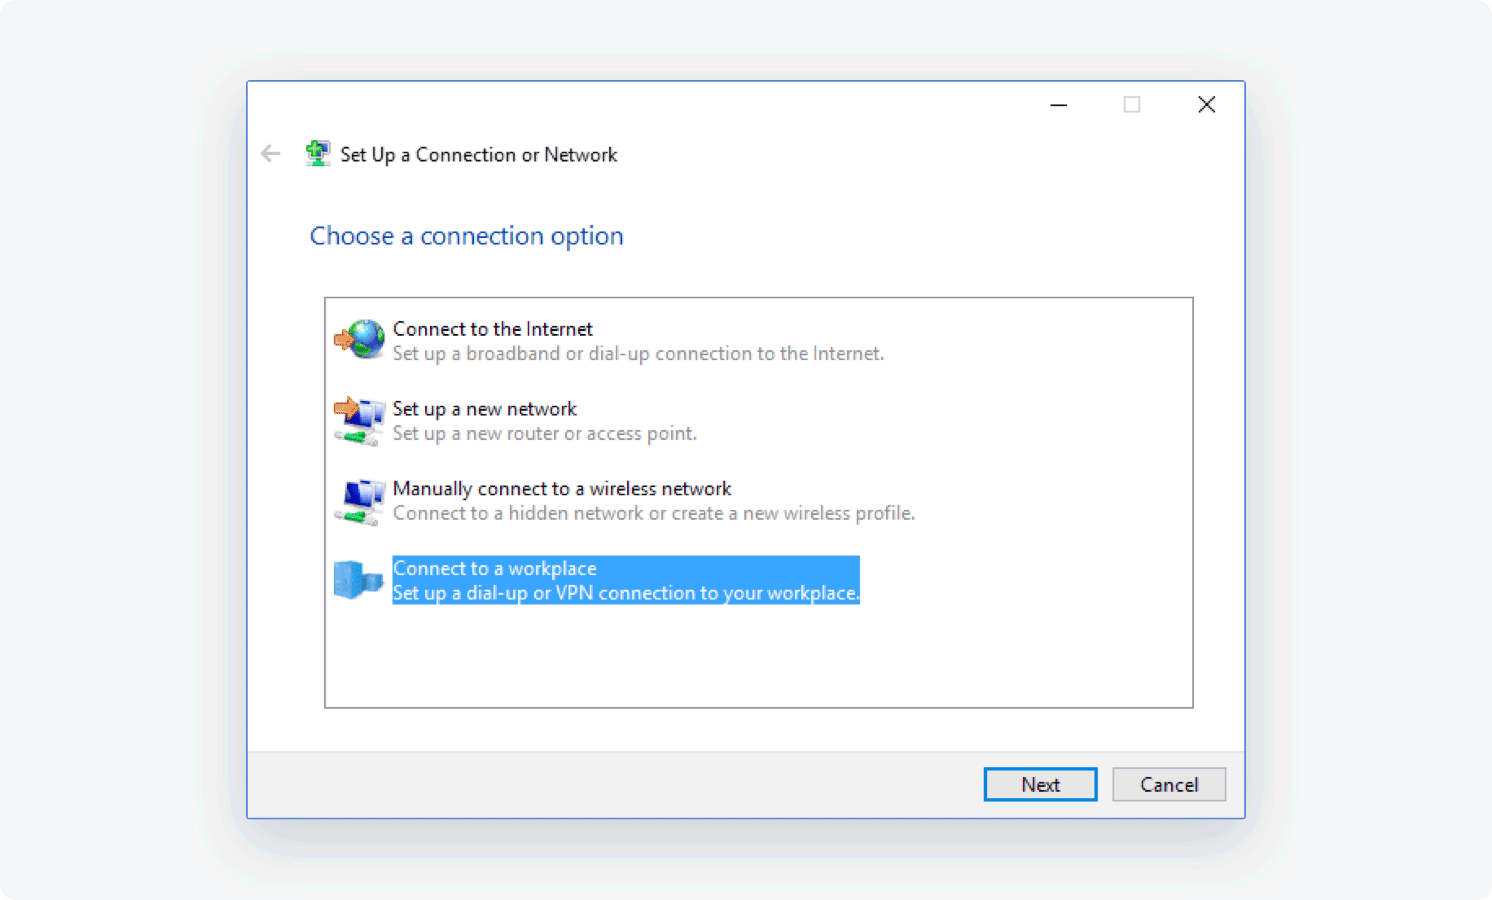
- Click Set up a new connection or network

- Click Connect to a workplace and hit Next
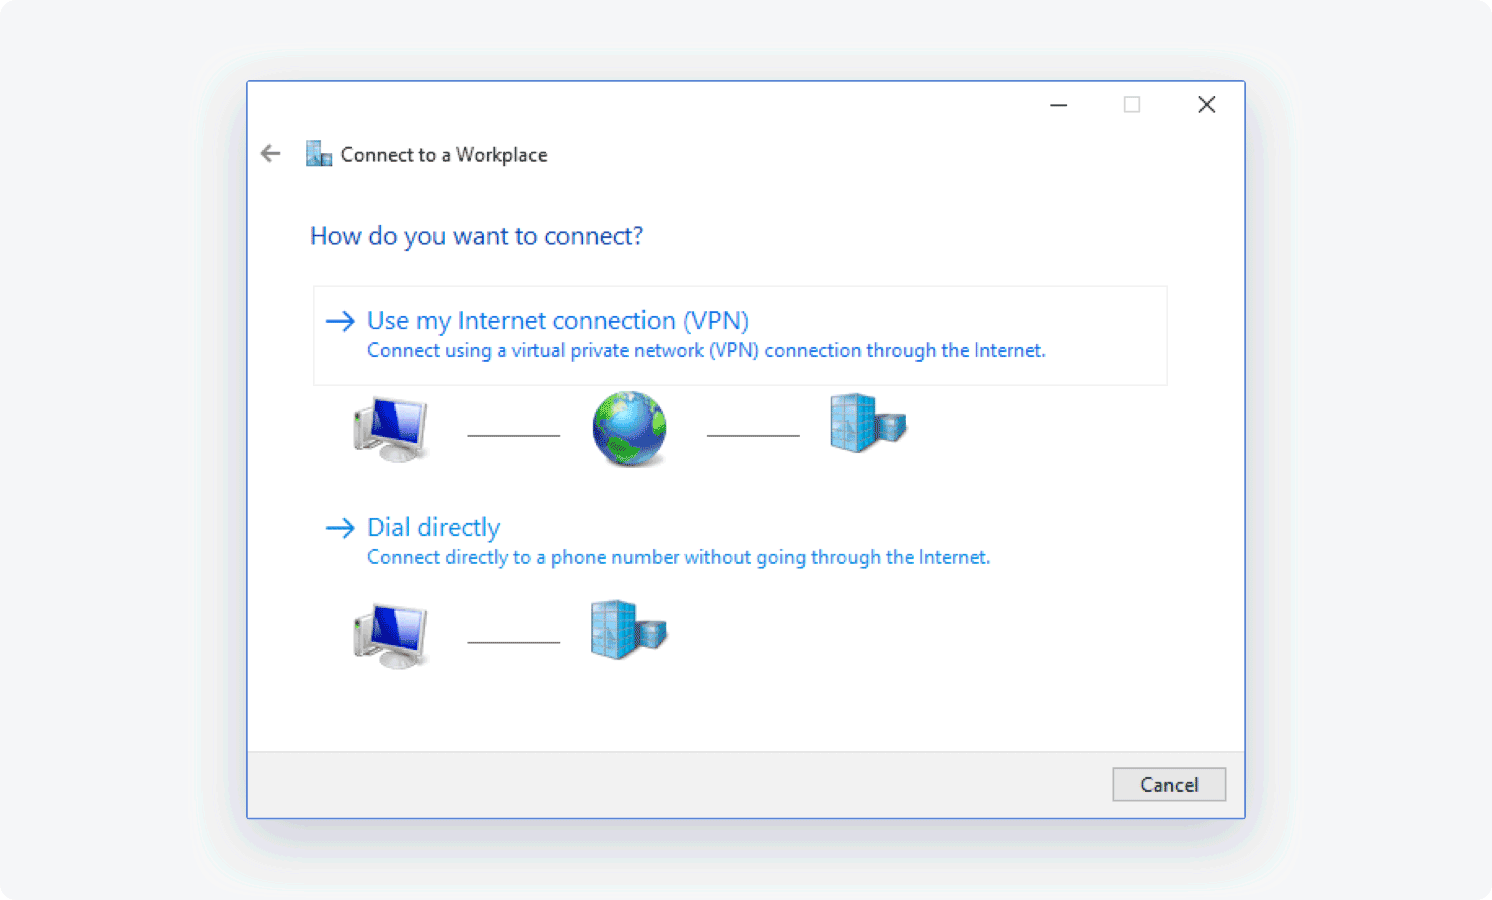
If asked "Do you want to use a connection that you already have?", select No, create a new connection and click Next
Click Use my Internet connection (VPN)
- In the Internet address field, type the hostname or IP of your private gateway, which can be found on our Downloads page
At the same time, you should copy the service credentials (username and password) at the bottom of the page.
For the Destination name, enter any name you would like your connection to have
Open Network and sharing center again and click Change adapter settings
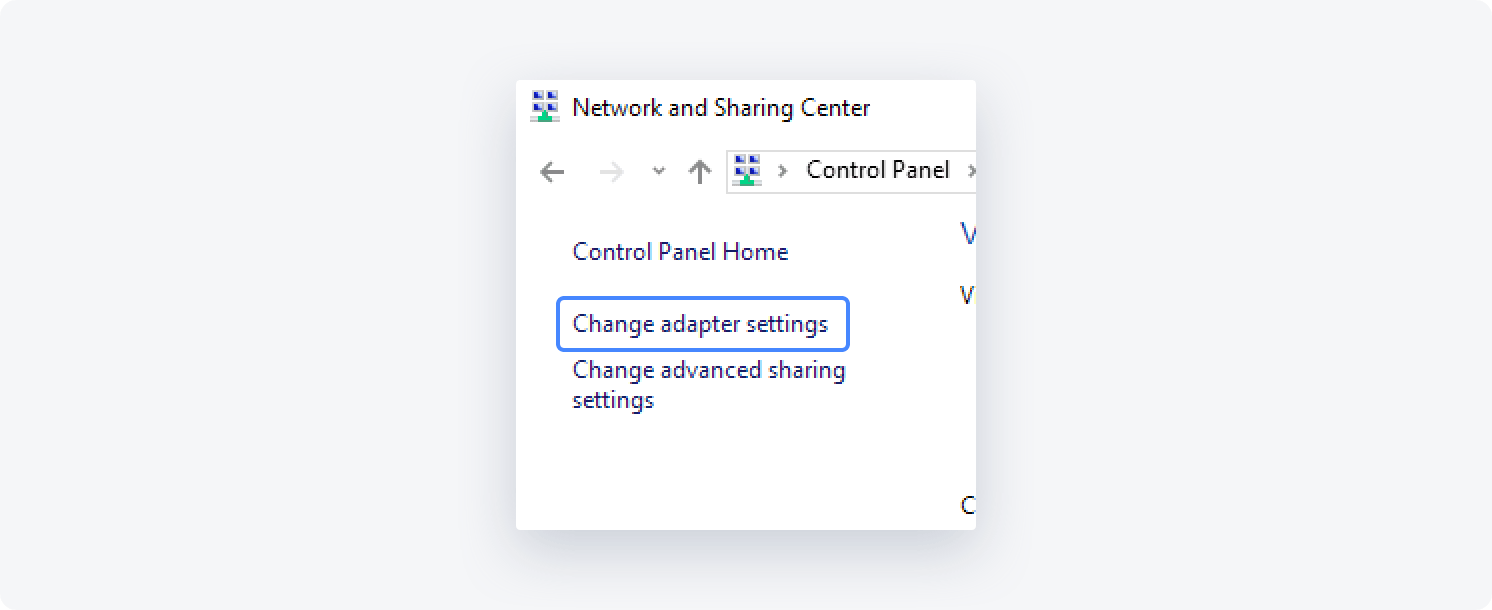
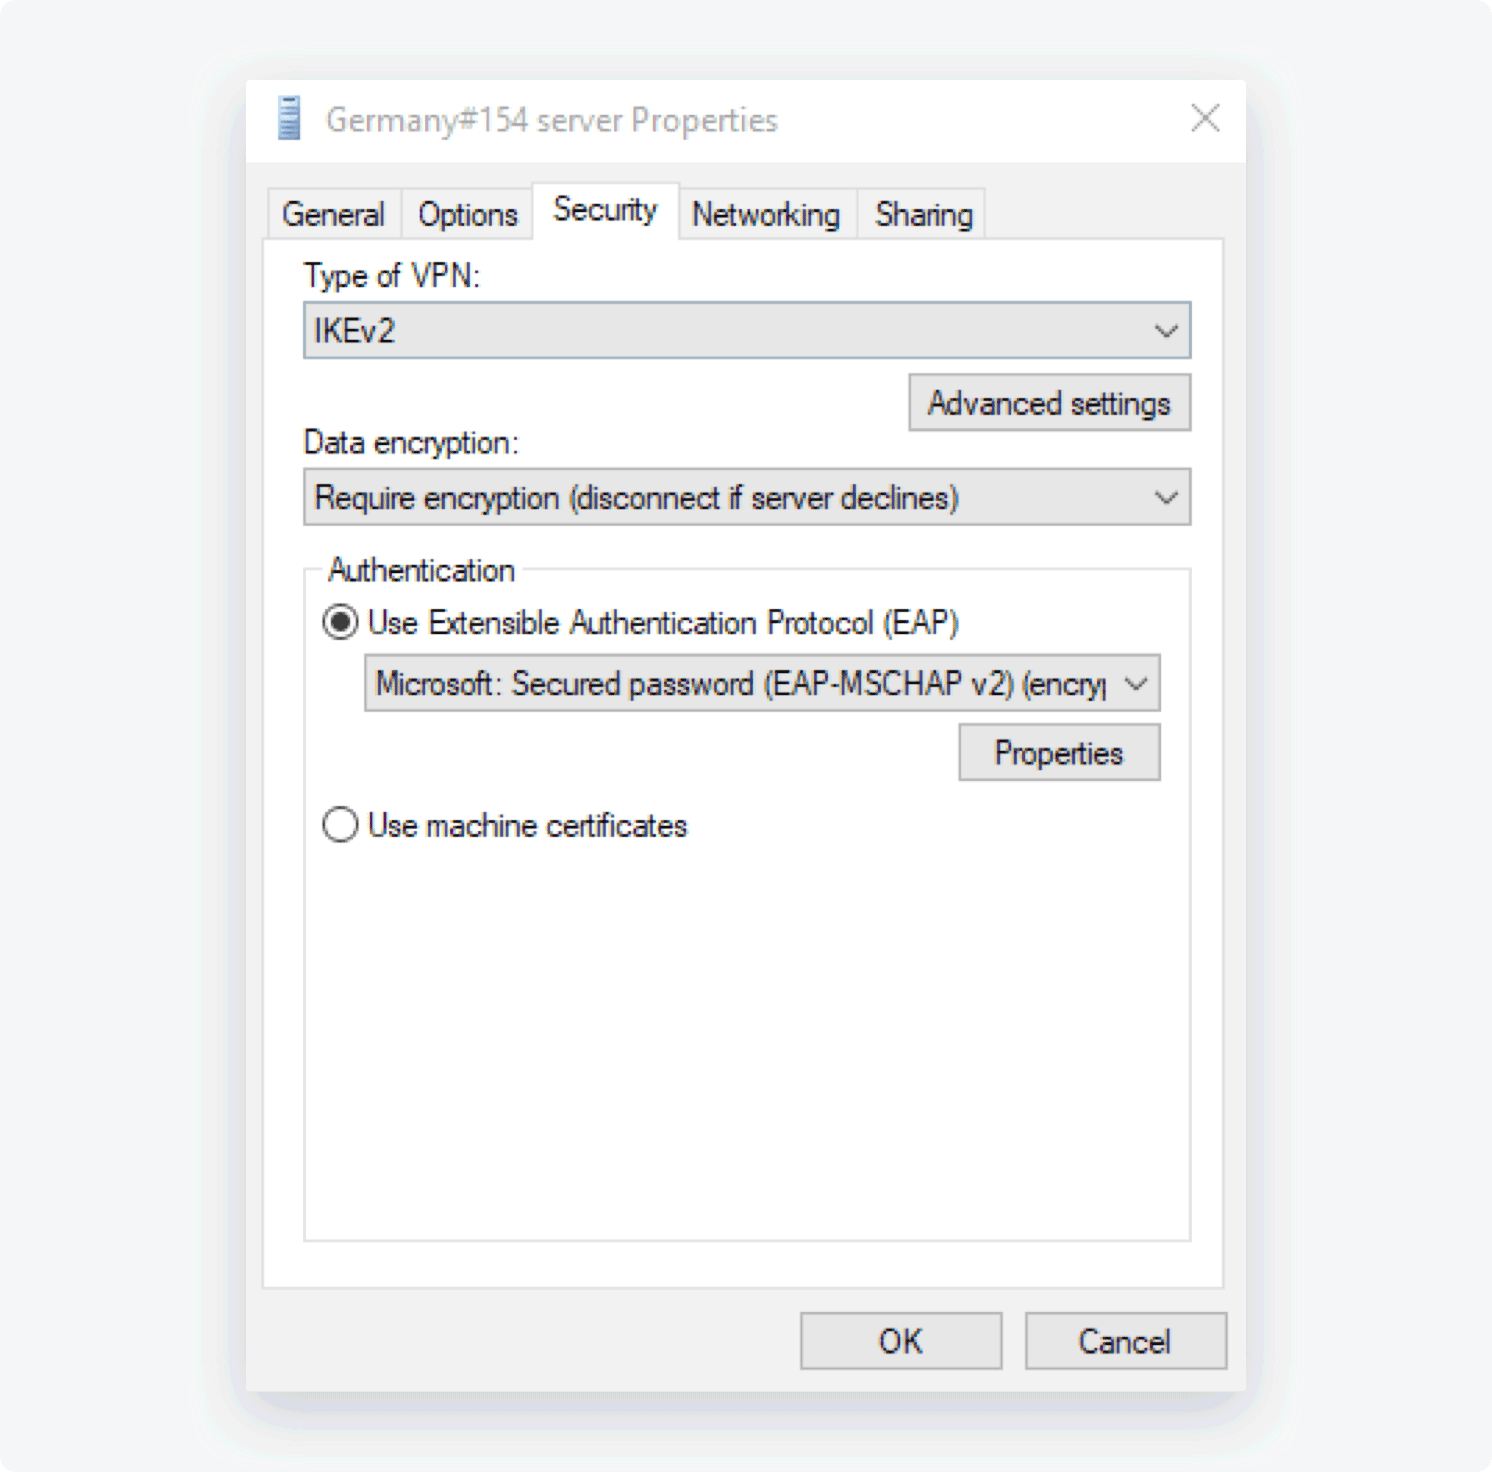
Right-click the adapter with the name you’ve just created, click Properties, and go to the Security tab
Configure as follows:
- Type of VPN: IKEv2
- Data encryption: Require encryption (disconnect if server declines)
- Authentication: Use Extensible Authentication Protocol(EAP) and EAP-MSCHAPv2
- Open the Networking tab and uncheck the Internet Protocol Version 6 (TCP/IPv6) box
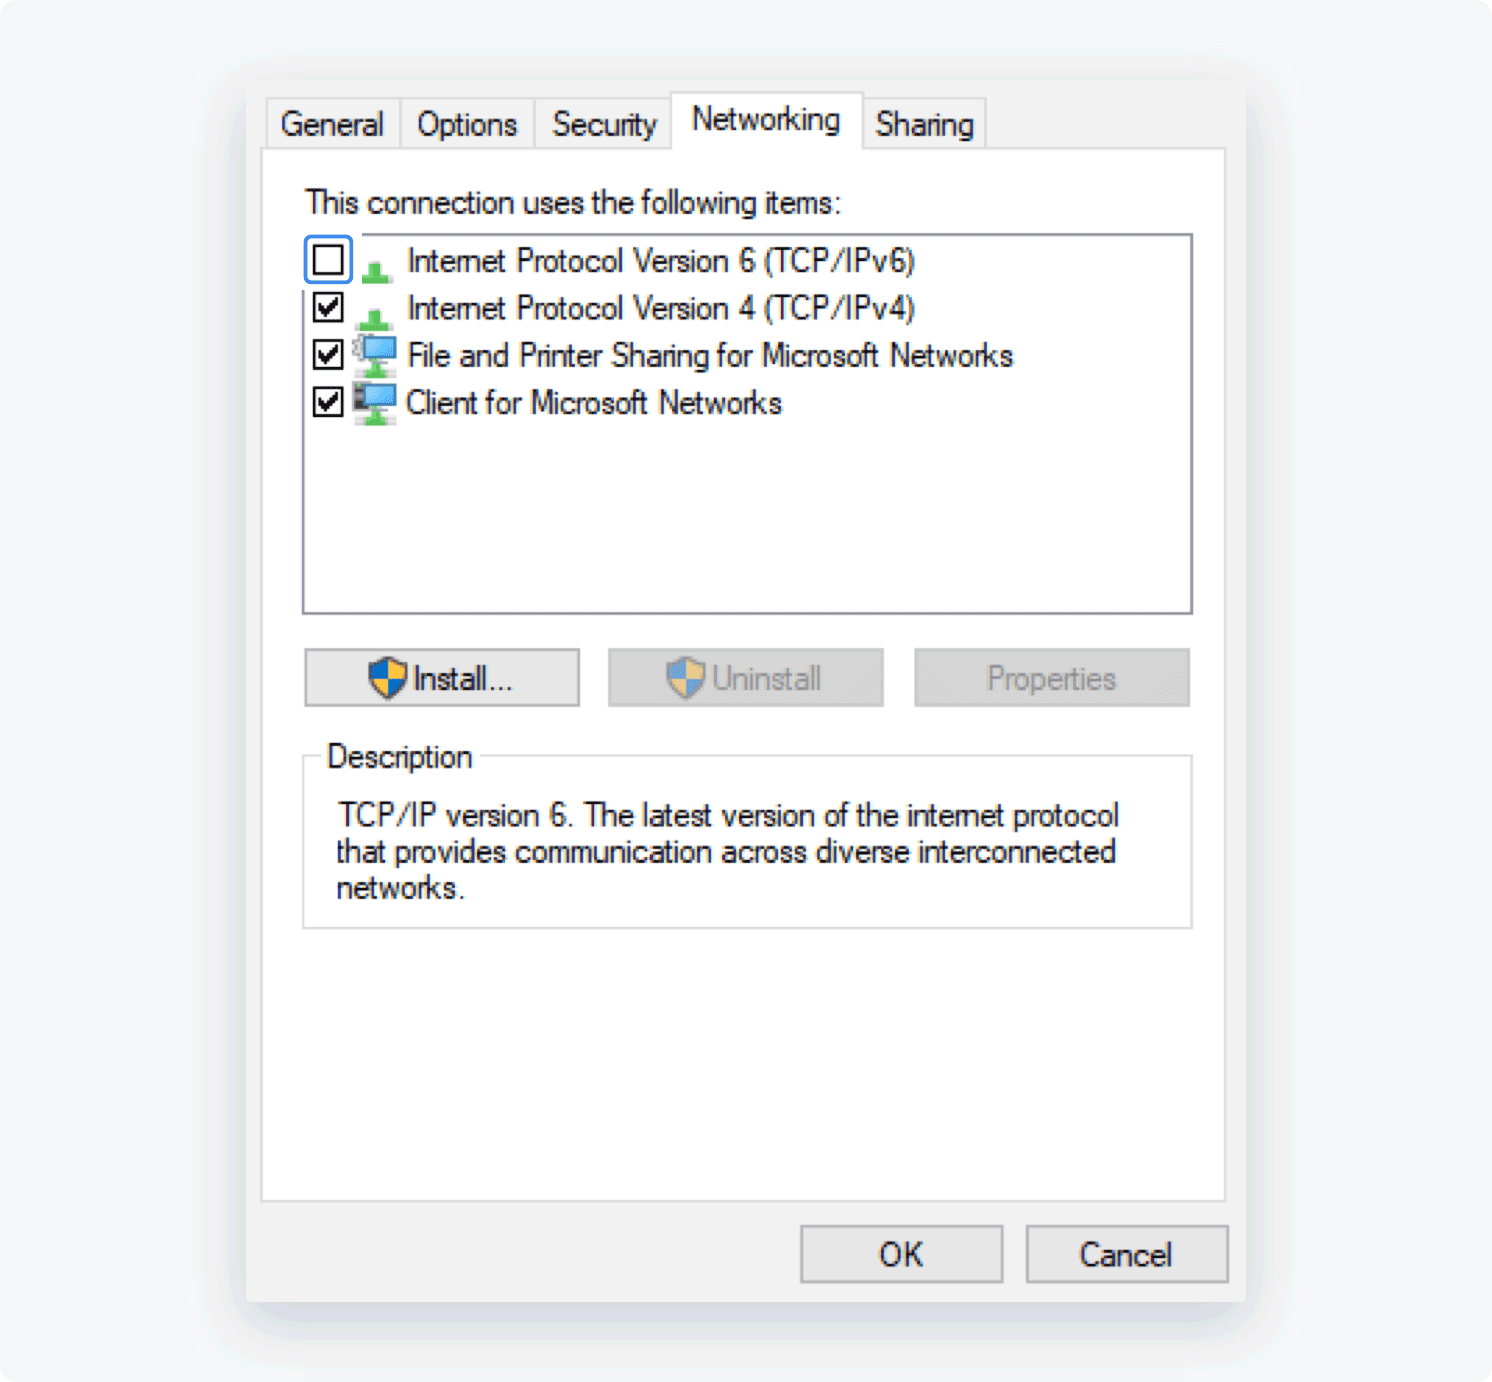
Click OK
In the system tray located in the bottom-right corner of the screen, click on either the Wi-Fi or Ethernet connection icon and click Open Network & Internet settings
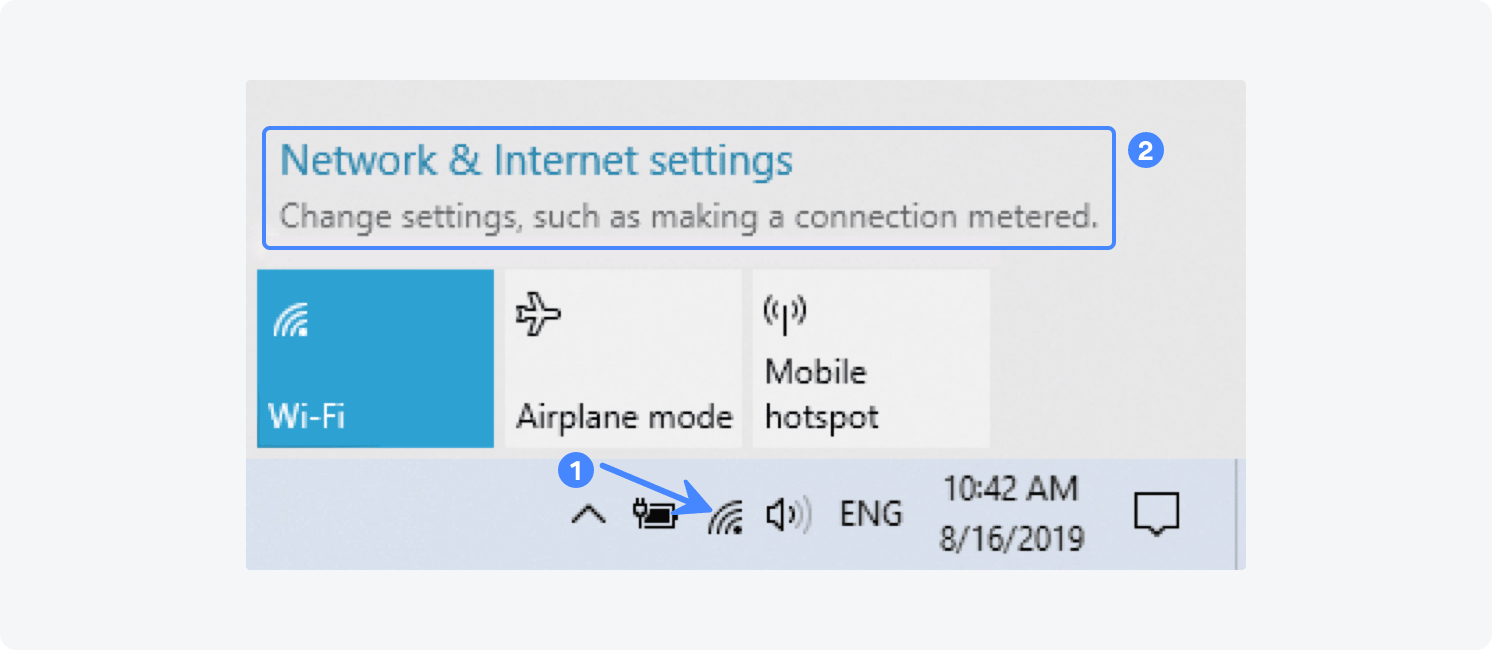
- In the left sidebar of the settings, select VPN, find your created IKEv2 connection, and click on Advanced options

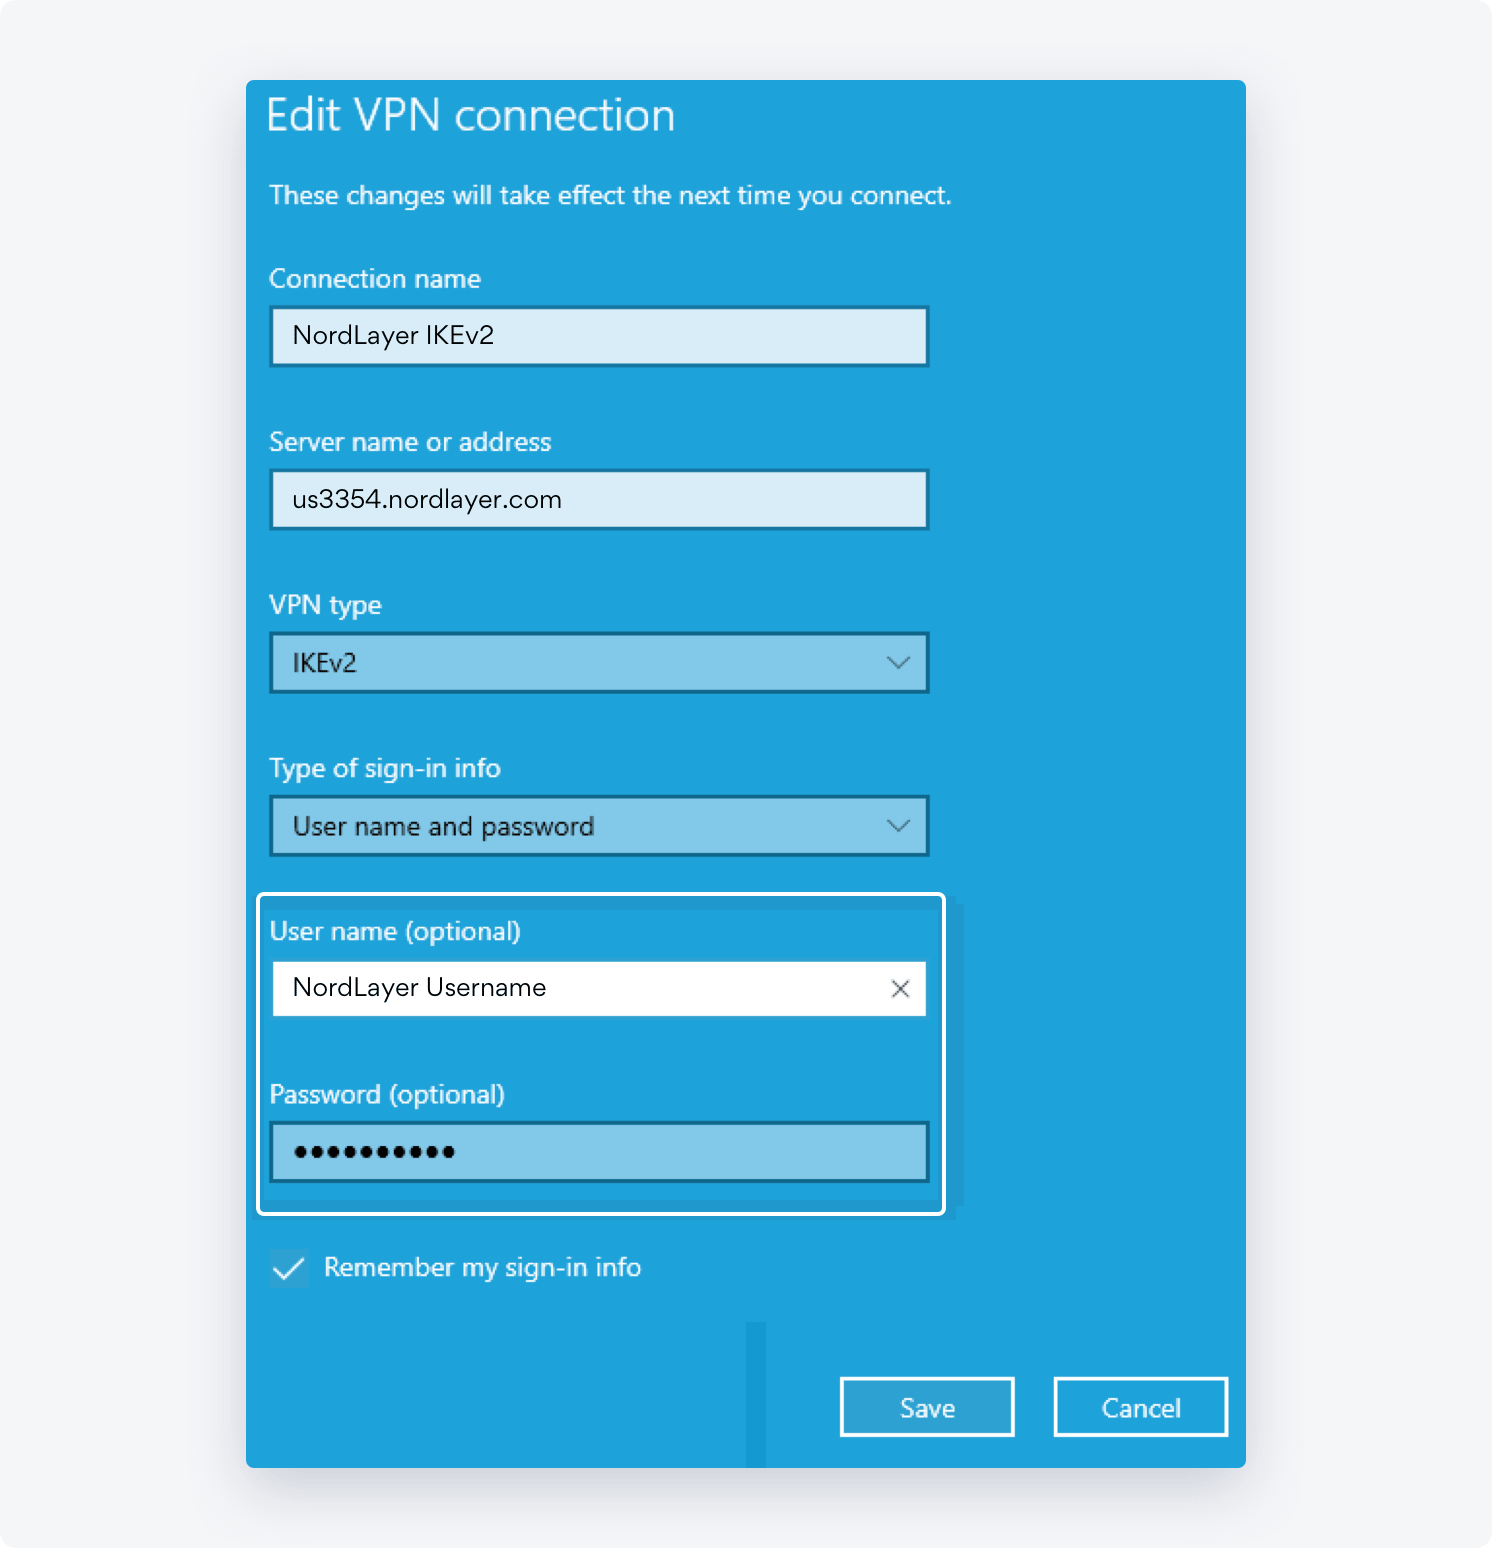
- Click Edit and enter your NordLayer service username and password that you have copied earlier
- Click on the network icon again in the system tray in the bottom-right corner of the screen and click Connect under NordVPN IKEv2
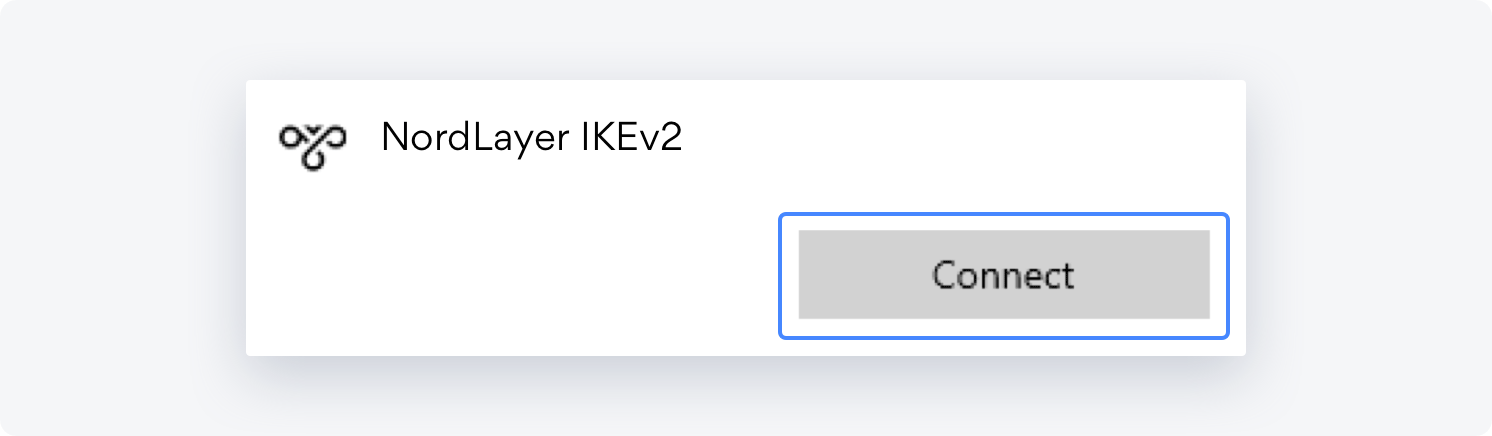
- You should now be connected
If you are not able to connect and get a “Policy match error” follow these steps:
- Open the “Run” window while pressing the Windows button + R on your keyboard at the same time. Type in regedit.
- Then, navigate to this directory – HKEY_LOCAL_MACHINE\SYSTEM\CurrentControlSet\Services\RasMan\Parameters
- Now right-click on the right side empty space and create a new DWORD (32bit) file named NegotiateDH2048_AES256
- Right-click on the newly created registry file and click on “Modify…“, then in the value data field enter the value of 2 and click OK.
- After doing this, close the regedit and try connecting to the VPN server again.
Note: In case you have any questions or are experiencing any issues, please feel free to contact our 24/7 customer support team.
Was this article helpful?