Once you have enabled Cloud LAN via the Administrator's Control Panel and added your gateways, the next step is to configure each device you wish to remotely access by assigning it a device name within the NordLayer application.
Please note, that you will need use this device name from the NordLayer application instead of the internal IP address in order to access shared resources remotely.
Please follow the instructions specific to the operating system used by each device— macOS, Windows, Linux, iOS, or Android.
Setting up the DDNS on macOS
- Open the NordLayer application and head to Settings -> Cloud LAN. You will then see an option to set a device name, which will be used to reach this device remotely.

- Once a device name is set, upon next VPN connection you will see your full device name (which you can then copy) listed near private gateways as seen in the screenshot below.
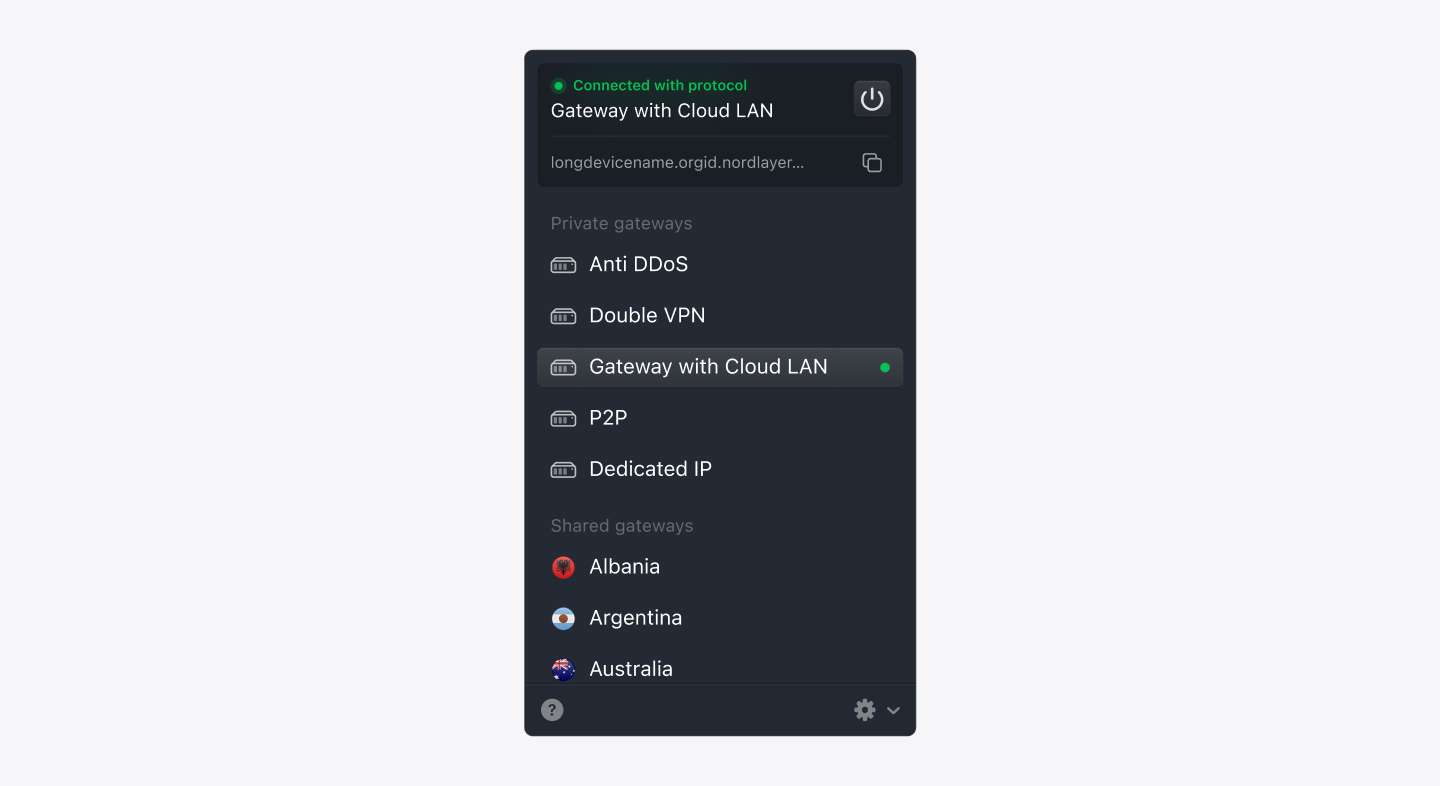
Note: In case you wish to change the device name, simply head back to Cloud LAN settings. However, if you wish to remove the device name altogether - simply leave the name field as blank and save changes.
Setting up the DDNS on Windows
- Open the NordLayer application and head to Settings -> Cloud LAN. You will then see an option to set a device name, which will be used to reach this device remotely.
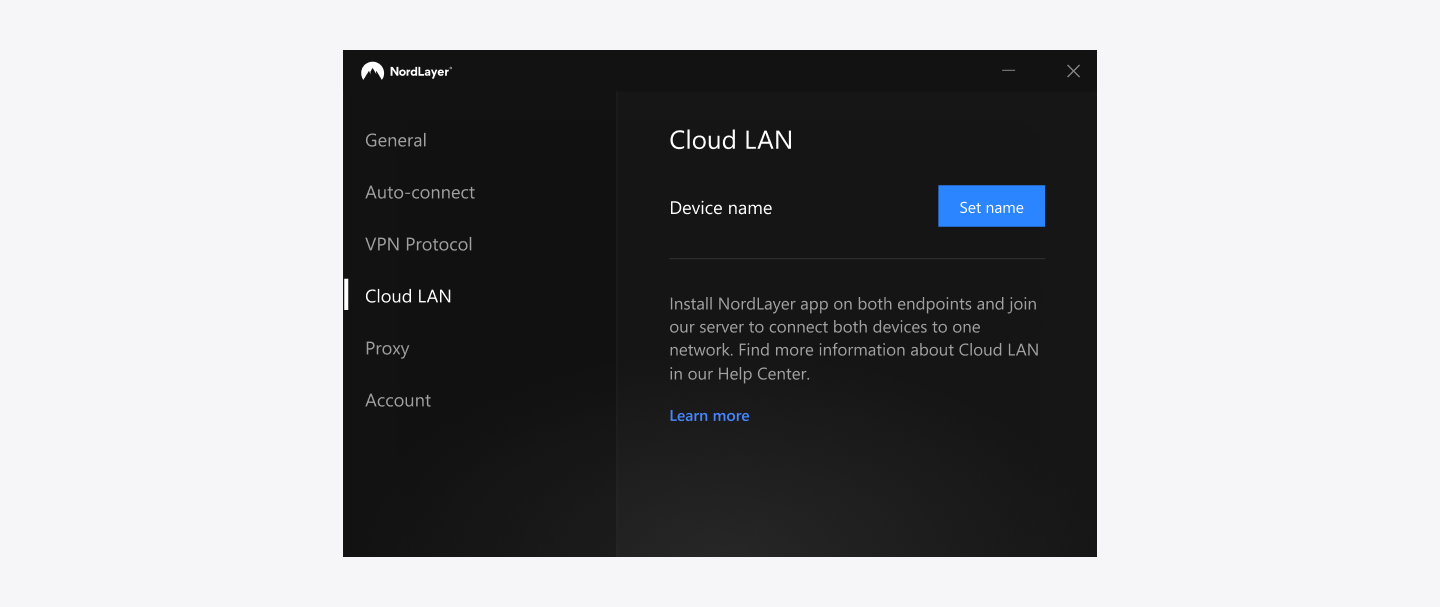
- Once a device name is set, upon next VPN connection you will see your full device name (which you can then copy) listed near private gateways as seen in the screenshot below.
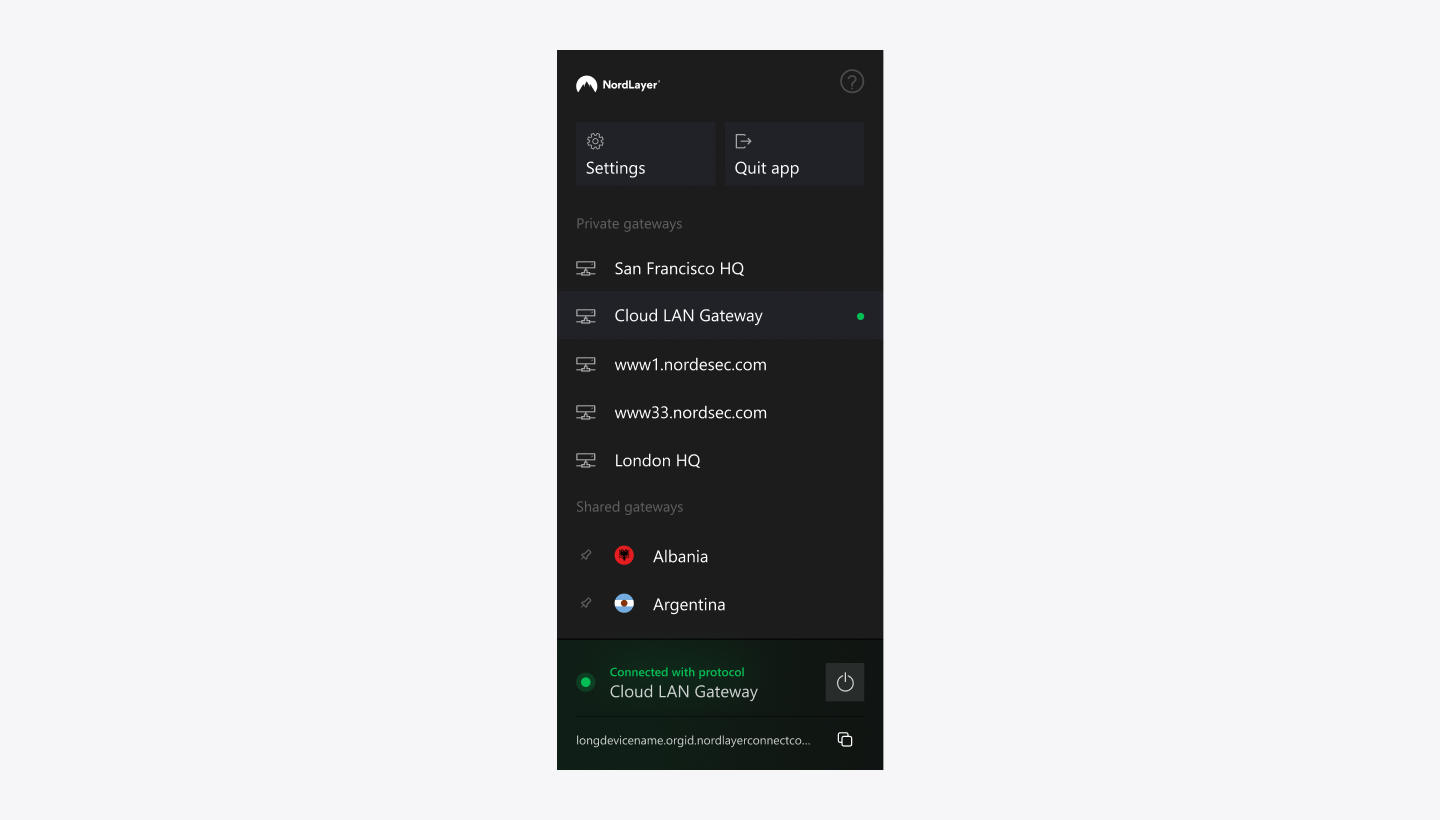
In case you wish to change the device name, simply head back to Cloud LAN settings. However, if you wish to remove the device name altogether - simply leave the name field as blank and save changes.
Setting up the DDNS on Linux
- In the Terminal, enter the command 'nordlayer settings set'. You will then see an option to set a device name, which will be used to reach this device remotely.

- Once a device name is set, upon next VPN connection you will see your full device name listed in the Terminal window.
In case you wish to change the device name, simply head back to Cloud LAN device name setting. However, if you wish to remove the device name altogether - simply leave the name field as blank and save changes.
Setting up the DDNS on Android
- Open the NordLayer application and head to Settings -> Cloud LAN. You will then see an option to set a device name, which will be used to reach this device remotely.
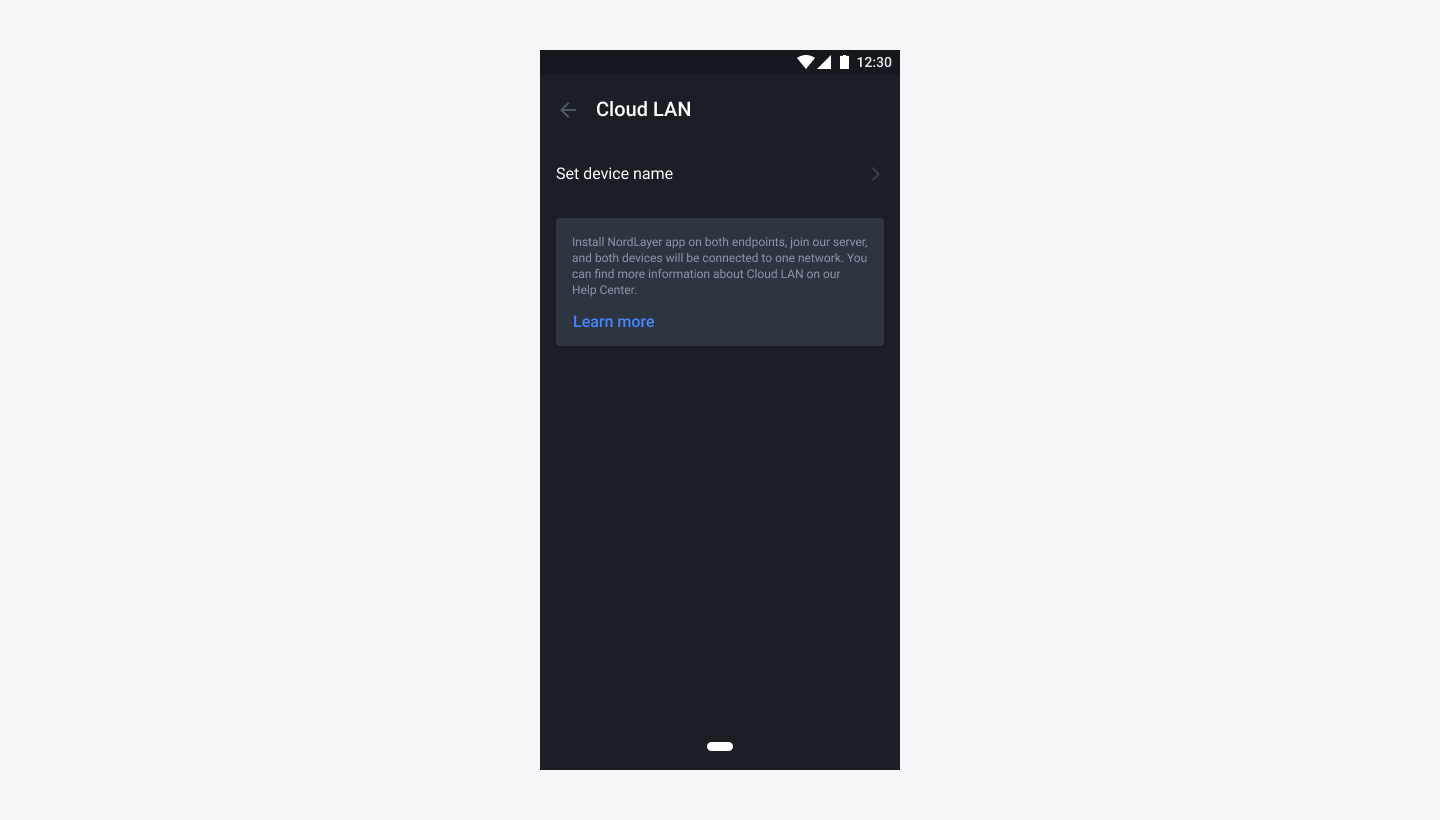
- Once a device name is set, upon next VPN connection you will see your full device name (which you can then copy) listed near private gateways as seen in the screenshot below.
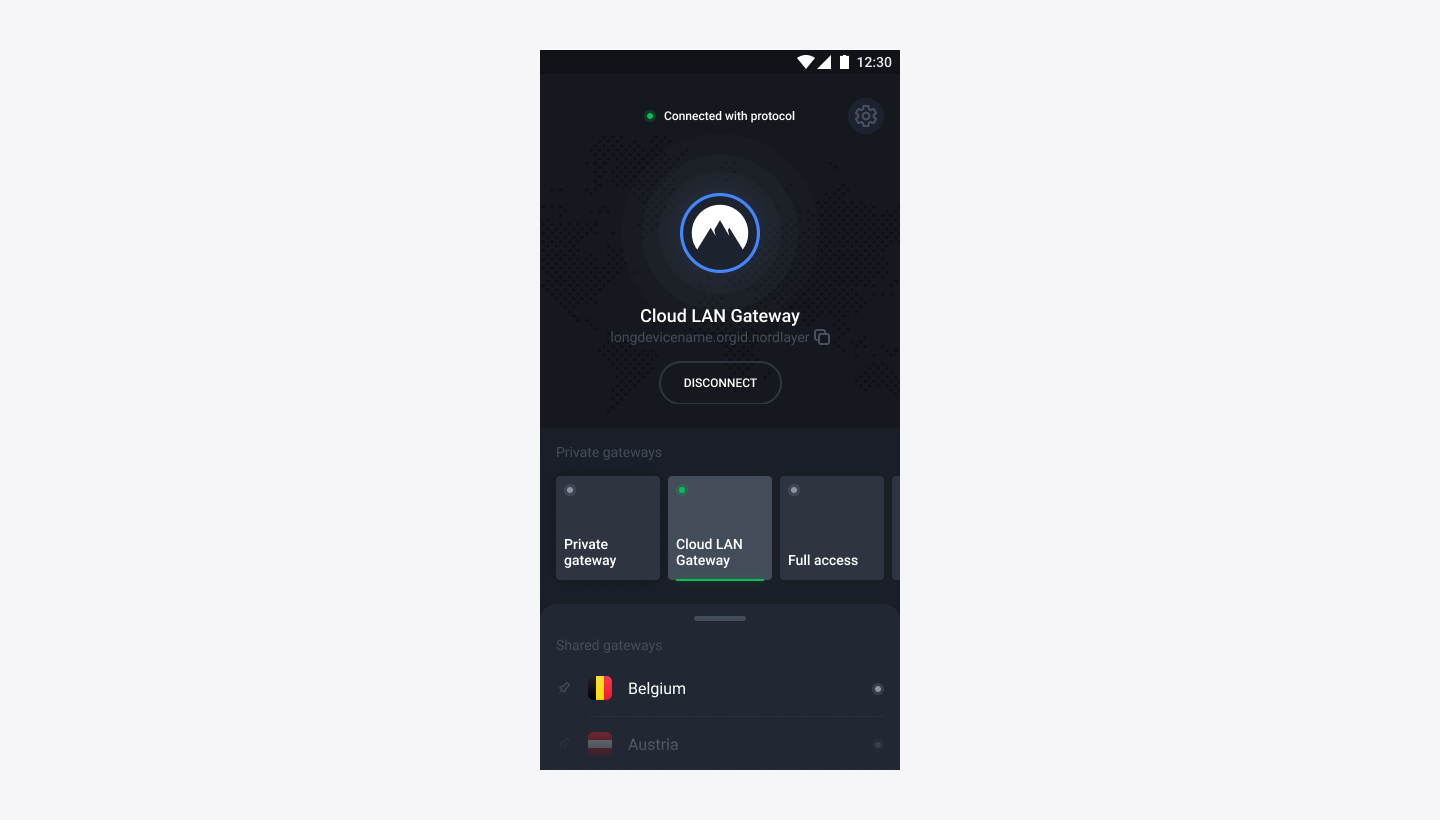
In case you wish to change the device name, simply head back to Cloud LAN settings. However, if you wish to remove the device name altogether - simply leave the name field as blank and save changes.
Setting up the DDNS on iOS
- Open the NordLayer application and head to Settings -> Cloud LAN. You will then see an option to set a device name, which will be used to reach this device remotely.
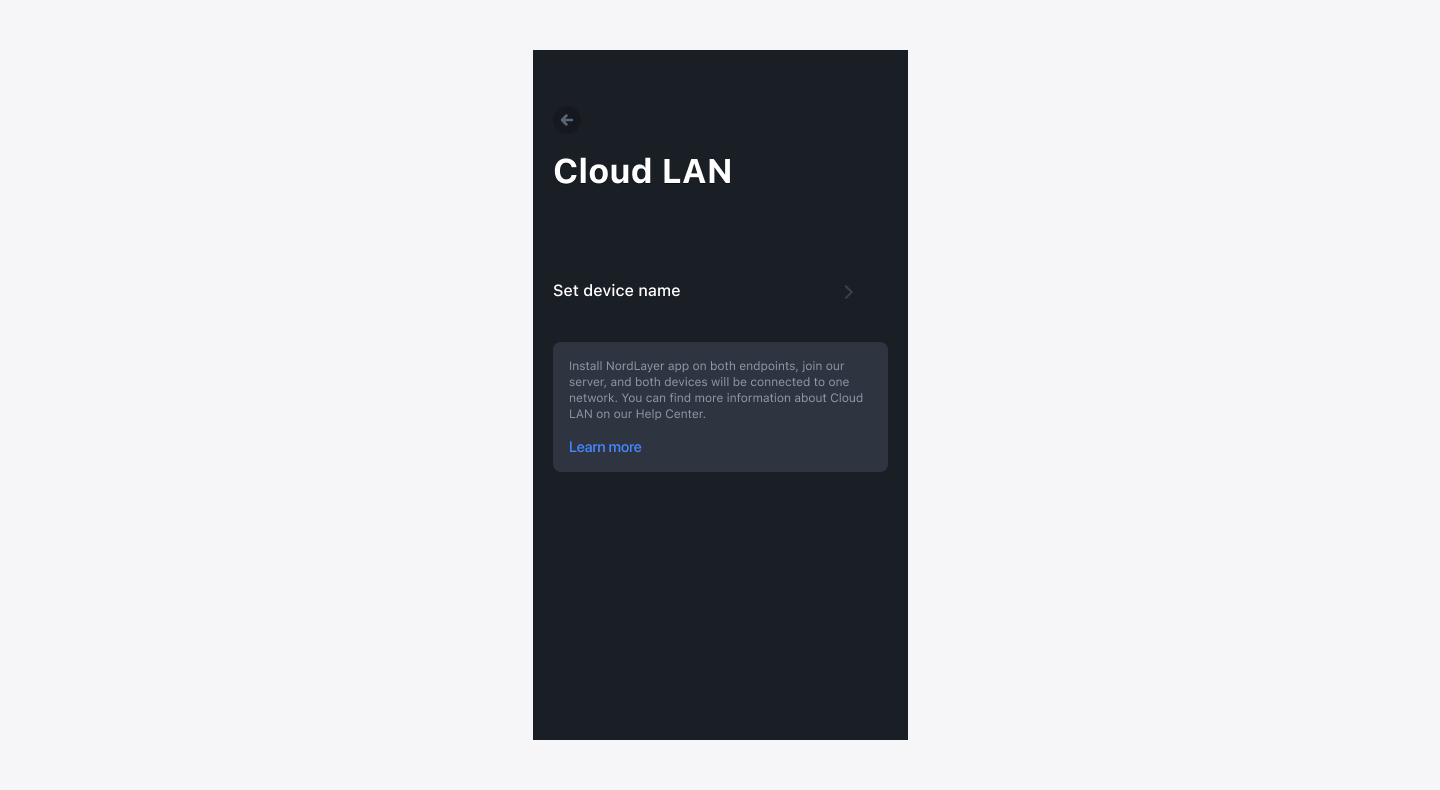
- Once a device name is set, upon next VPN connection you will see your full device name (which you can then copy) listed near private gateways as seen in the screenshot below.
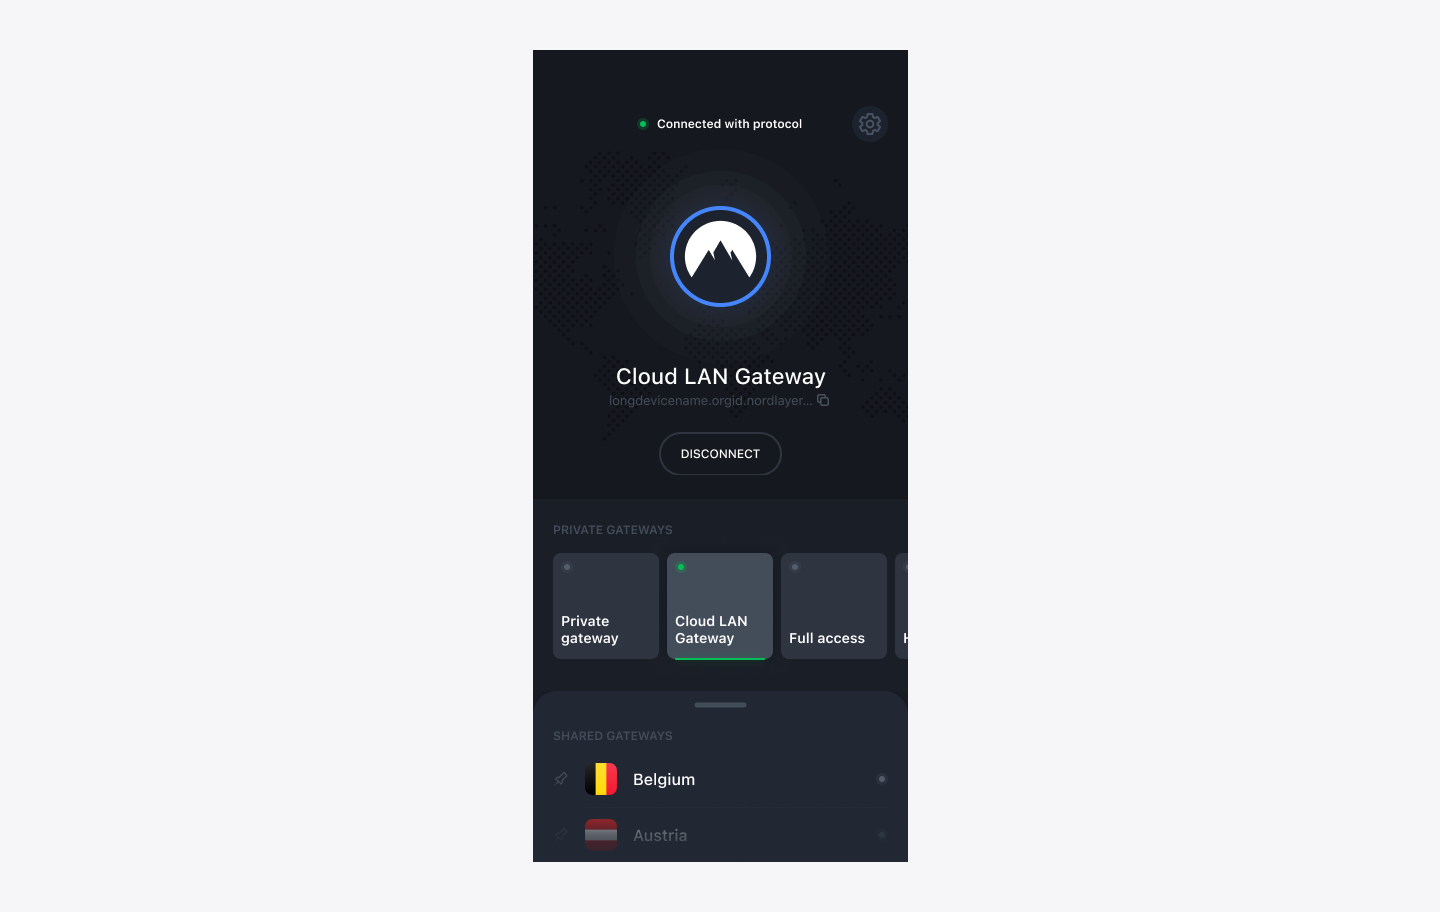
In case you wish to change the device name, simply head back to Cloud LAN settings. However, if you wish to remove the device name altogether - simply leave the name field as blank and save changes.
Note: In case you have any questions or are experiencing any issues, please feel free to contact our 24/7 customer support team.