Note: If your device/service supports SHA256 and DH group 14, it is recommended to use these settings instead.
Please note, the choice between Transit Gateway or a simple Virtual Gateway depends on your AWS architecture. If you are not sure, we encourage you to visit AWS's official documentation.
Configuring the tunnel in the AWS Console
Go to the VPC section in the AWS Console
.png)
Under the left menu Virtual Private Network (VPN) section, go to Customer Gateways
.png)
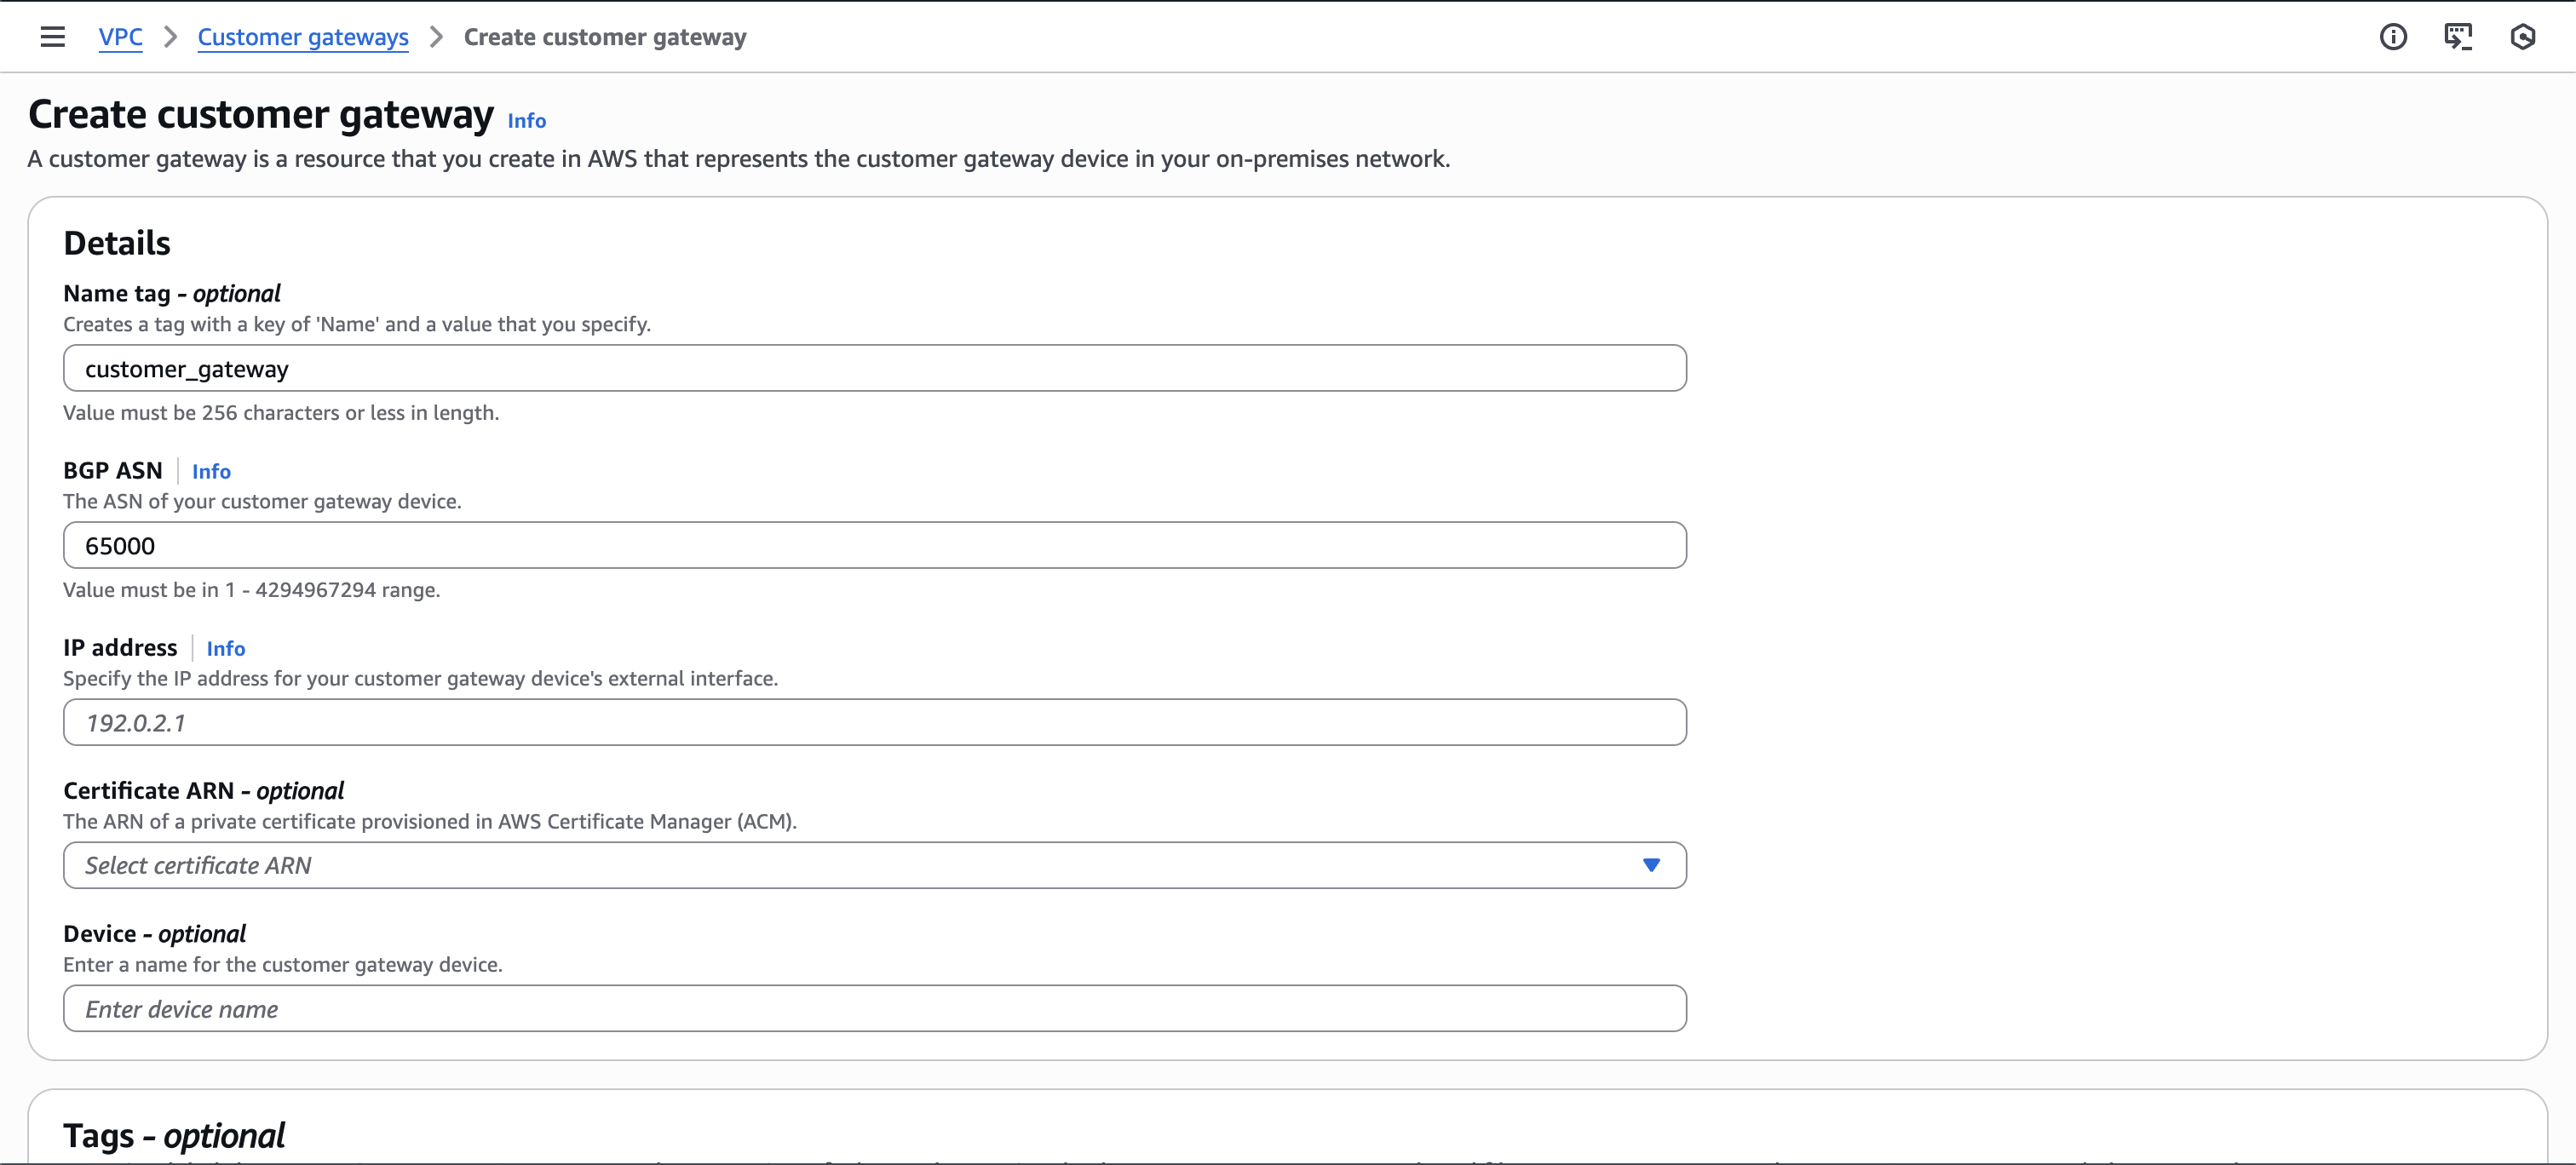
Select Create Customer Gateway
Select static routing
Fill in the IP Address of your NordLayer server with a dedicated IP
Select Create Customer Gateway. A message should display indicating the gateway was created successfully
Configuring a virtual private gateway
If you already have a virtual private gateway attached to your VPC, skip this section and continue at Creating a virtual private network connection.
- Go back to Services, scroll down to Networking & Content Delivery, and select VPC
.png)
- On the left side, under Virtual Private Network (VPN) select Virtual Private Gateways
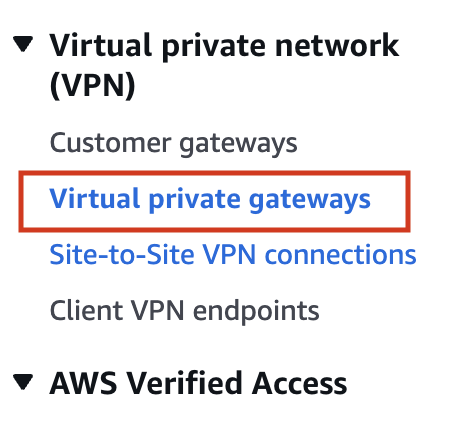
- Select Create Virtual Private Gateway

Type the name of the gateway (for example US_HQ)
Select ASN as Amazon default ASN
Select Create Virtual Private Gateway
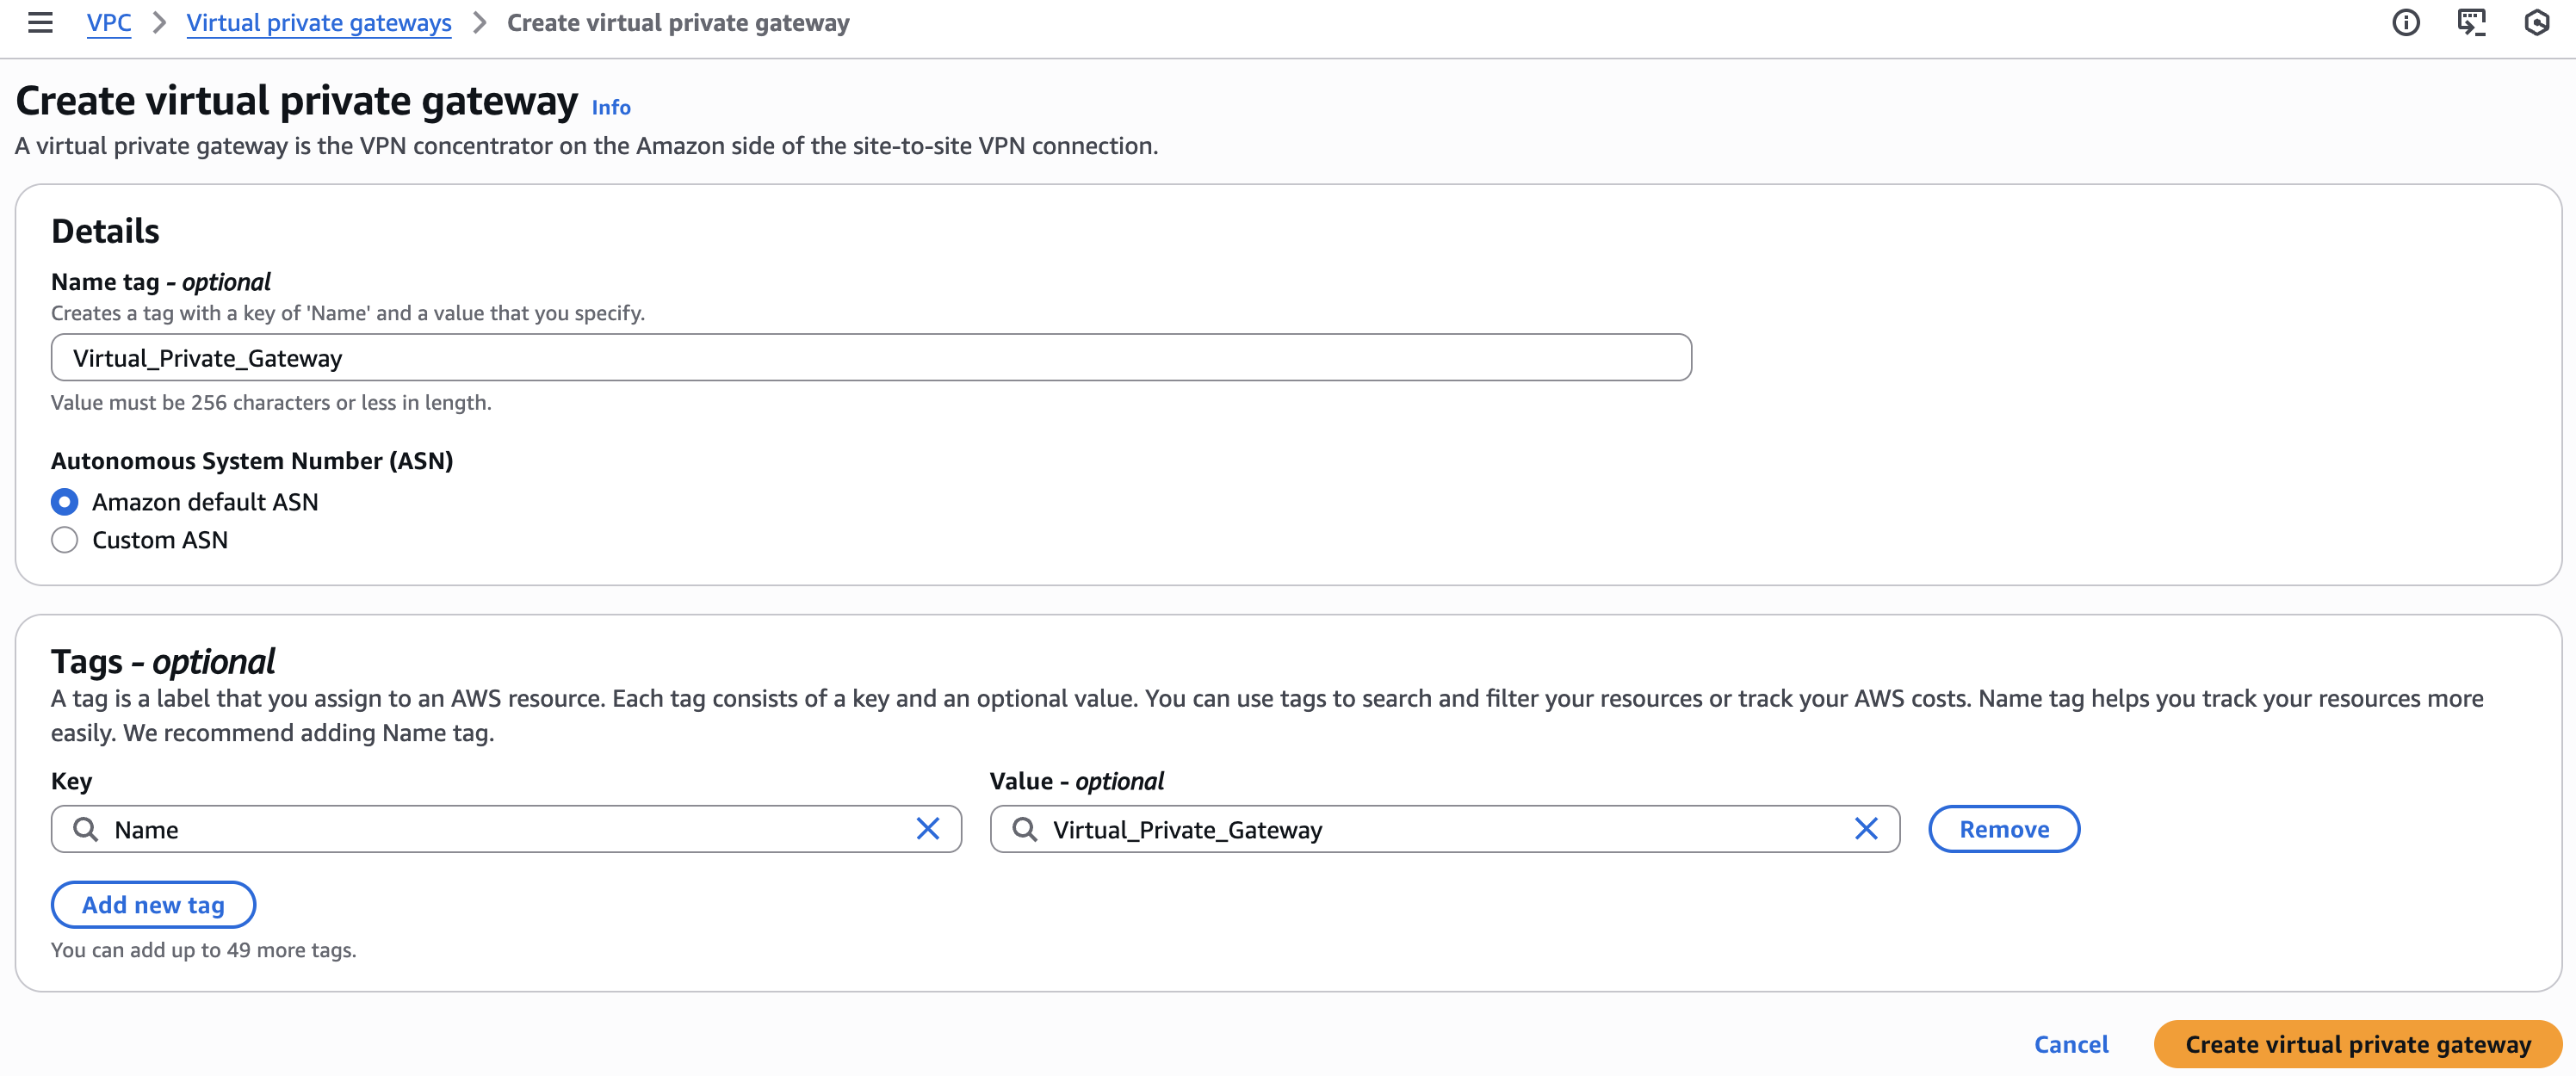
A message should display indicating that the virtual Private Gateway was created successfully.
- Select the newly created gateway and select Actions; on the context menu select Attach to VPC
.png)
- From the drop-down menu, select the VPC and select Yes, Attach
Creating a virtual private network connection
- Under Virtual Private Network (VPN) in the left menu, go to Site-to-Site VPN Connections
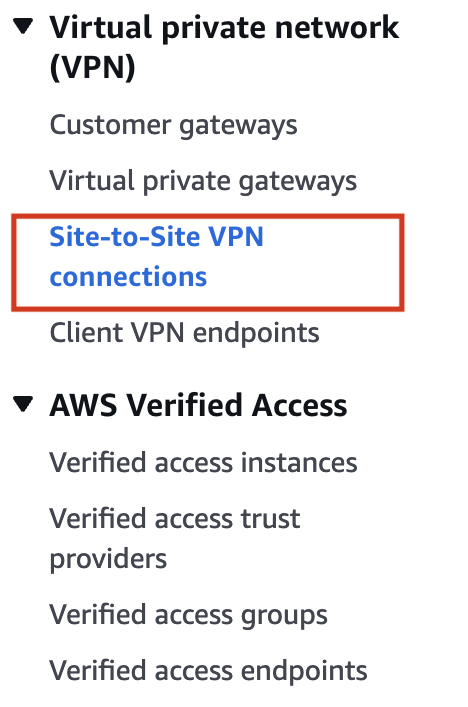
- Select Create VPN Connection

Enter the name tag (for example EU_Office)
Select the created Virtual Private Gateway
Under Customer Gateway, select Existing
Select the Customer Gateway that you have created
Under Routing Options, select Static
Fill in the following Static IP Prefixes: 10.6.0.0/20
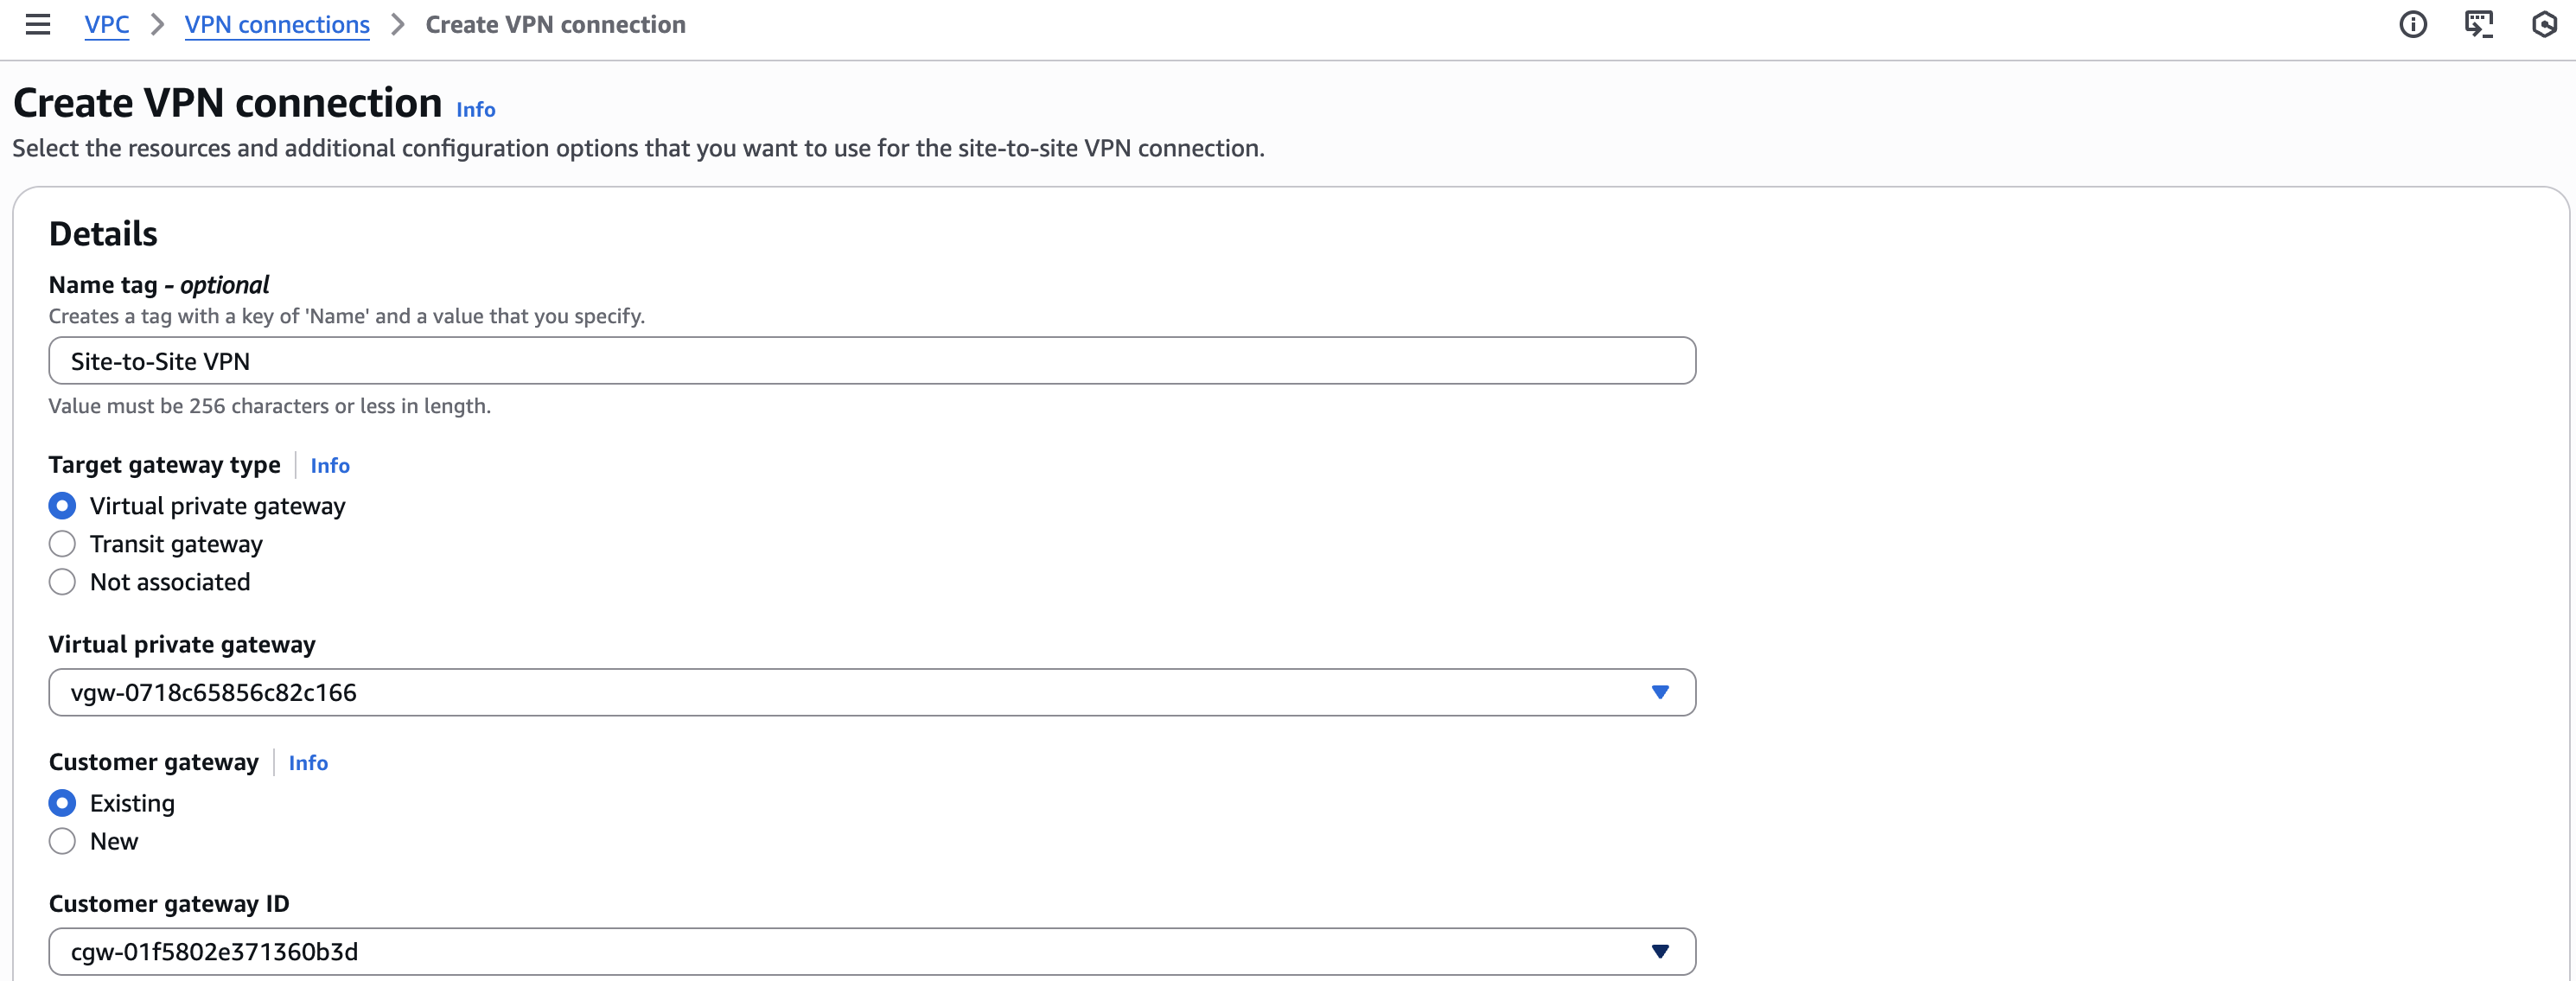
Under Tunnel Options leave the default values as-is
Select Create VPN Connection
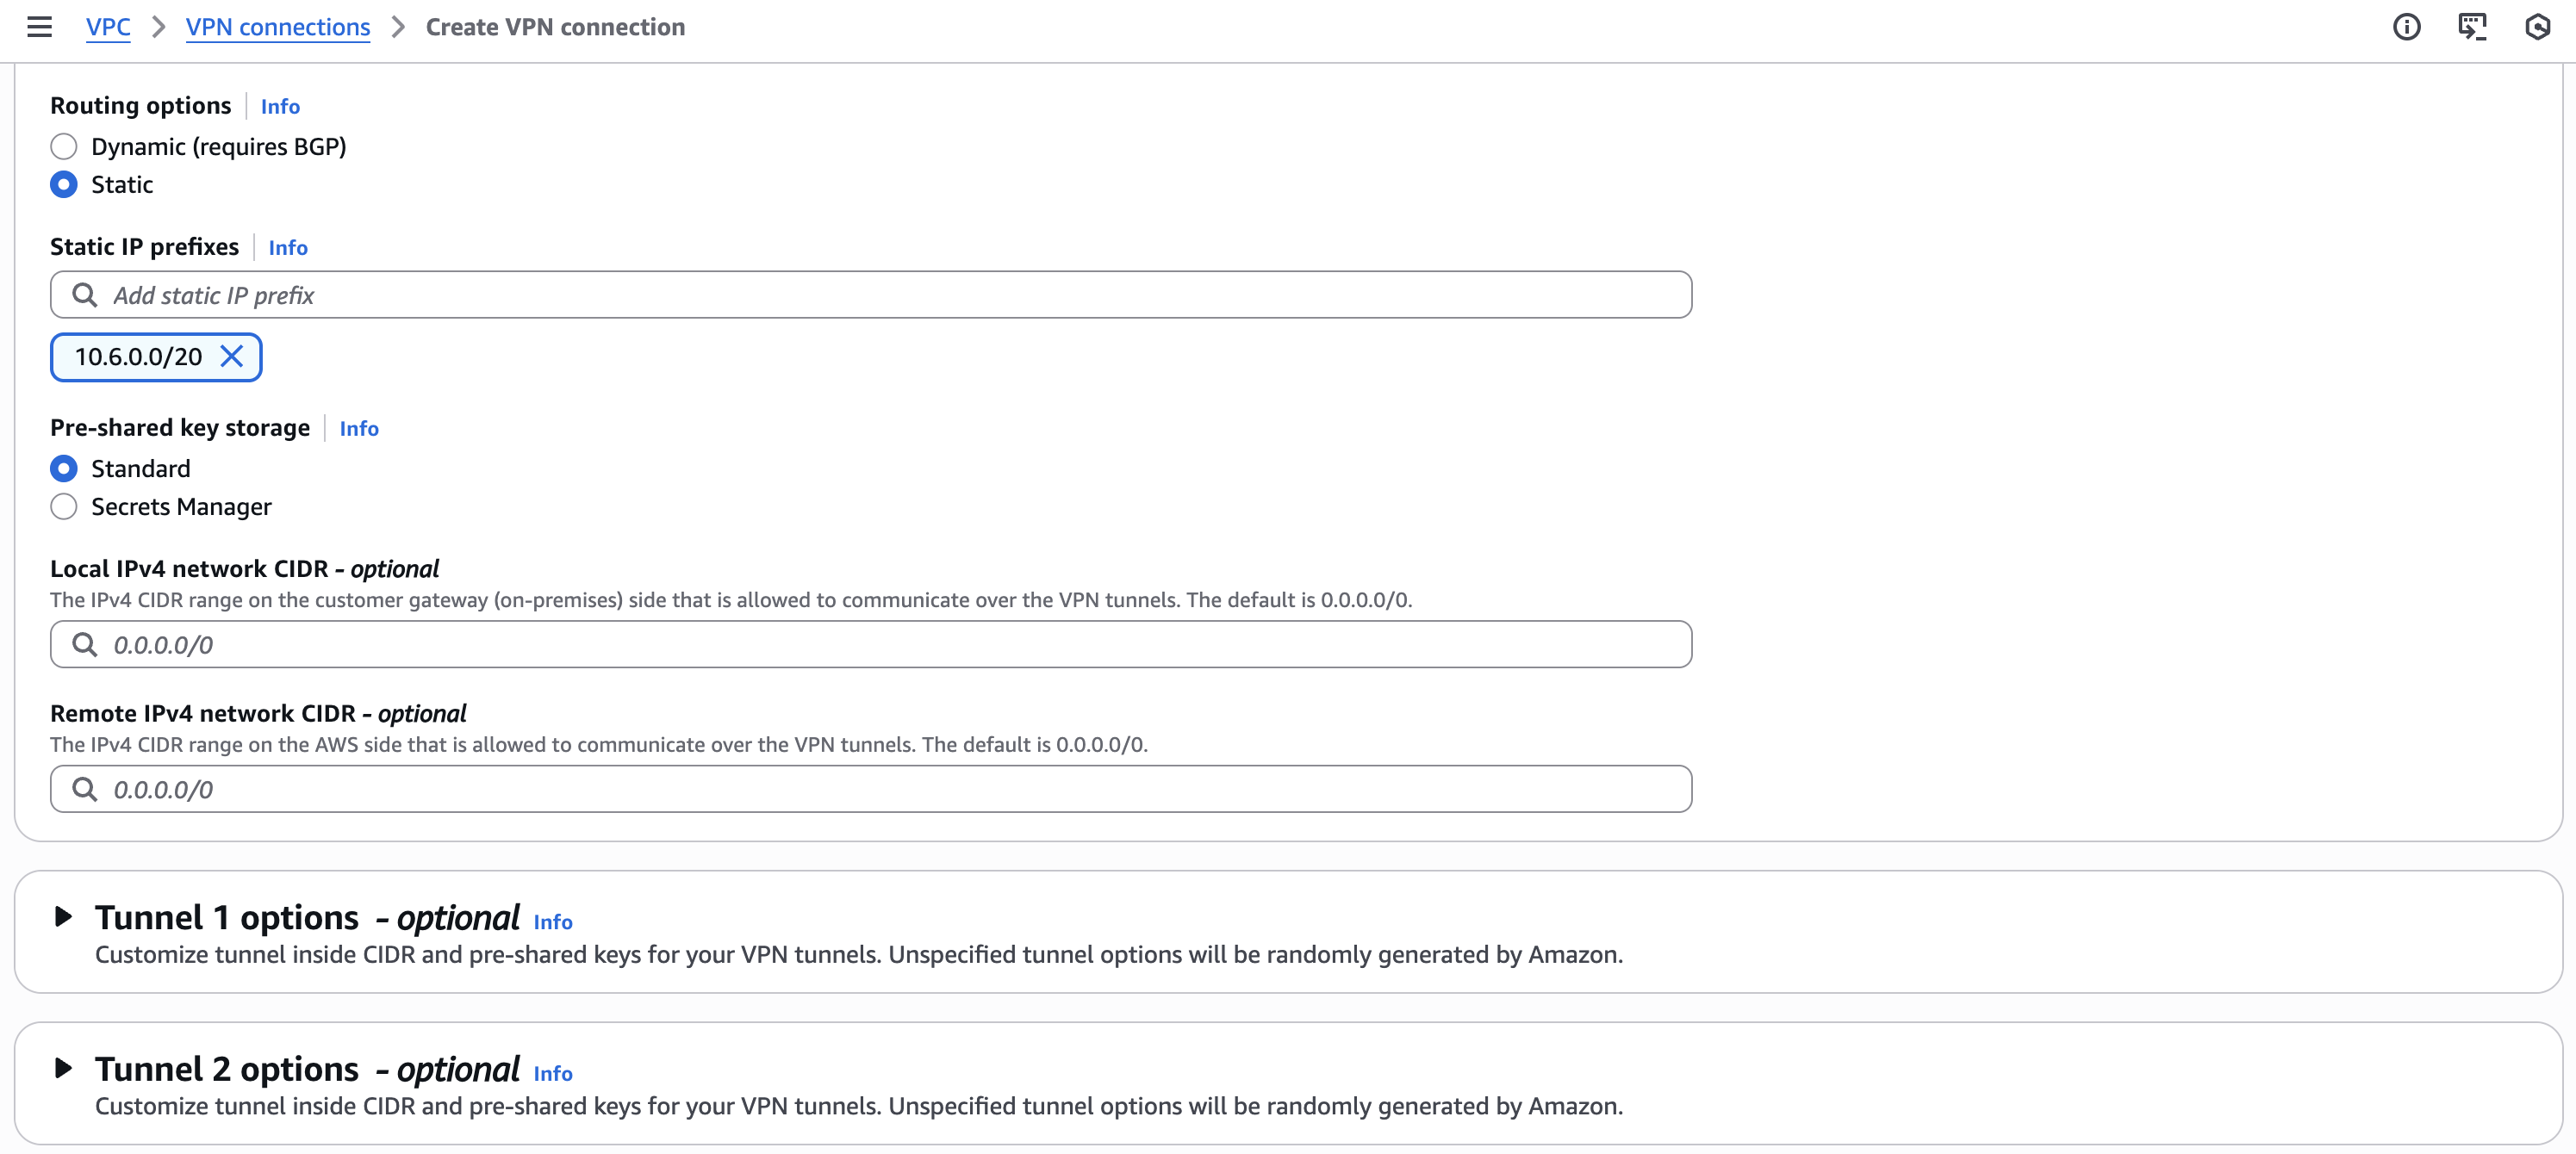
In this page you can also select the inside subnets that you would like to connect via the tunnel.
- A message should display indicating that a VPN Connection Request was created successfully
Configuring the routing rules to the default gateway
- Select the VPC section in the AWS Console and enter the Route table associated with your VPC
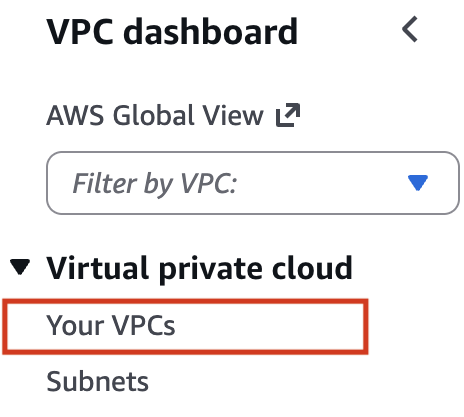
- For the Route Tables menu option, select the routing table that is associated with the VPC you have created for the tunnel

- Select Edit and add the new static routes for the subnets below:

Fill in 10.6.0.0/20 at the destination field and your new VPN Gateway ID as the target (it will appear under the subcategory Virtual Private Gateway).
- Select Save
In case have a customized security group associated with your VPC:
Allow incoming connections from NordLayer local network within your security groups: Configure your AWS security groups to allow all traffic from NordLayer (10.6.0.0/20) or allow only special traffic using the port or services from these sources.
Collecting the tunnel configuration from the AWS Console
- Return to Site-to-Site VPN Connections and select Download Configuration
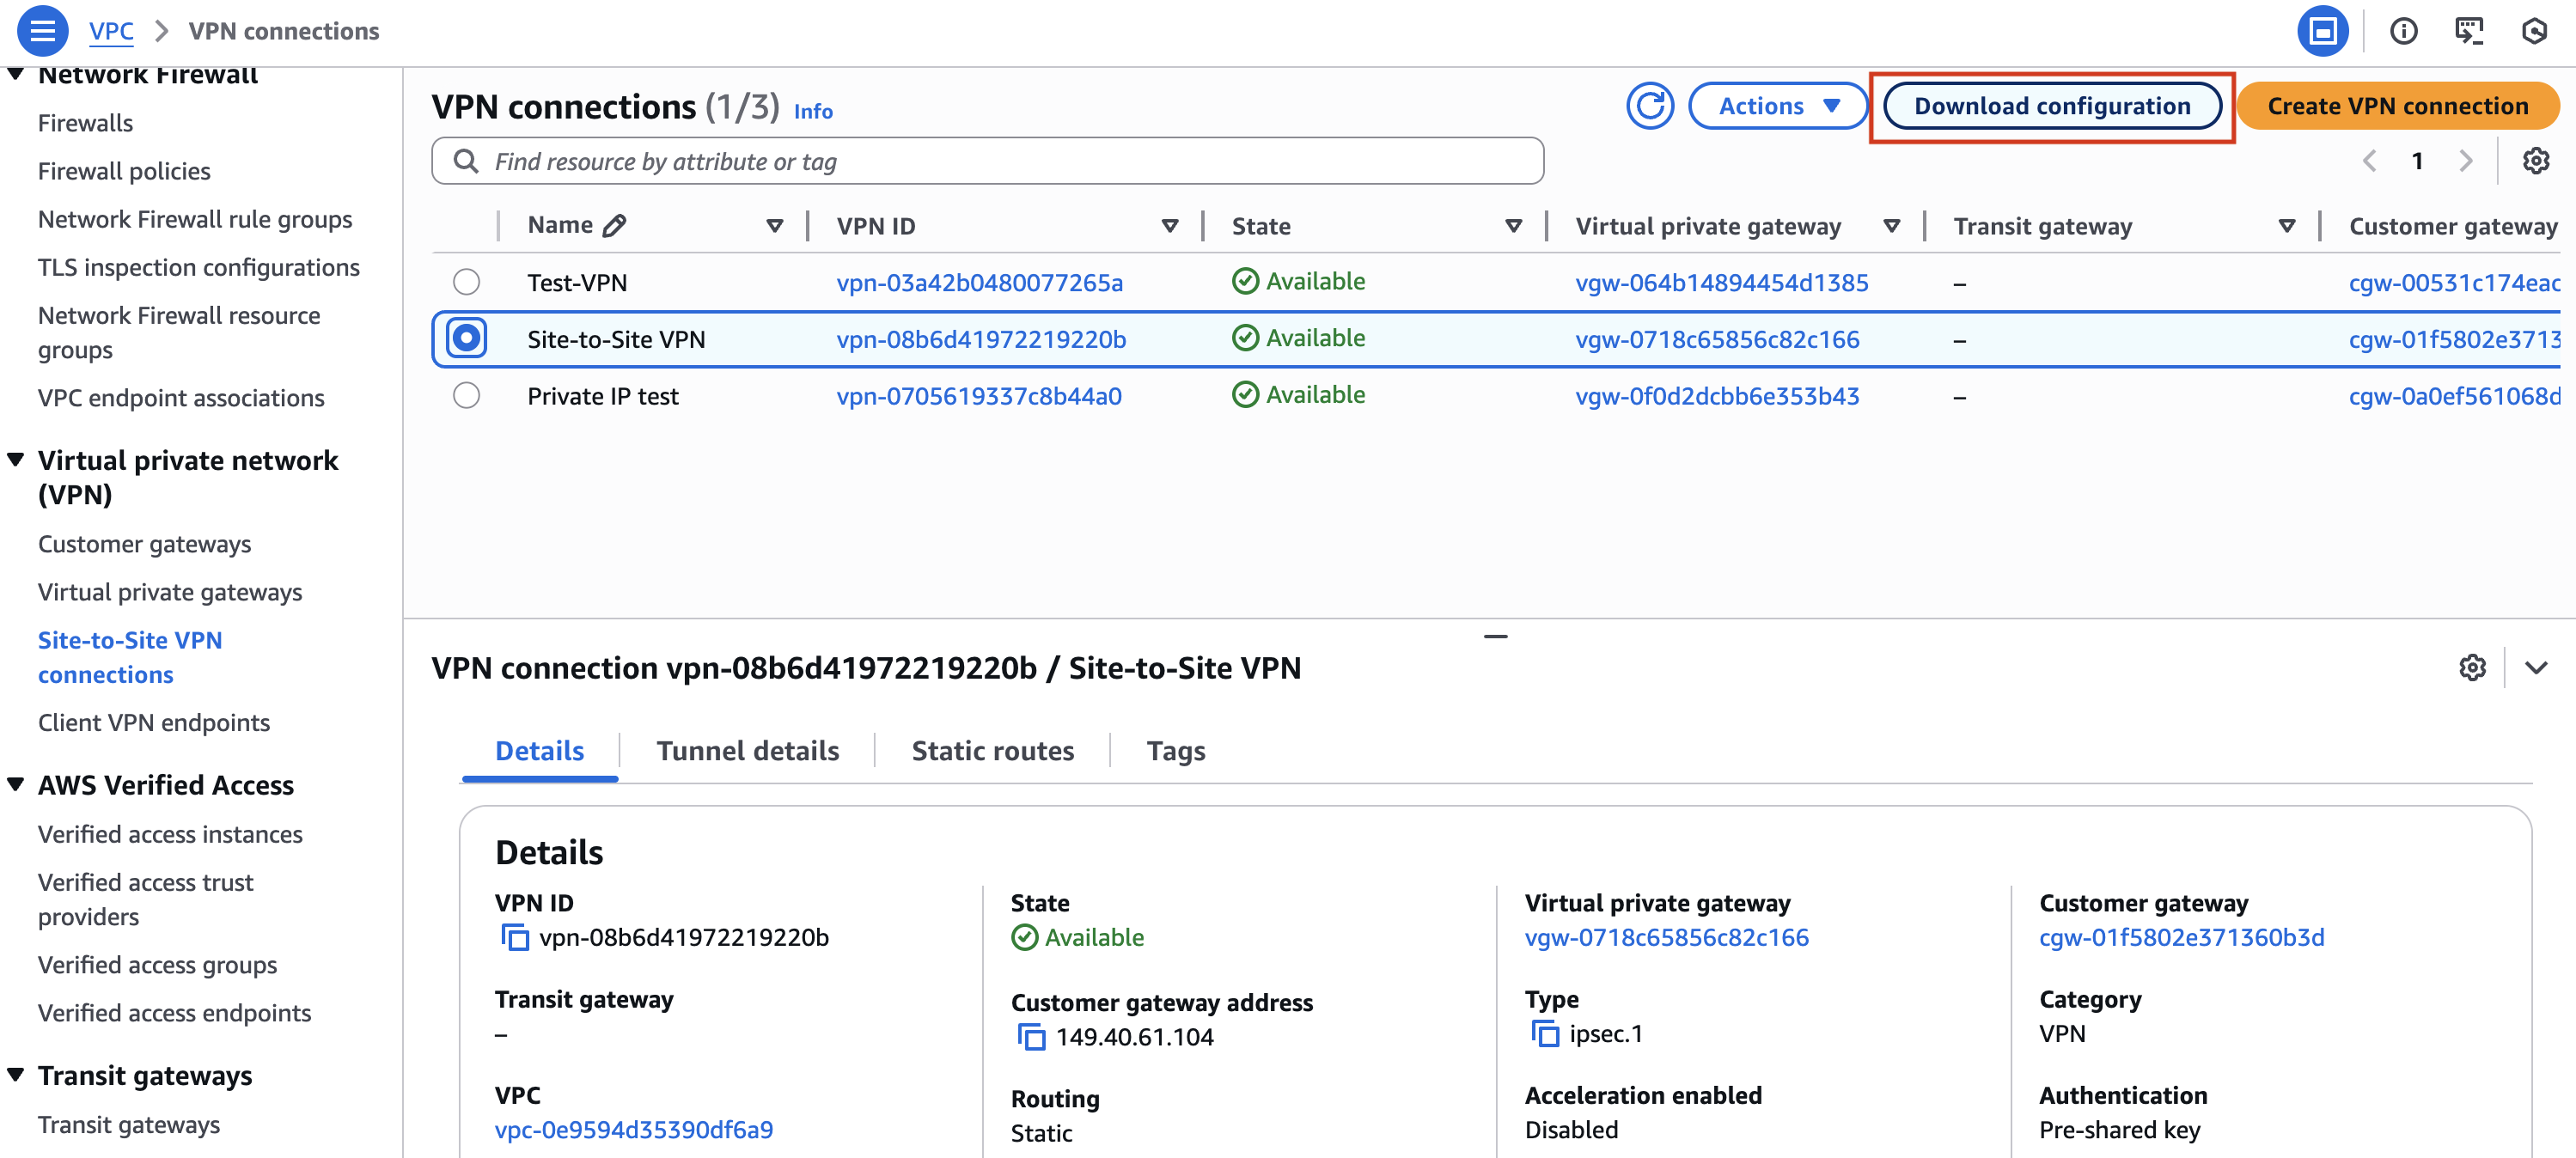
- Fill in the following details and click on "Download".
.png)
Obtain IPSEC Tunnel #1 details
- Open the configuration file which you have just downloaded and scroll until conn Tunnelid as shown in the screenshot below:
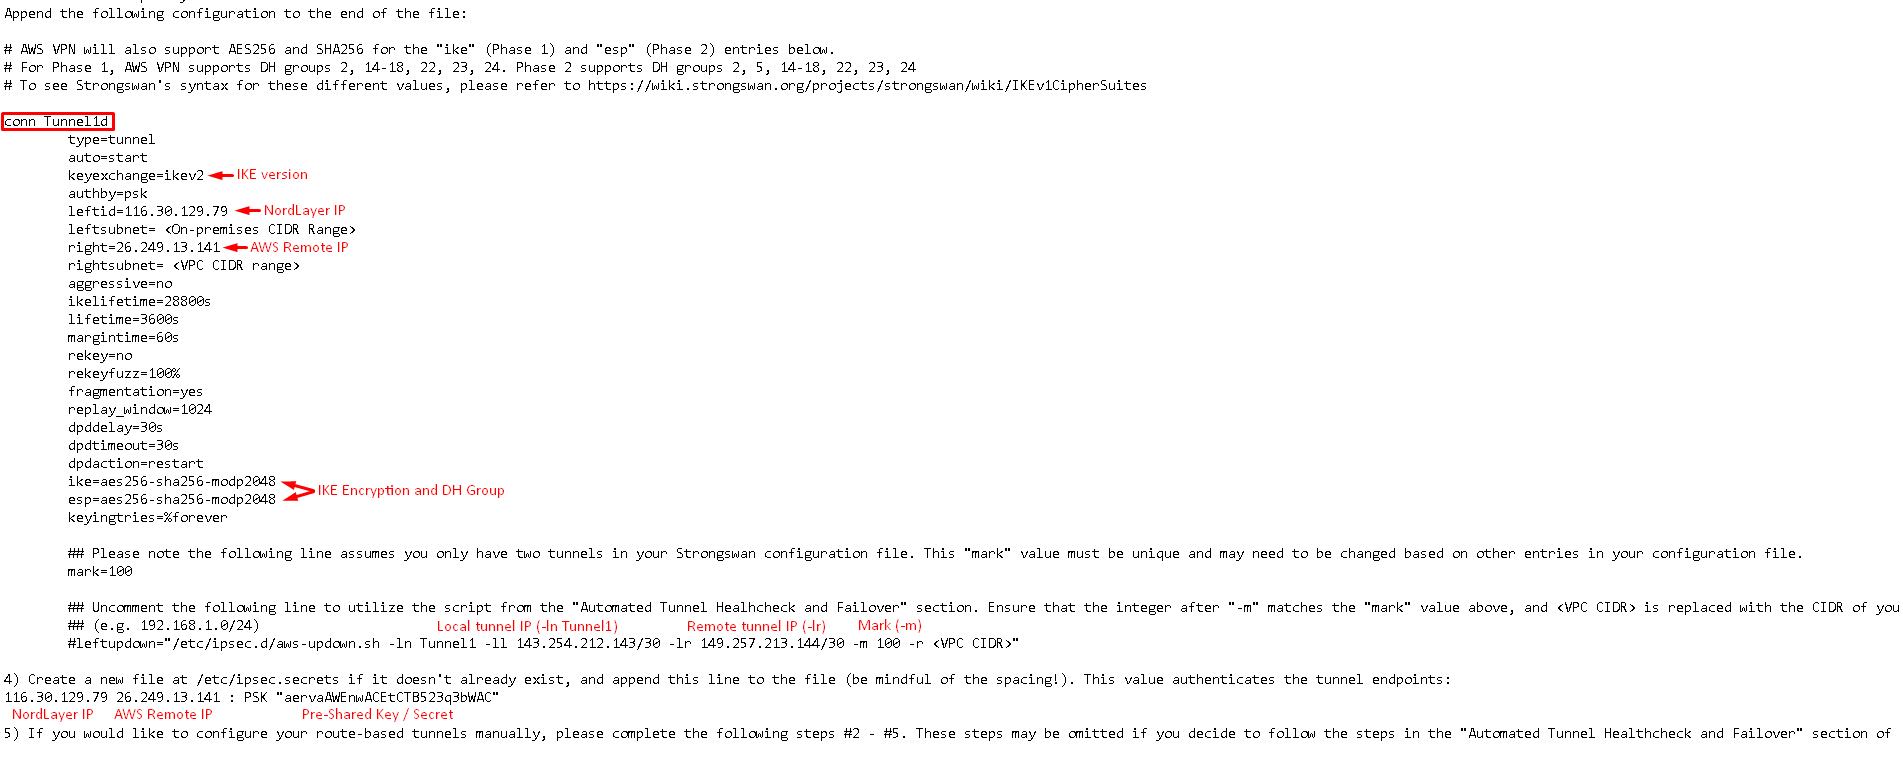
- Make a note of these details as they will be needed for the VPN server configuration:
- IKE version: IKEv2 (recommended)
- Remote IP (right): Your AWS Remote IP
- Encryption settings IKE Encryption and DH Group
- Local IP (-ll): Local Tunnel IP
- Remote IP (-lr): Remote Tunnel IP
- Mark (-m): specified in the config
- Pre-shared key (PSK): Your Pre-Shared Key / Secret
Obtain IPSEC Tunnel #2 details
- Within the same configuration file, scroll down to locate the section labeled conn Tunnel2.
- Take note of the following details as they will be required for configuring Site-to-Site connection:
- IKE version: IKEv2 (recommended)
- Remote IP (right): Your AWS Remote IP
- Encryption settings IKE Encryption and DH Group
- Local IP (-ll): Local Tunnel IP
- Remote IP (-lr): Remote Tunnel IP
- Mark (-m): specified in the config
- Pre-shared key (PSK): Your Pre-Shared Key / Secret
Submitting Site-to-Site request form
Once you have obtained all necessary details from the AWS config – IPSEC Tunnel #1 and IPSEC Tunnel #2 – please proceed next by submitting our Site-to-site Request from.
Note: In case you are experiencing different results, make sure that you have you carefully gone through all the steps. Having said that, in case the issue persists please feel free to contact our 24/7 customer support team.