Note: If your device/service supports SHA256 and DH group 14, it is recommended to use these settings instead.
Configuring the tunnel at the Barracuda Management Interface
-
Open the Barracuda Management Interface
-
In the top menu, select Configuration > Virtual Servers > Your virtual server > Assigned Services > VPN (VPN-Service) > Site to Site
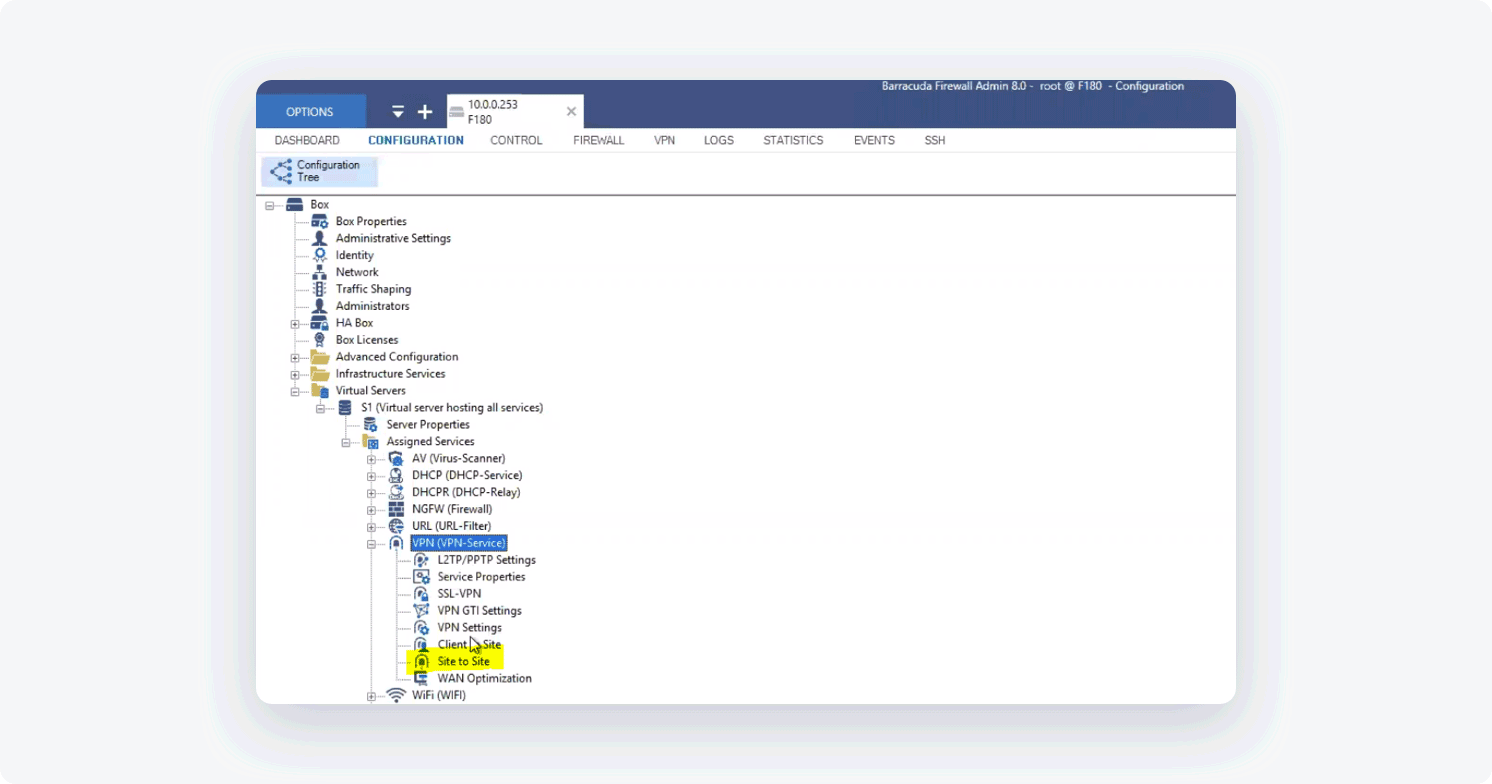
- Select IPsec IKEv2 Tunnels and create a new tunnel, then fill in the following information:
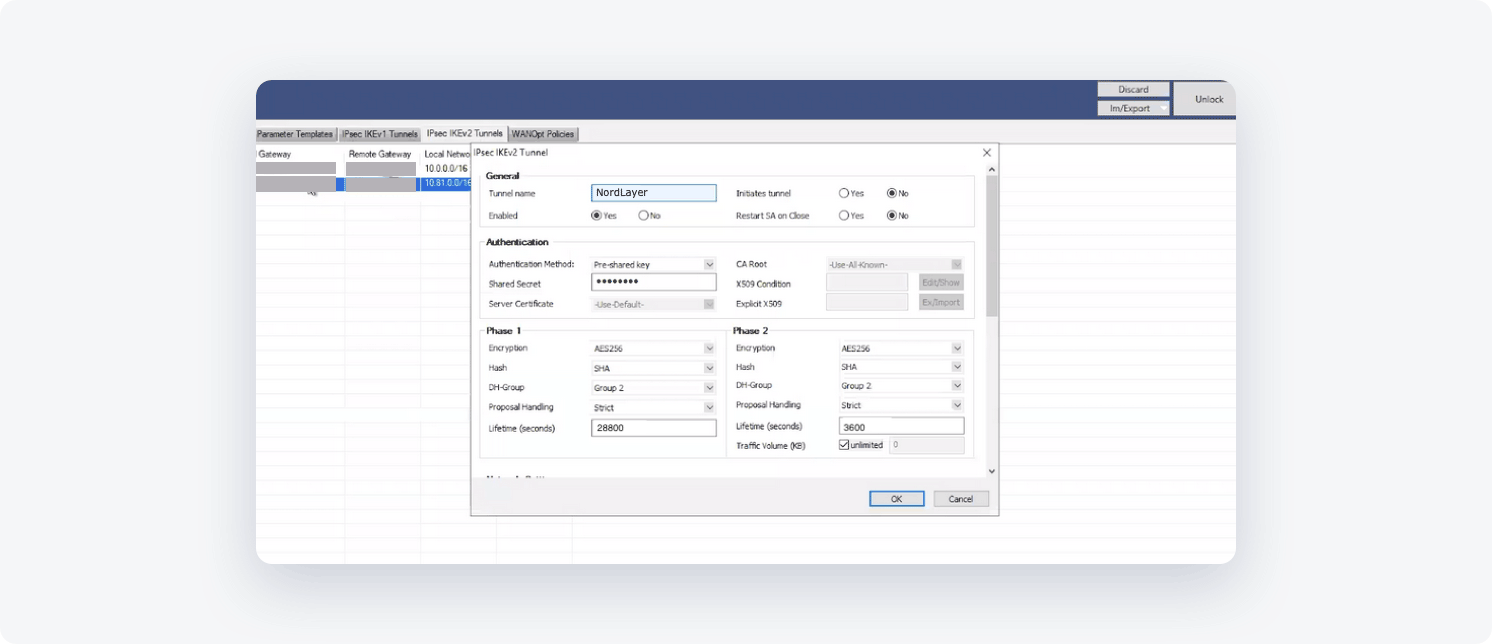
Phase 1:
- Encryption: AES256
- Hash: SHA256
- Diffie-Hellman Group: 14
- Proposal Handling: Strict
- Lifetime: 28800
Phase 2:
- Encryption: AES256
- Hash: SHA256
- DH-Group: 14
- Proposal Handling: Strict
- Lifetime: 3600
- Traffic Volume (KB): Unlimited
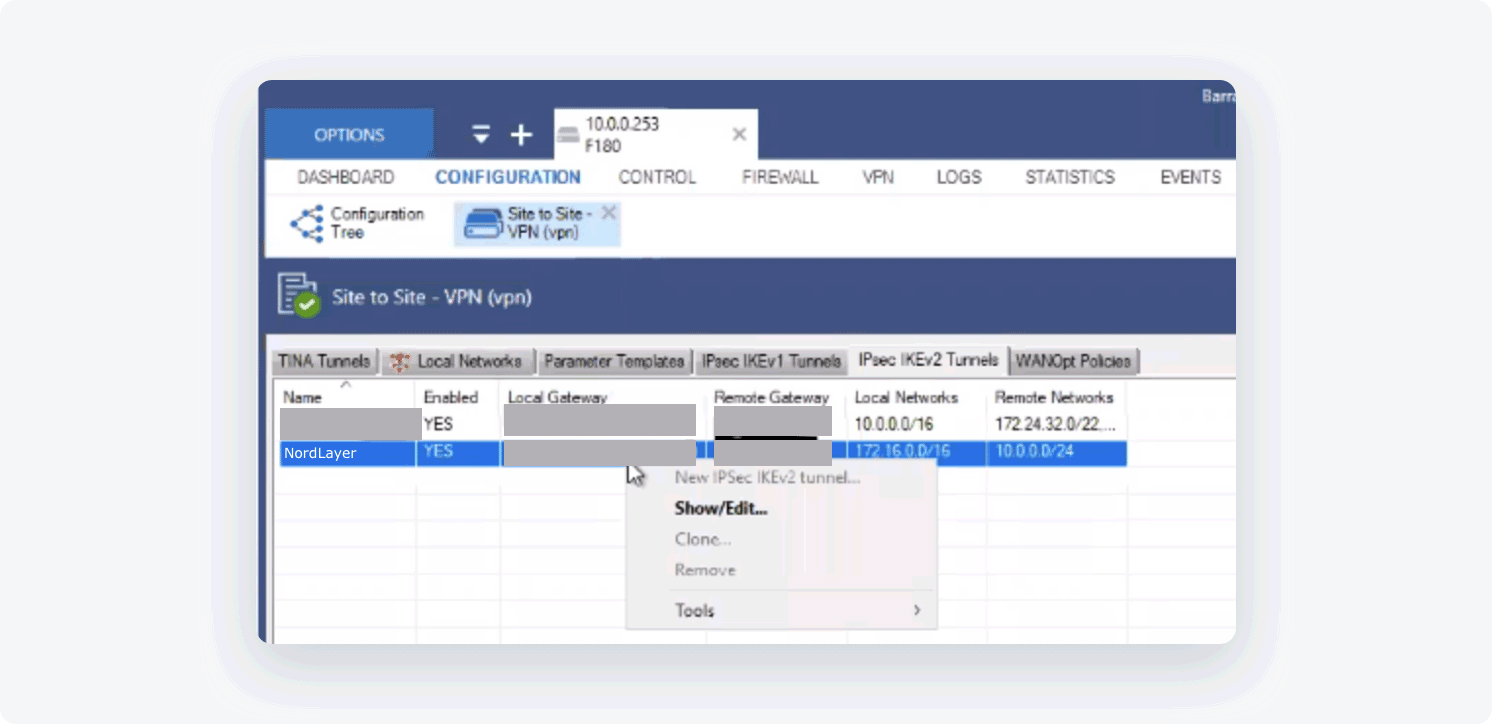
- Next, you will need to configure the Network Settings, go to the Configuration > Site to Site VPN (vpn) and edit or add a new one:
- Endpoint Type: IPv4
- One VPN Tunnel per Subnet Pair: Unchecked
- Universal Traffic Selectors: Unchecked
- Force UDP Encapsulation: Unchecked
- IKE Reauthentication: Checked
- Next Hop Routing: 0.0.0.0
- Interface Index: 0

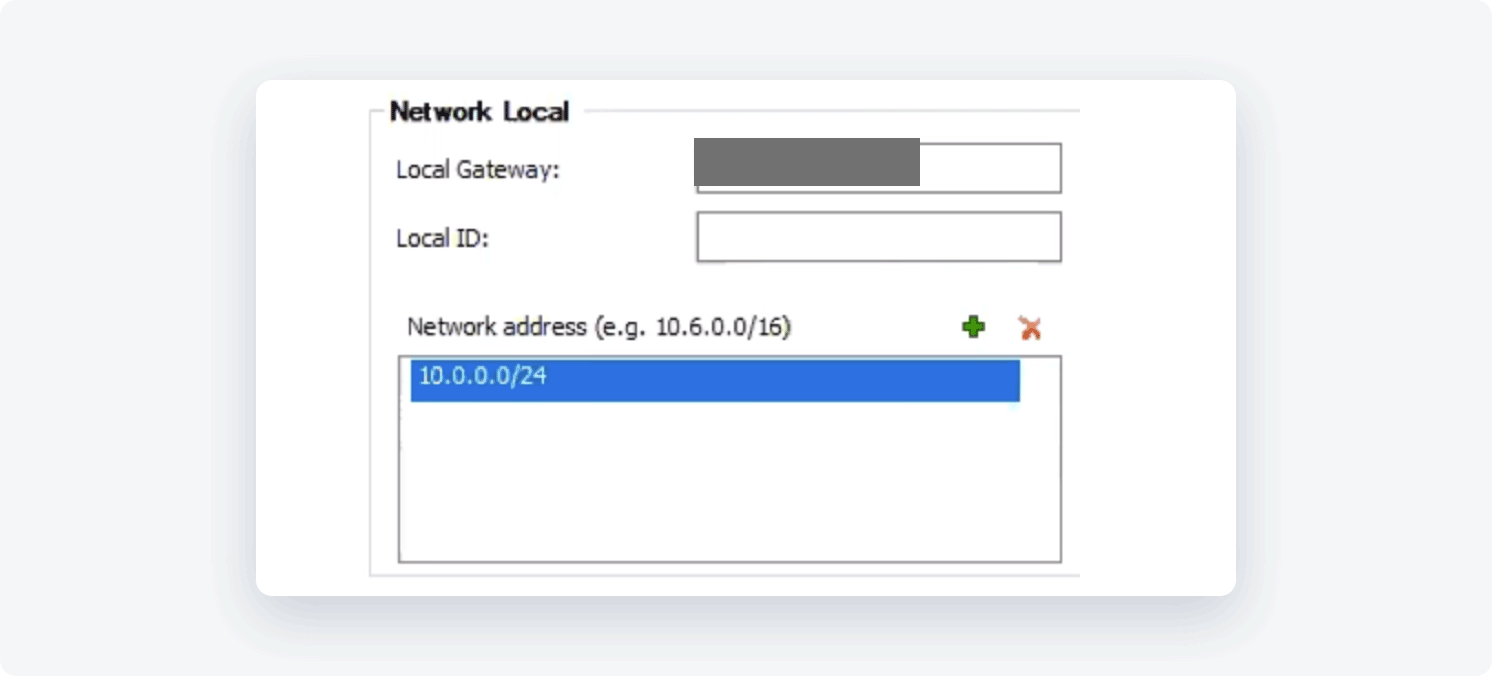
Network Local:
- Local Gateway: Barracuda FW Public IP
- Local ID: Barracuda FW Public IP
- Network address: Internal-Network Subnets
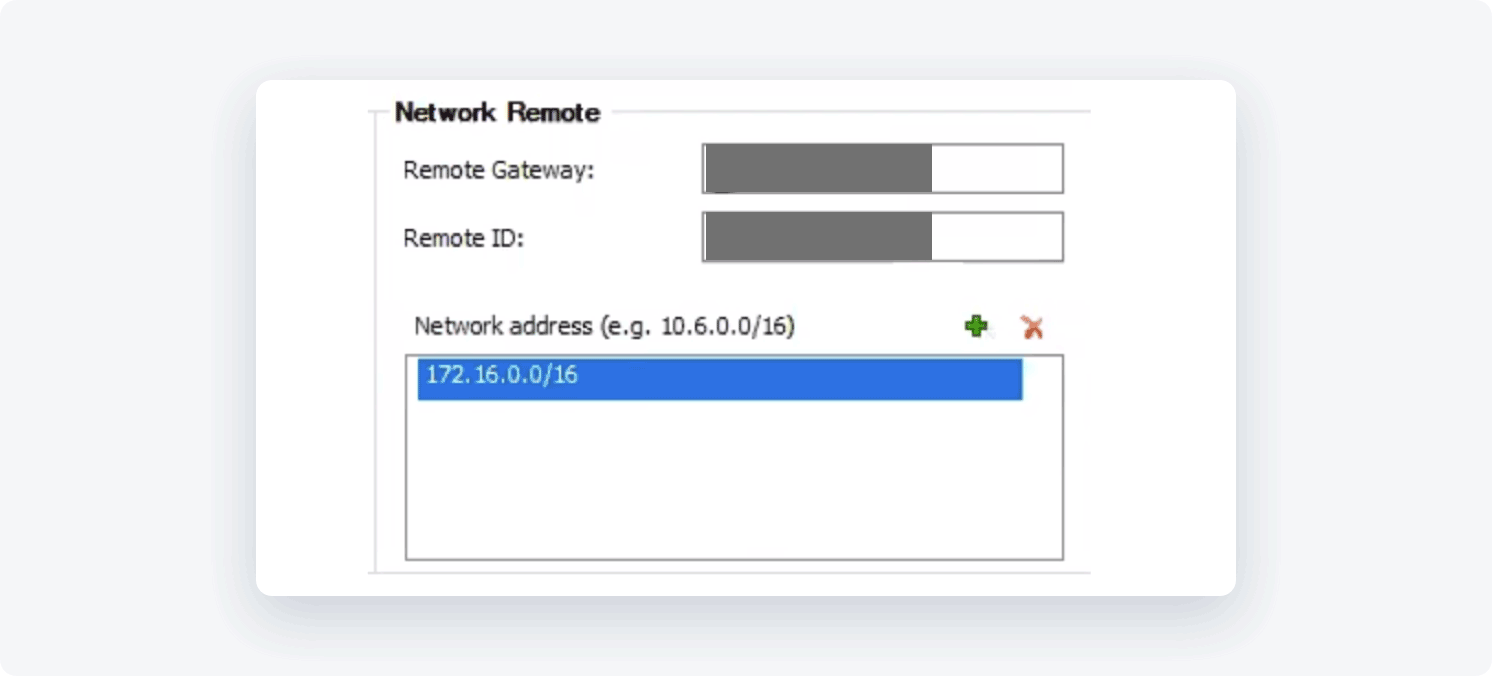
Network Remote:
- Remote Gateway: the IP of your NordLayer server with a dedicated IP
- Remote ID: the IP of your NordLayer server with a dedicated IP
- Network address: 10.6.0.0
Dead Peer Detection:
- Action: Restart
- Delay (seconds): 30

- Click OK
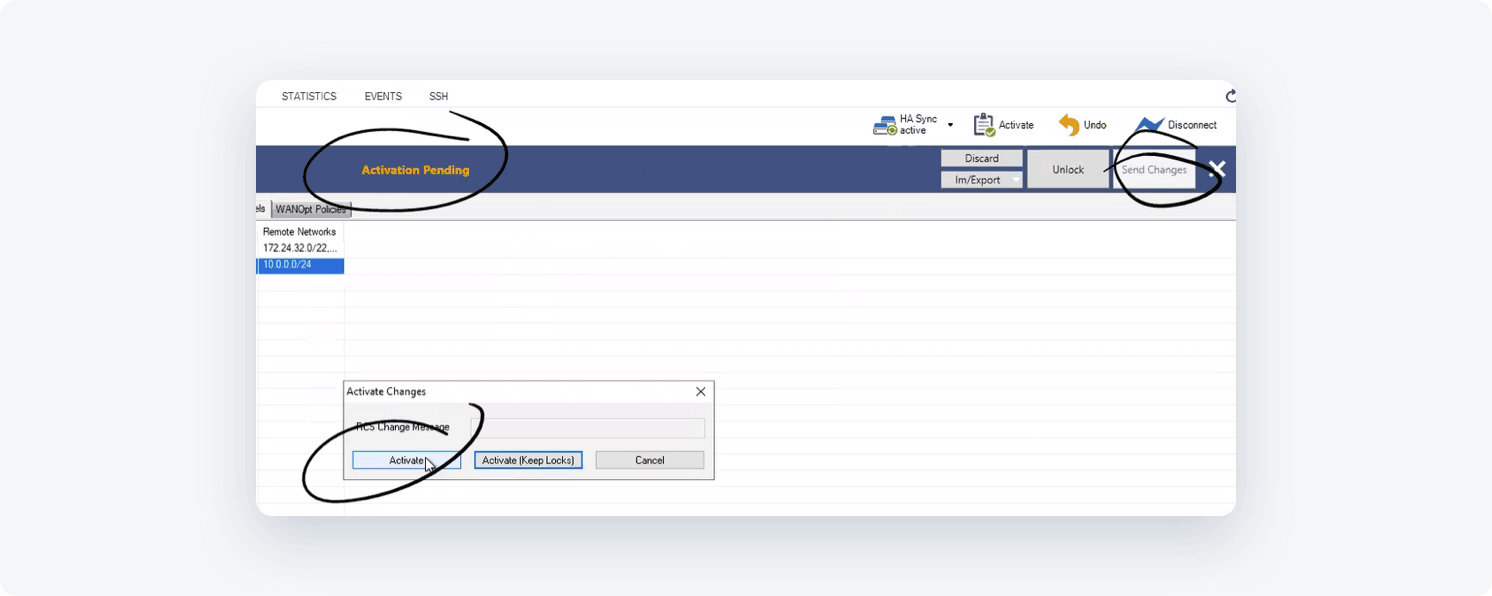
Don't forget to click on Send Changes, Activation Pending and Activate:
Configuring firewall and static routing
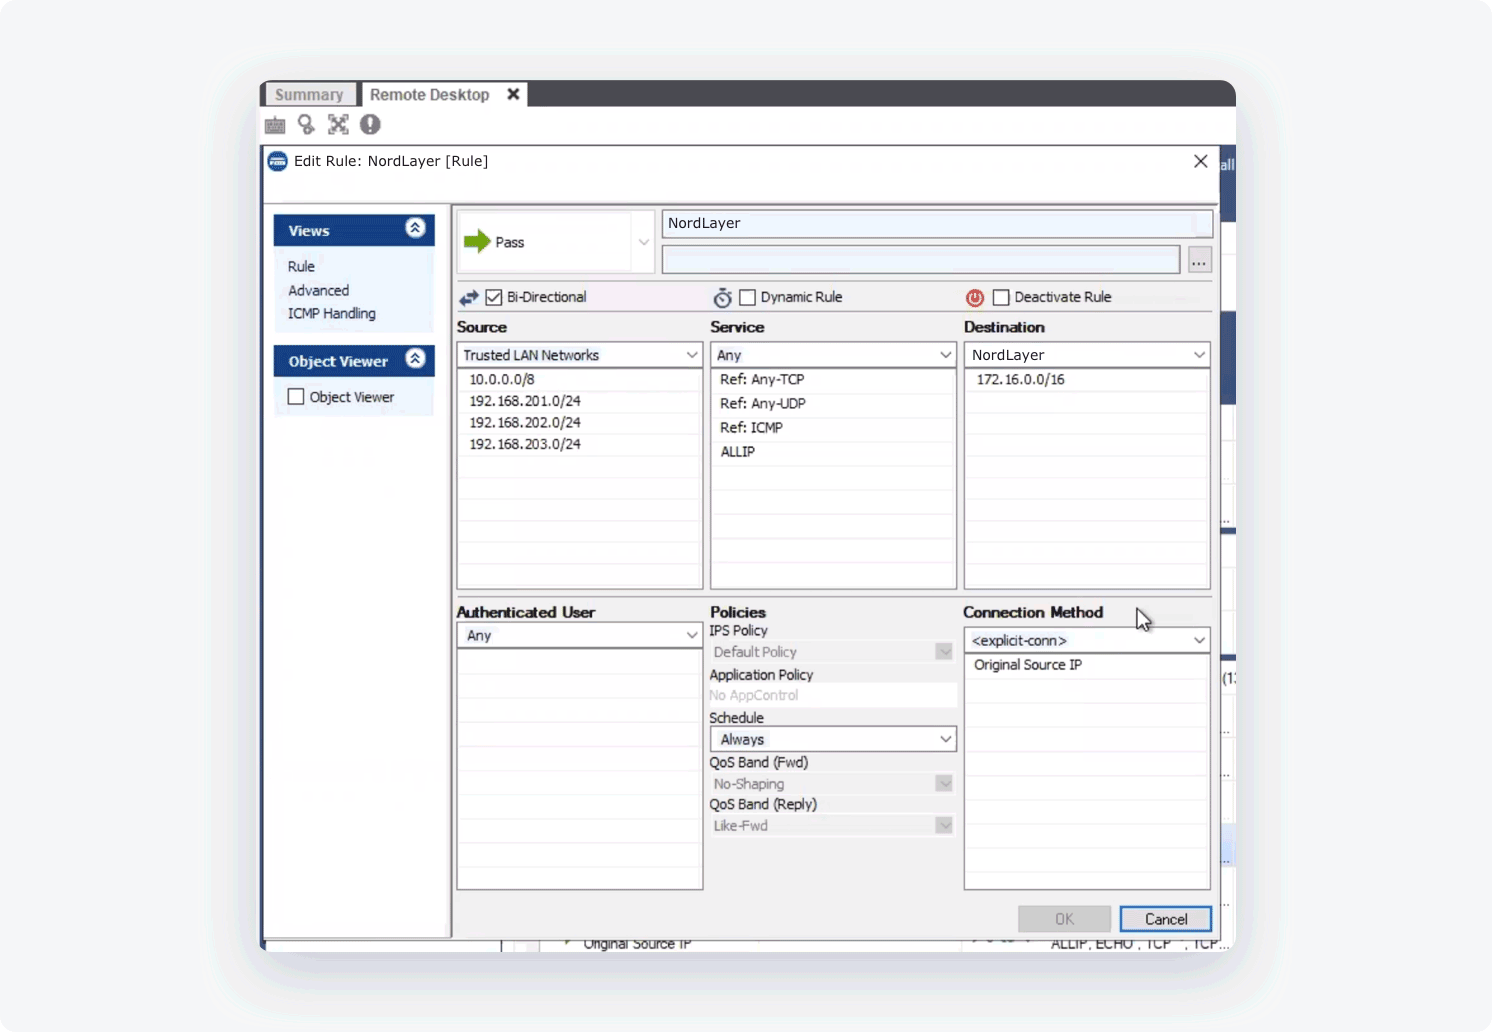
Be sure to allow-list NordLayer private gateway public IP on your firewall rules to allow for incoming traffic, under Firewall > Forwarding Rules:
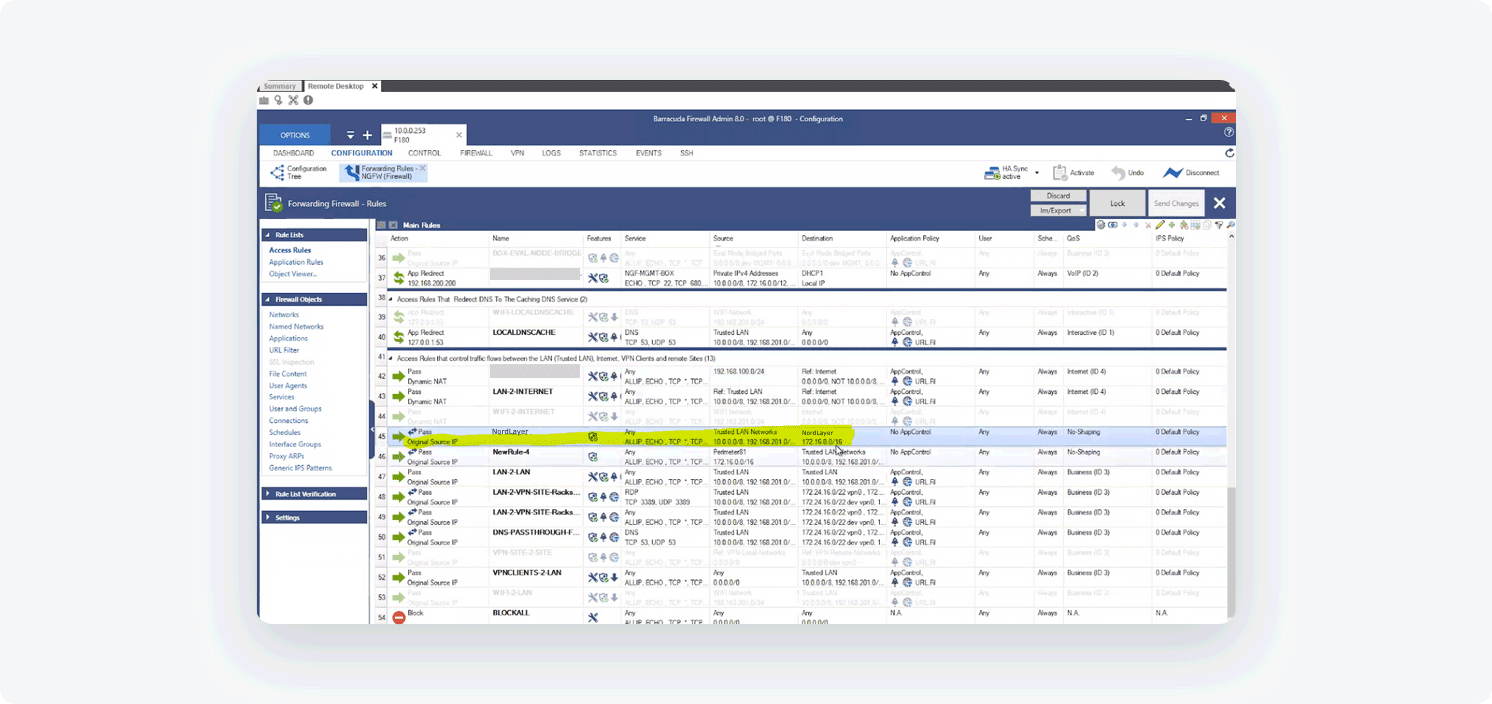
It should appear under the firewalls rules as seen below:
It is also necessary to add static routes from the NordLayer subnet (10.6.0.0/20) to the local network and from the local network to the NordLayer subnet (10.6.0.0/20) to the local network through the VPN tunnel gateway.
-
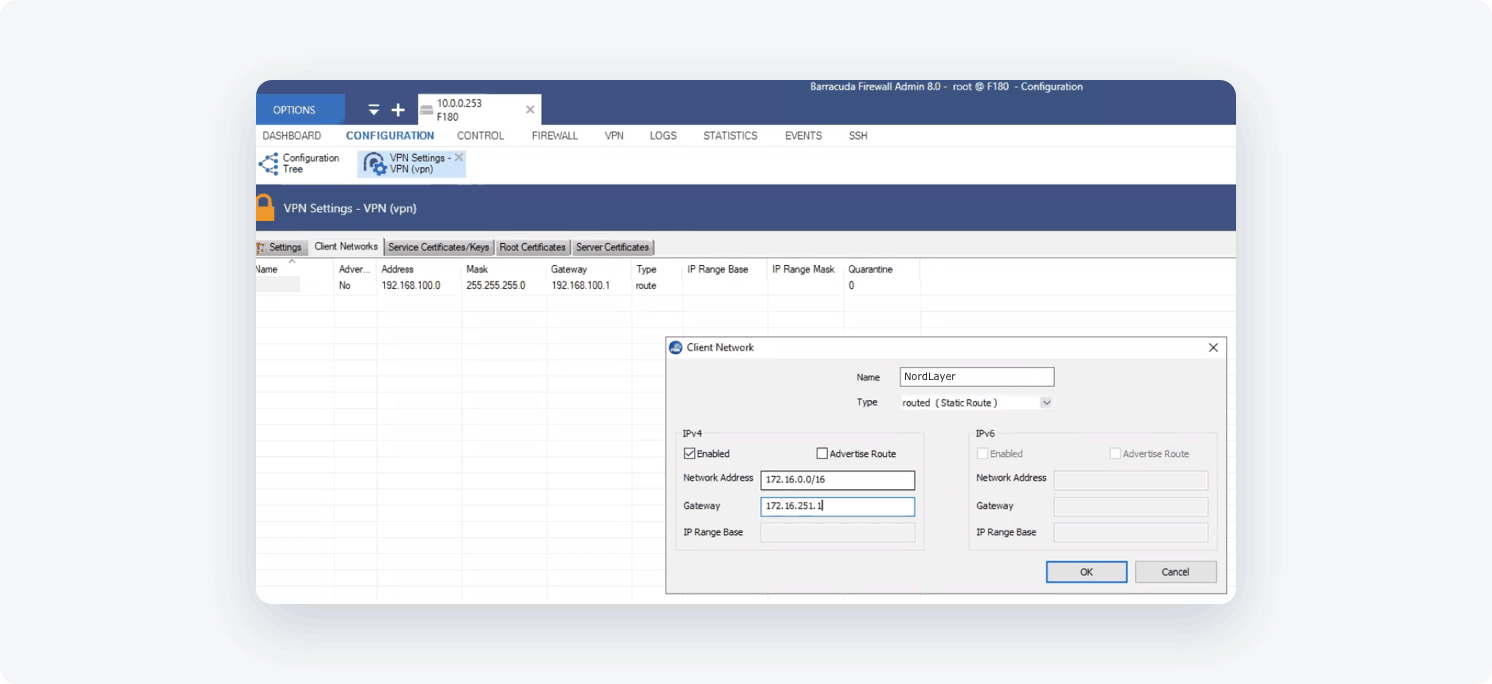
Go to Configuration-> Client Networks
-
Add a new network and set the following:
- Network Address: 172.XXX.0.0/16 (or relevant subnet)
- Gateway: local Barracuda IP
- Name: NordLayer (or any other name you chose for the tunnel).
- Select OK
Make sure the tunnel is up
At the Barracuda Management Interface, go to VPN -> Site-to-Site. If the tunnel is up the line will appear in the table:

Ending note:
In order to finalize the site-to-site setup on our end, please provide these values via Site-to-site request from in the NordLayer Control Panel:
- Pre-shared key - you can generate it or we can provide it
- Encryption details (AES, SHA and DH group) - AES256, SHA256 and DH group 14 are recommended (also must support IKEv2)
- Remote gateway/router public IP (must be reachable while connected to the server with a dedicated IP)
- Remote subnet and mask (the subnet is used in your local network)
Note: In case you are experiencing different results, make sure that you have you carefully gone through all the steps. Having said that, in case the issue persists please feel free to contact our 24/7 customer support team.