Note: If your device/service supports SHA256 and DH group 14, it is recommended to use these settings instead.
Initial Google Cloud platform configuration
GCP includes a few steps throughout the configuration and needs to be applied for every VPC.
- Create Virtual Private Gateway
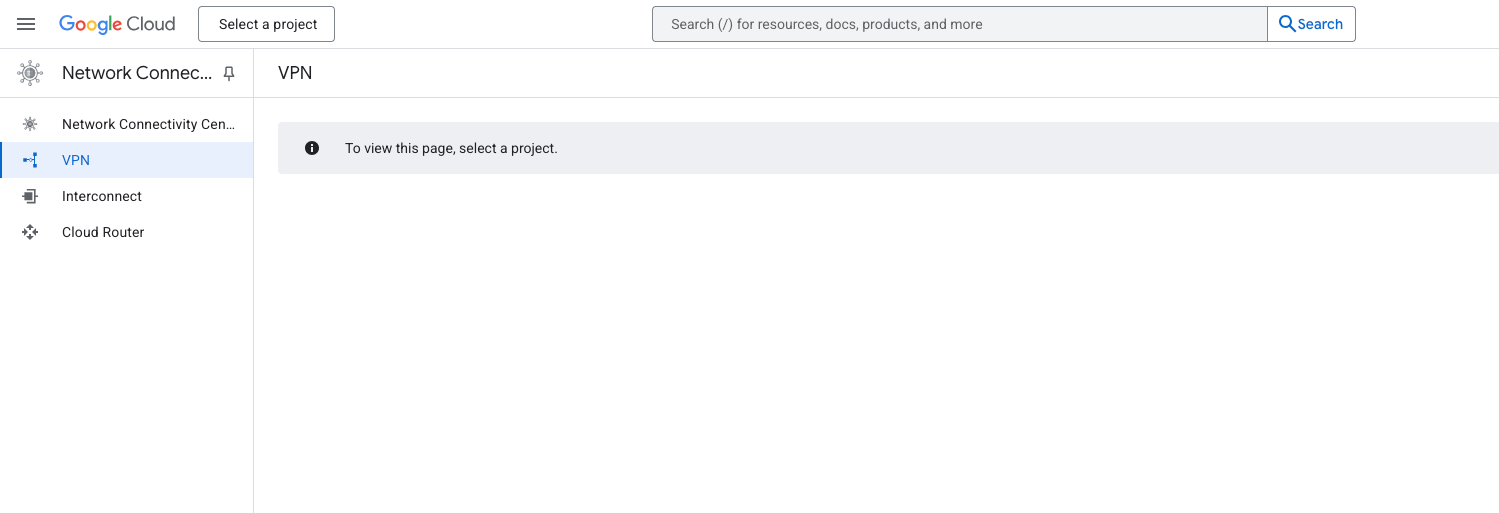
- Go to the Network Connectivity Center in the Google Cloud Platform Console. Under the left menu go to VPN section
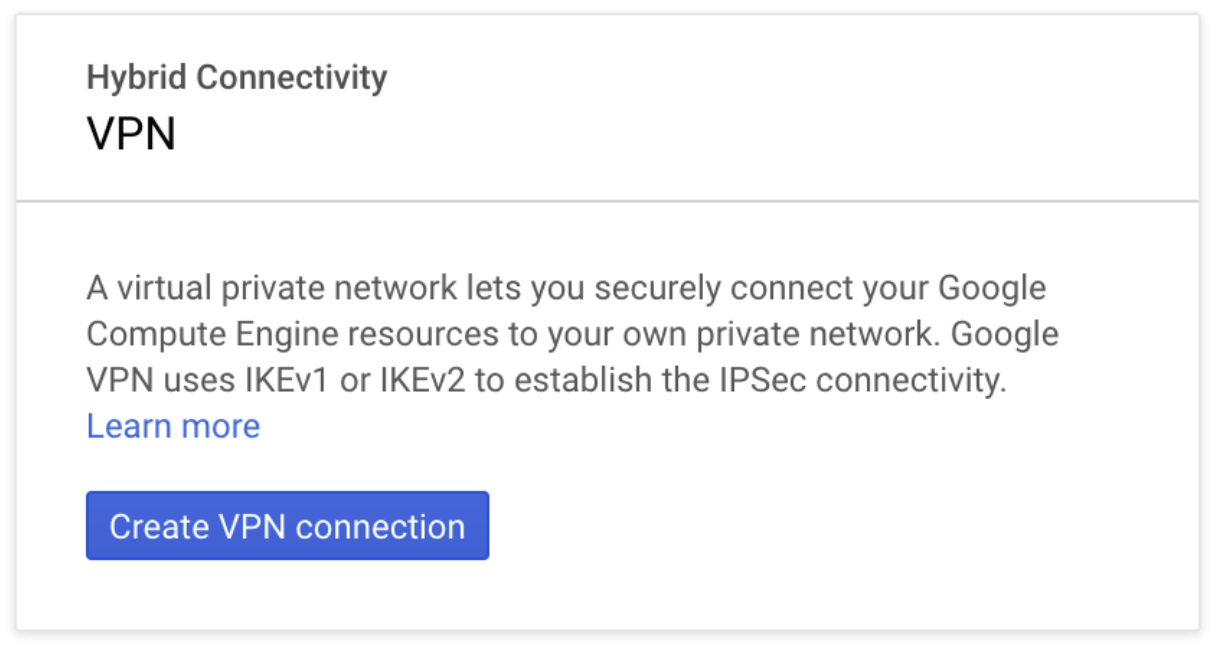
- Select Create VPN connection
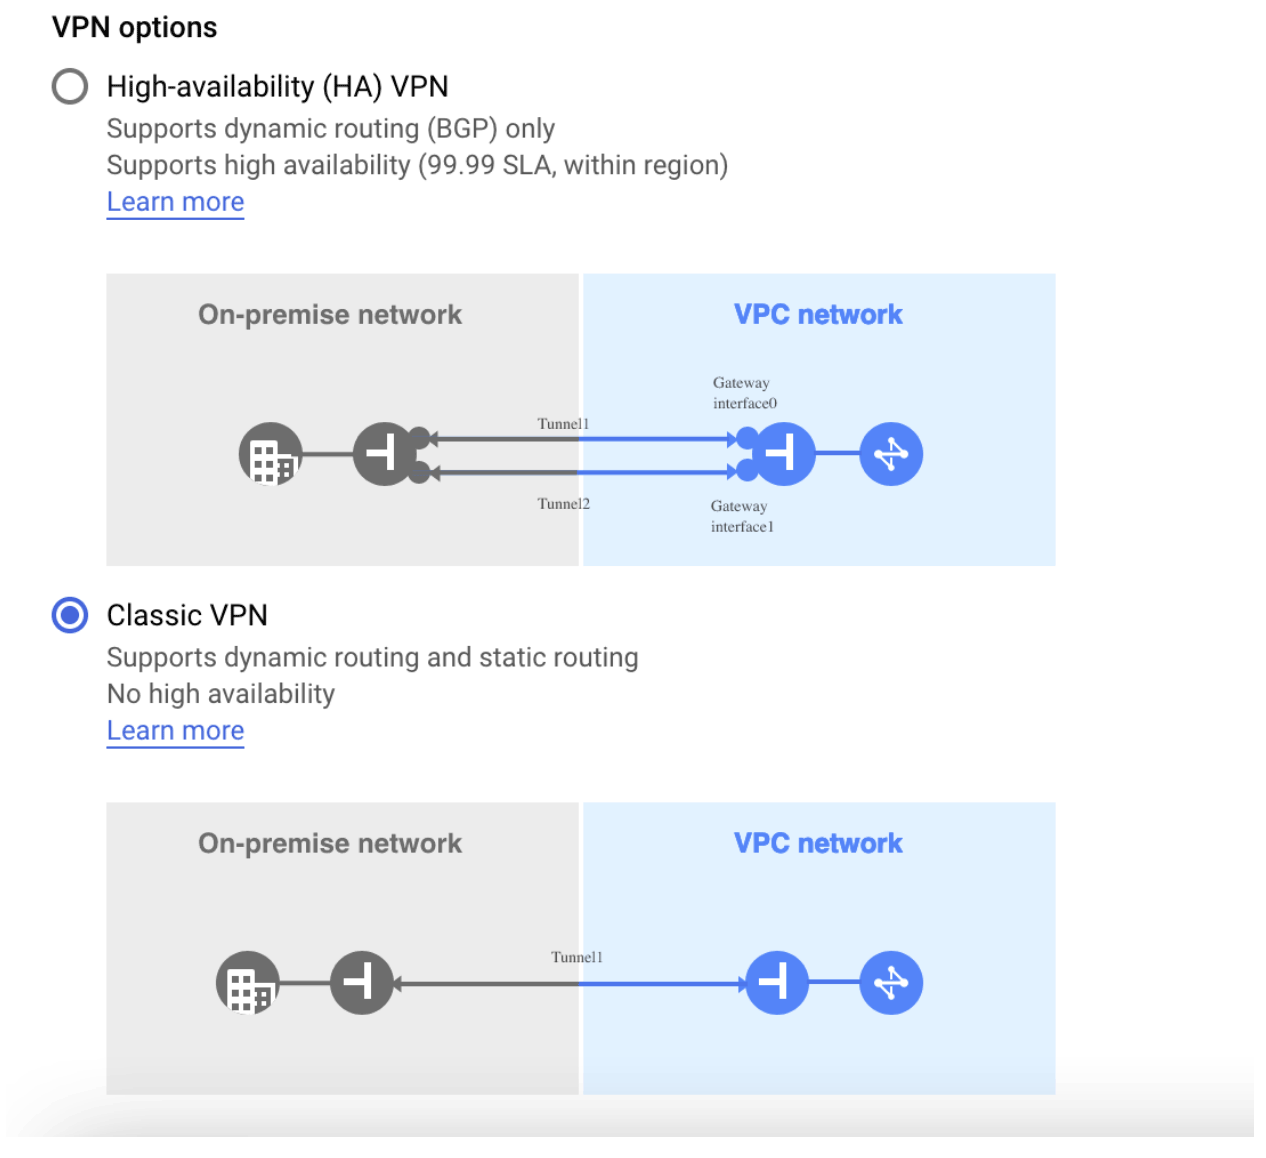
- Select Classic VPN
- Fill in the following information:
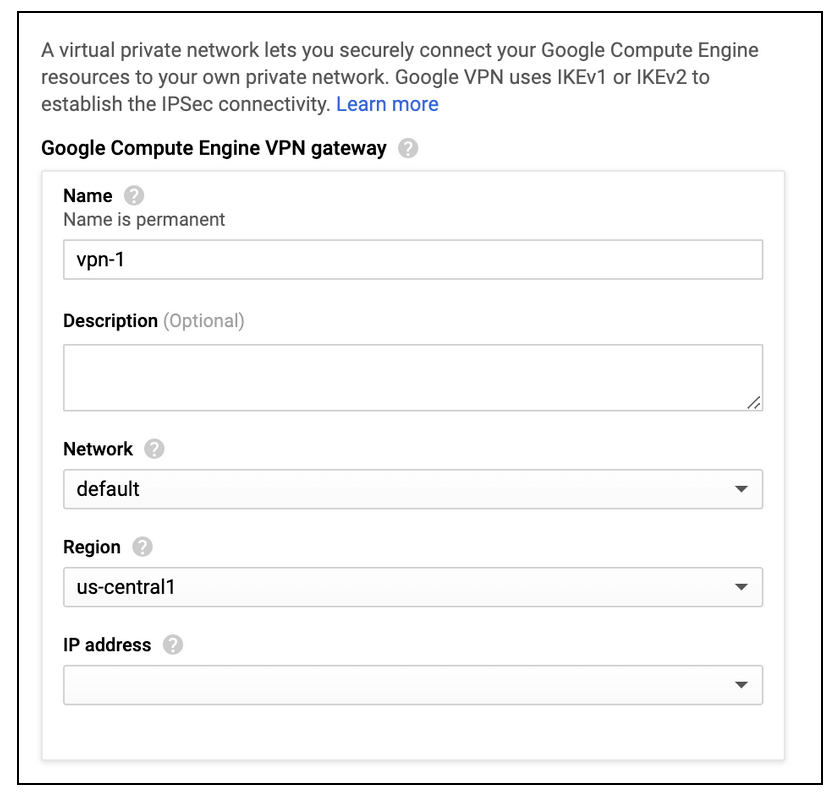
- Name: Choose the name of your own choice
- Network: Select default or a specific VPC
- Region: Preferably the region in which your resources lie
- IP Address: Create an IP address that will serve to connect your gateway
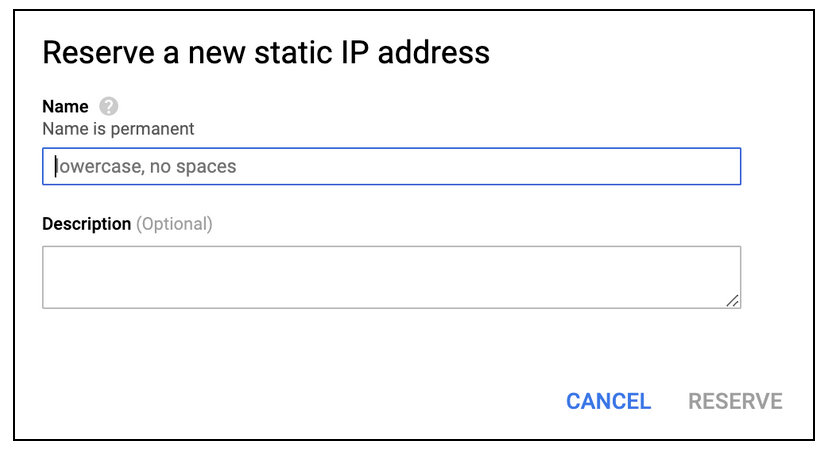
- Create a Tunnel
- Scroll to the lower part of the page. Fill in the following information:
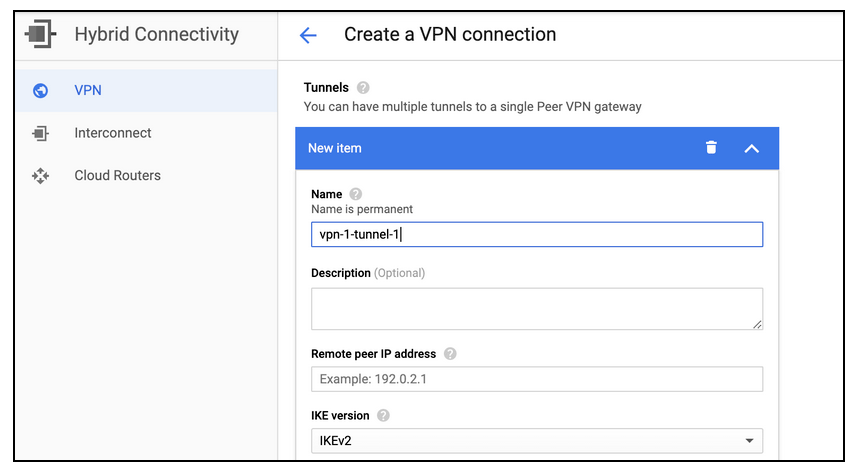
- Name: Choose the name of your own choice
- Remote peer IP address: Enter the IP of your NordLayer server with a dedicated IP
- IKE Version: IKEv2
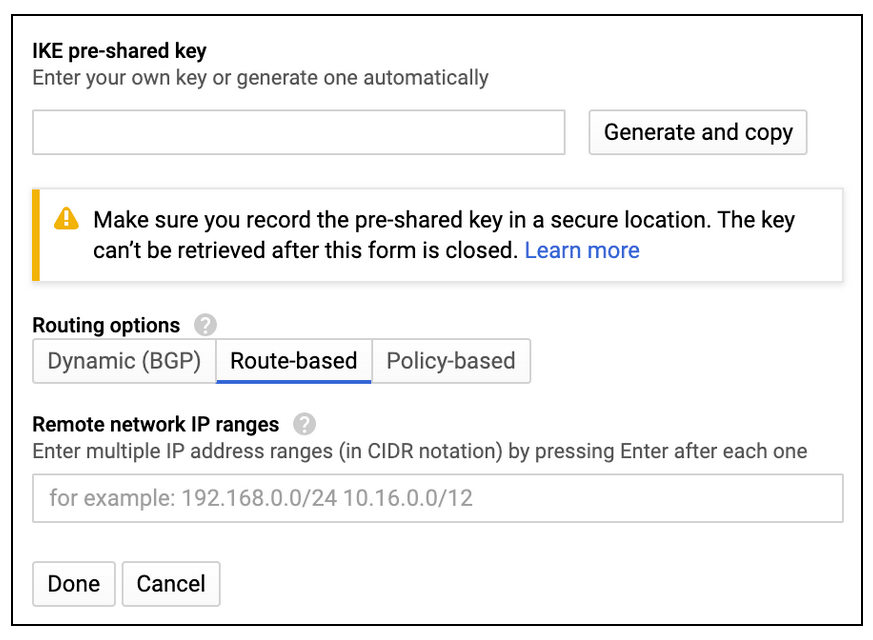
- IKE pre-shared key: Select Generate and copy or choose a key of your own and write it down (we will also need this value on our end)
- Routing options: Route-based
- Remote network IP ranges: 10.6.0.0/20
- Select Done, then Create.
Configuring the routing rules to the VPC network
- Go to the VPC Network in the Google Cloud Platform Console. Under the left menu go to Routes

- Select Create Route Rule and fill in the following information:
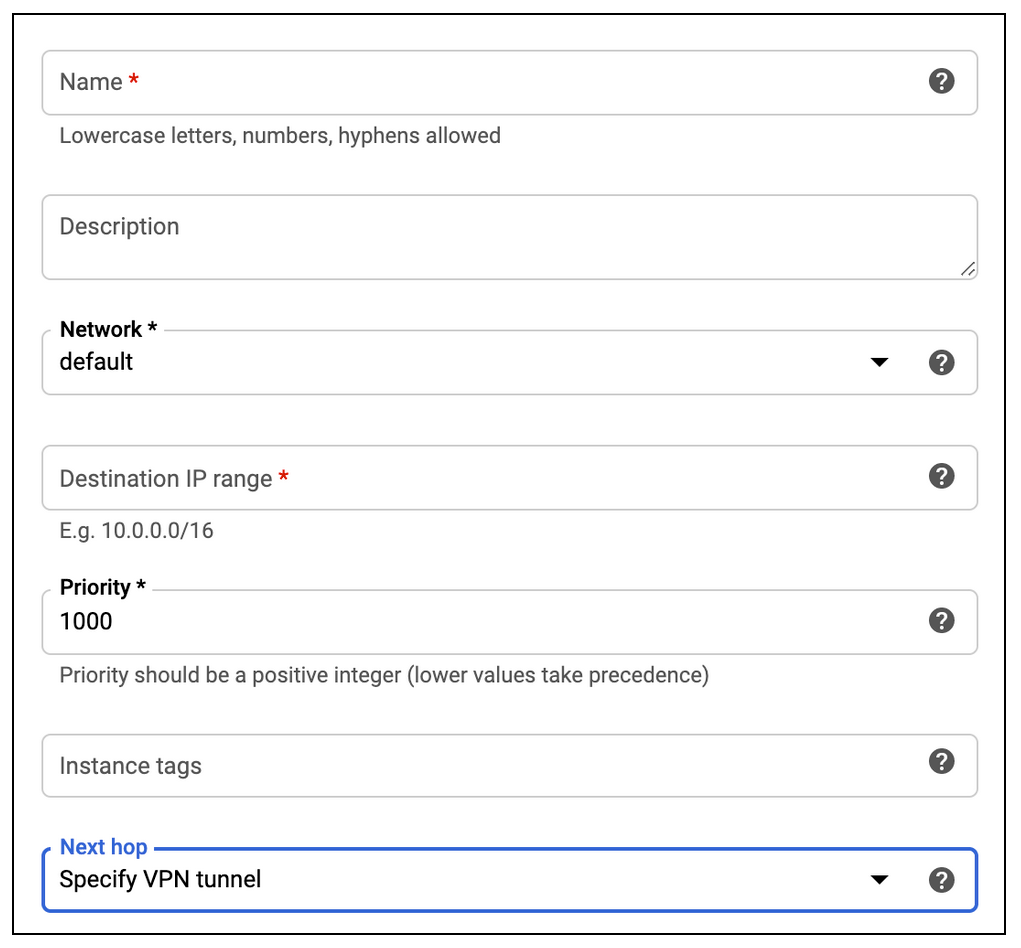
- Name: The name of the VPN gateway
- Network: The VPC network containing the instances that the VPN gateway will serve (should be the same network as selected in the previous steps)
- Destination Network IP range: Specify 10.6.0.0/20
- Priority: 1000
- Next hop: Select Specify VPN Tunnel
- Next hop VPN tunnel: Select the VPN tunnel you created in the previous steps
- Select Create
Allowing incoming connections from NordLayer local network using firewall rules
-
Go to the VPC Network in the Google Cloud Platform Console
-
Under the left menu go to Firewall Rules

- Select Create Firewall Rule and fill in the following information:
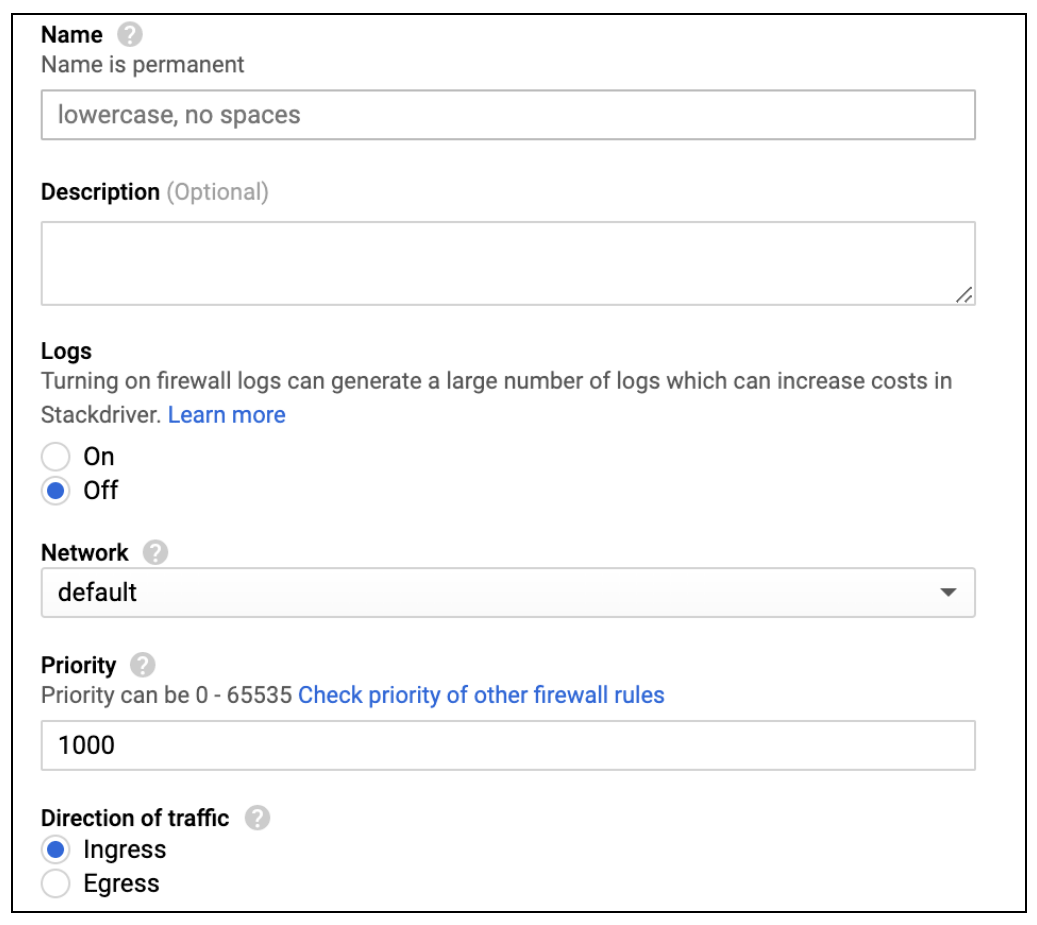
- Name: Choose the name of your own choice
- Logs: Off
- Network: The VPC network containing the instances the VPN gateway will serve (should be the same network as selected in the previous steps)
- Priority: 1000
- The direction of traffic should be Ingress
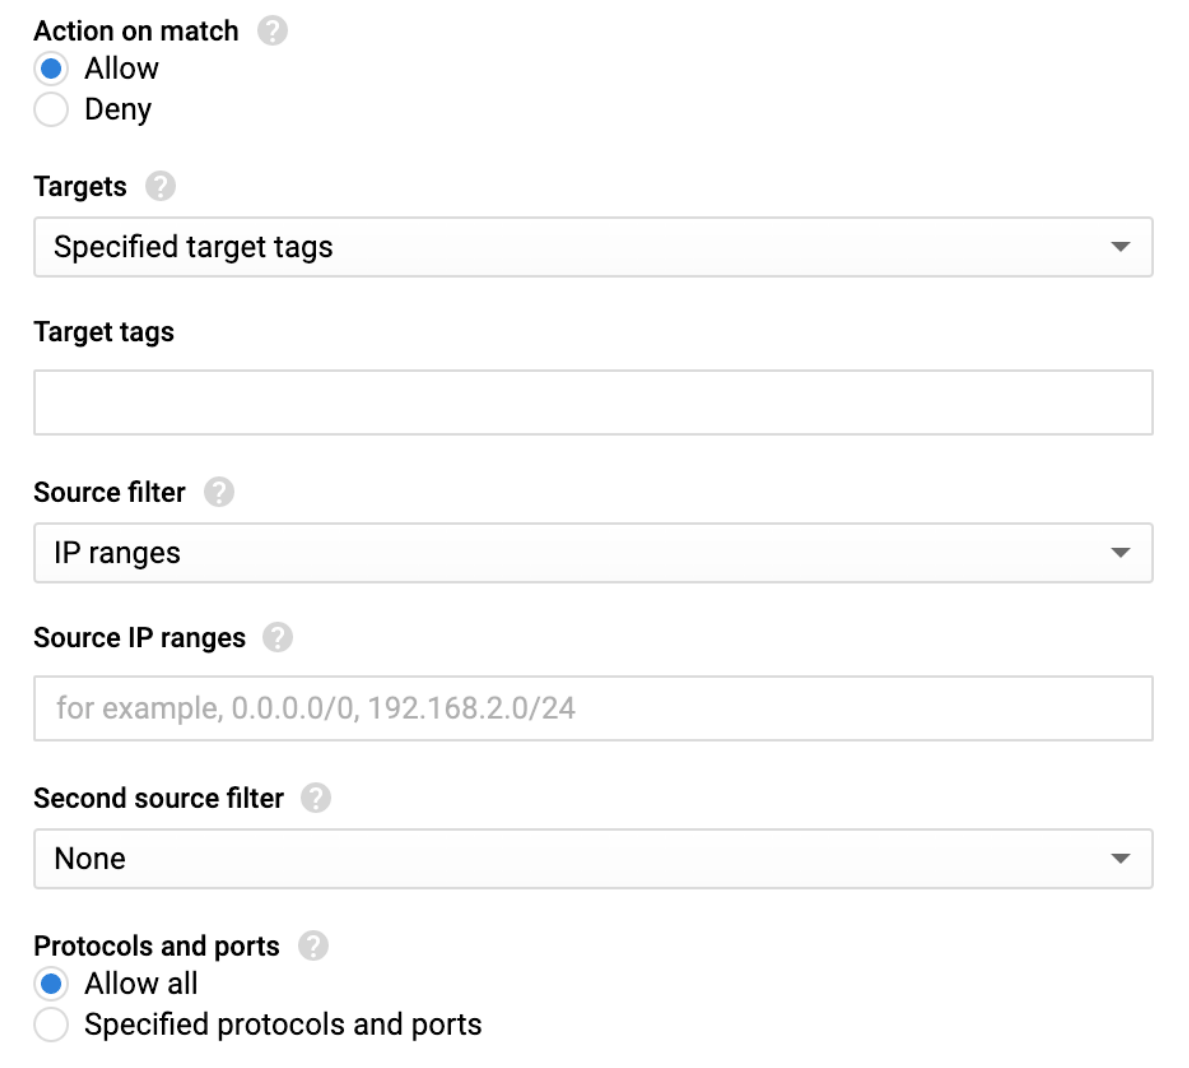
- Action on match: allow
- Target tags: optional
- Source filter: IP Ranges
- Source IP ranges: 10.6.0.0/20
- Second source filter: none
- Allowed protocols or ports: all
Ending note:
In order to finalize the site-to-site setup on our end, please provide these values via Site-to-site request from in the NordLayer Control Panel:
- Pre-shared key - you can generate it or we can provide it
- Encryption details (AES, SHA and DH group) - AES256, SHA256 and DH group 14 are recommended (also must support IKEv2)
- Remote gateway/router public IP (must be reachable while connected to the server with a dedicated IP)
- Remote subnet and mask (the subnet is used in your local network)
Note: In case you are experiencing different results, make sure that you have you carefully gone through all the steps. Having said that, in case the issue persists please feel free to contact our 24/7 customer support team.