Note: If your device/service supports SHA256 and DH group 14, it is recommended to use these settings instead.
Configuring the tunnel in the Palo Alto WebGUI
-
Open the Palo Alto WebGUI, and select the Network tab
-
Select Interfaces and open the Tunnel tab
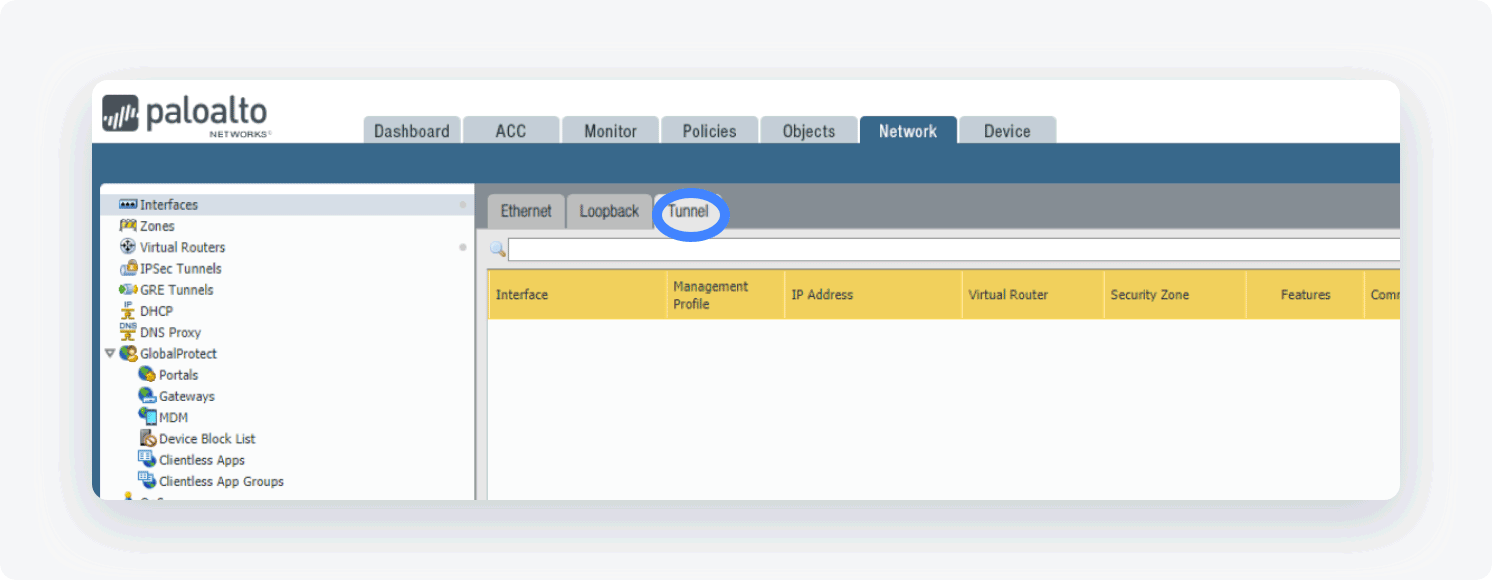
- Click Add

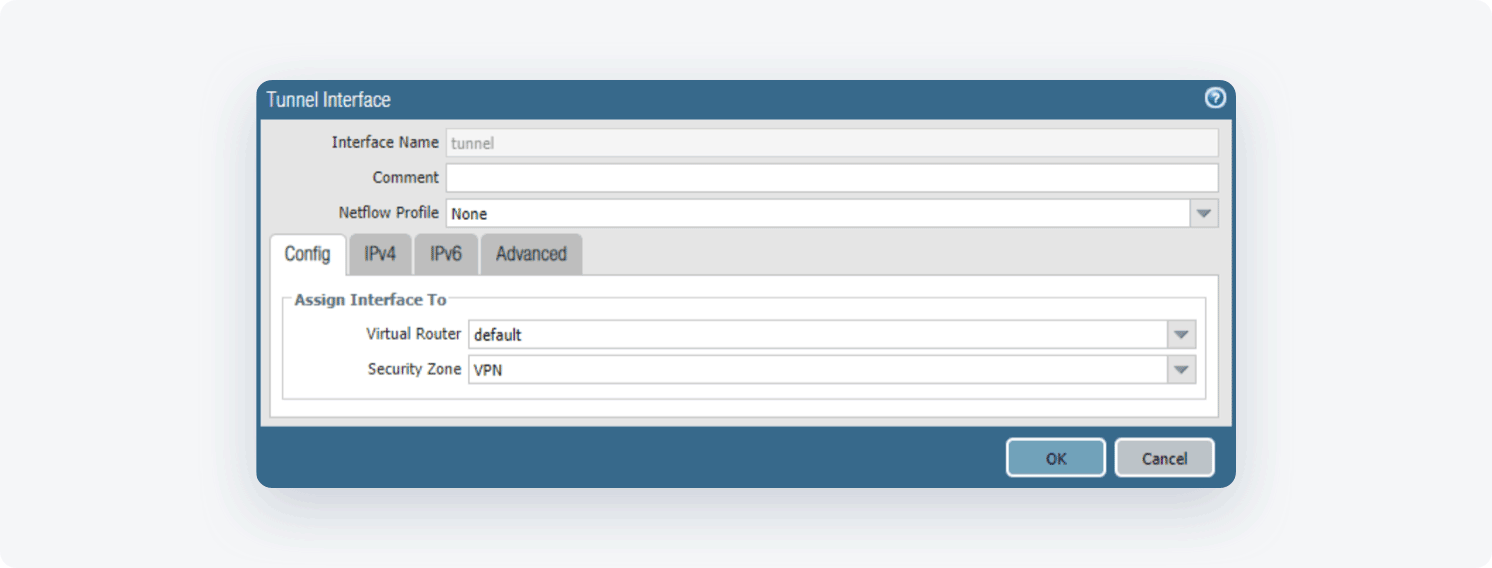
- Assign the parameters with the following information
- Virtual Router: Select the virtual router you would like your tunnel interface to reside in.
- Security Zone: Configure a new zone for the tunnel interface for more granular control of traffic ingress/egressing the tunnel. If the tunnel interface is in a zone different from the zone where the traffic will originate or depart, then a policy is required to allow the traffic to flow from the source zone to the zone containing the tunnel interface.
-
Open the Network tab
-
Select Network Profiles and go to IKE Crypto
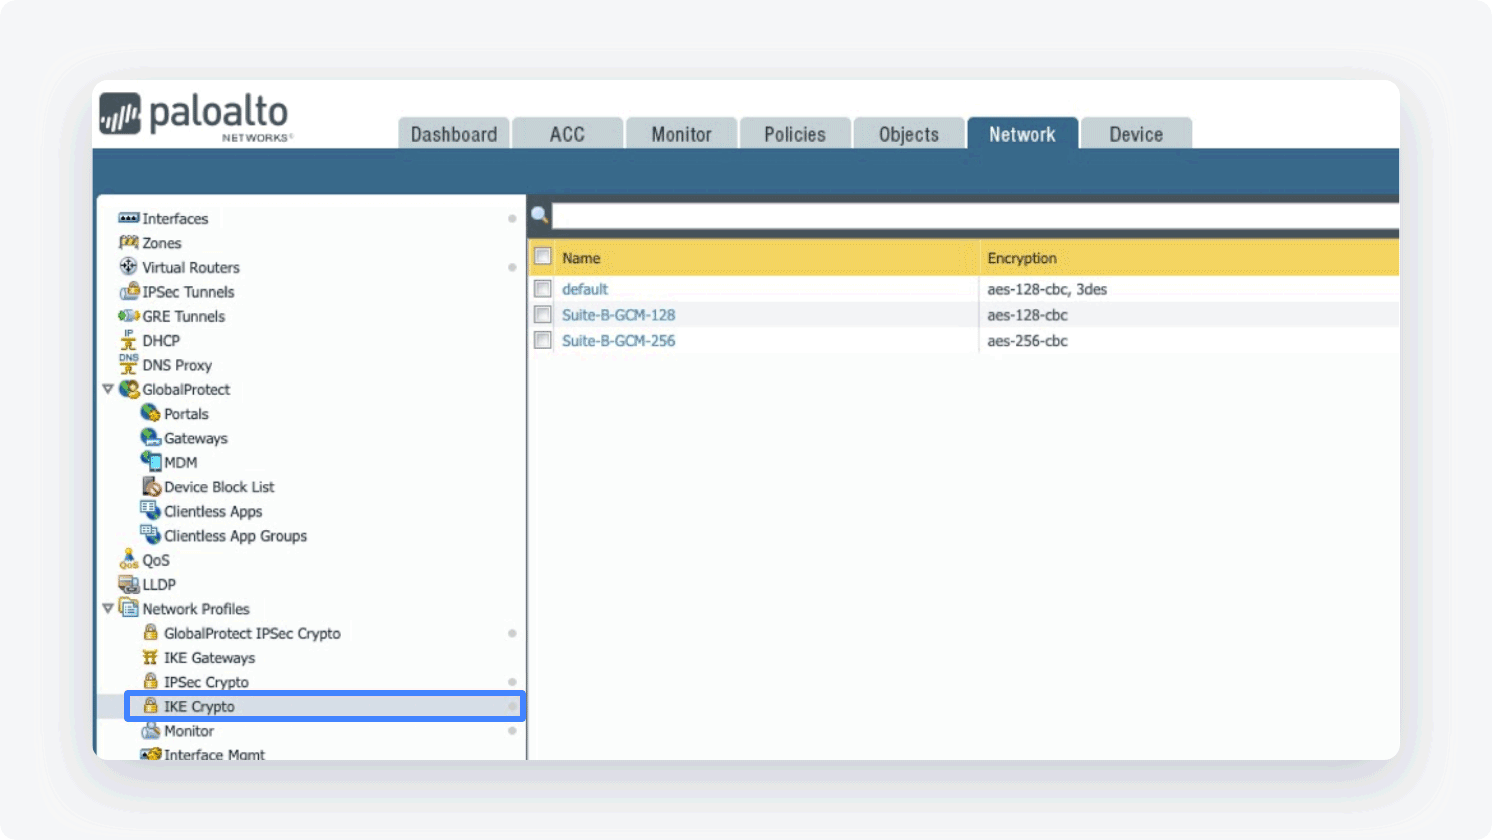
- Click Add (at the bottom of the page) and define the IKE Crypto profile (IKEv1 Phase-1) parameters
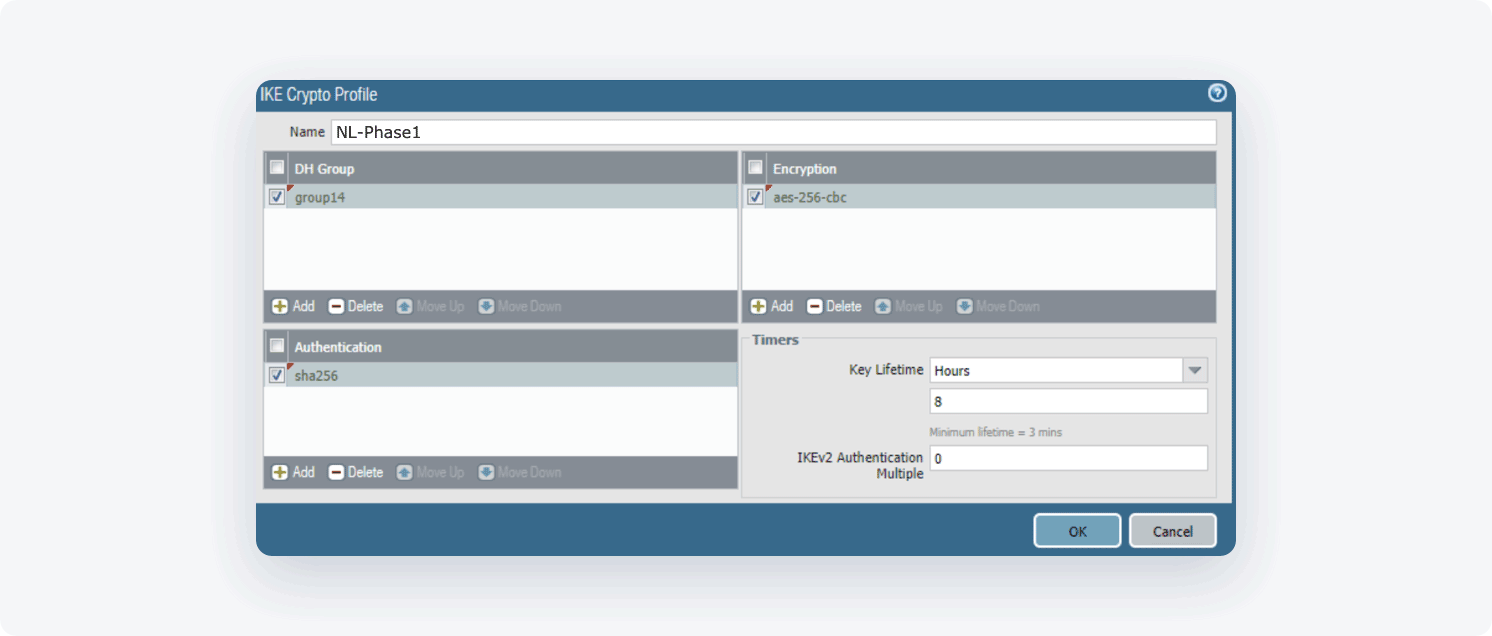
- Name: Choose the name of your own choice.
- DH Group: 14
- Encryption: aes-256-cbc
- Authentication: sha256
- Key Lifetime: 8 Hours
- IKEv2 Authentication Multiple: 0
-
Open the Network tab. Select Network Profiles and go to IKE Gateway
-
Select Add and fill in the following information:
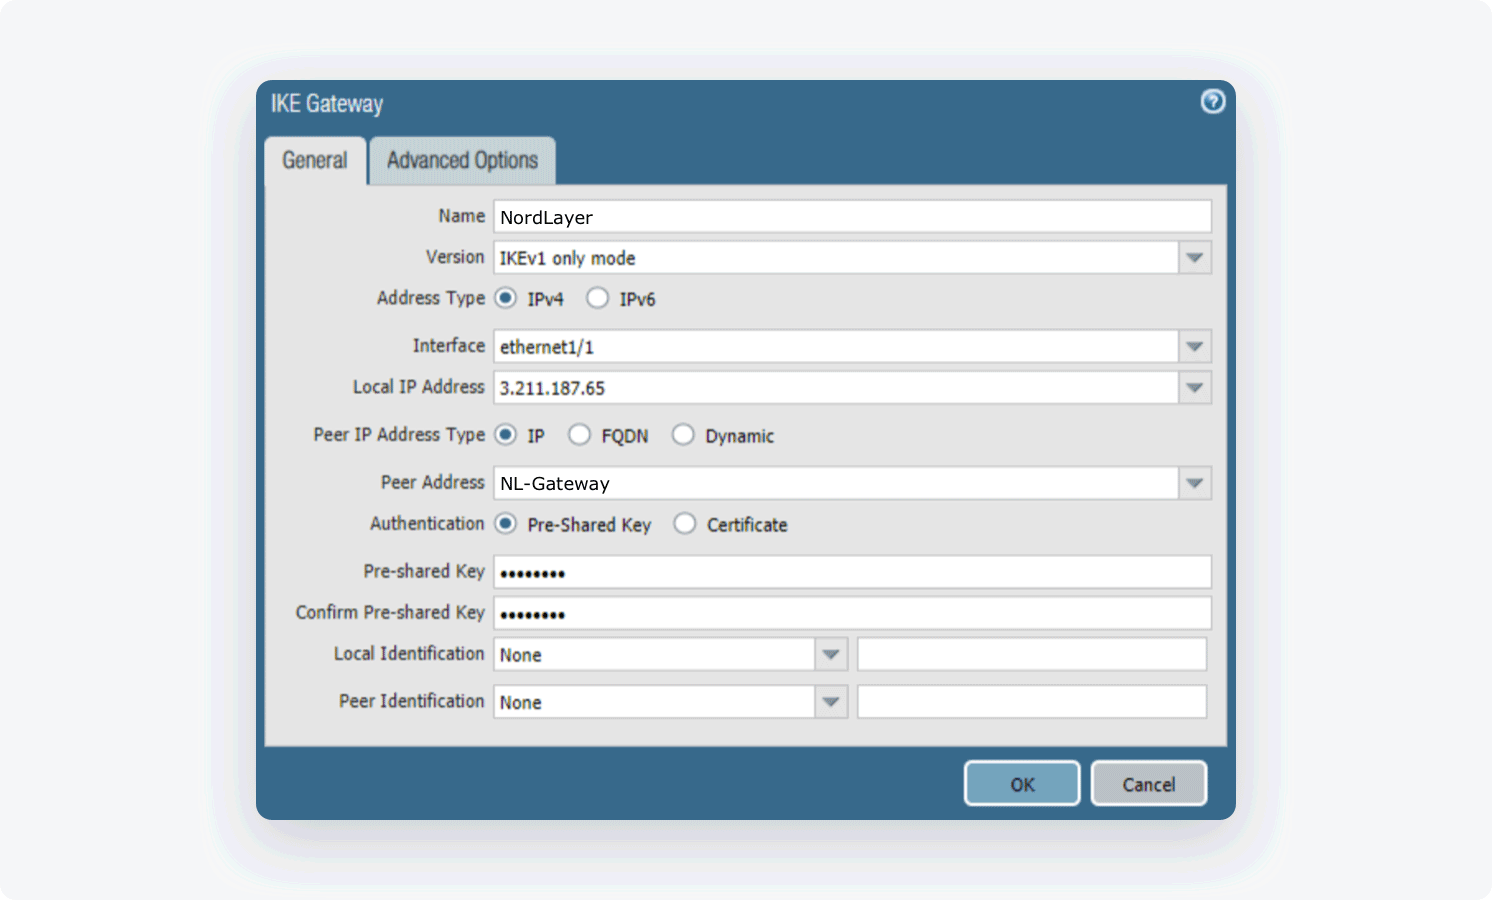
- Name: Choose the name of your own choice
- Version: IKEv1 (IKEv2 recommended)
- Address Type: IPv4
- Interface: The external interface connected to the internet
- Local IP Address: Choose the external IP address
- Peer IP Address Type: IP
- Peer Address: the IP of your NordLayer server with a dedicated IP
- Authentication: Pre-Shared Key
- Pre-Shared Key: Enter a string of your own choice containing lower-case characters, upper-case characters, and a number. Please write down this value as we will also need this value on our end.
- Local Identification: None (the gateway will use the local IP as the local identification value)
- Peer Identification: None (the gateway will use the peer IP as the peer identification value)
-
Open the Network tab. Select Network Profiles and go to IPSec Crypto
-
Select Add and fill in the following information:
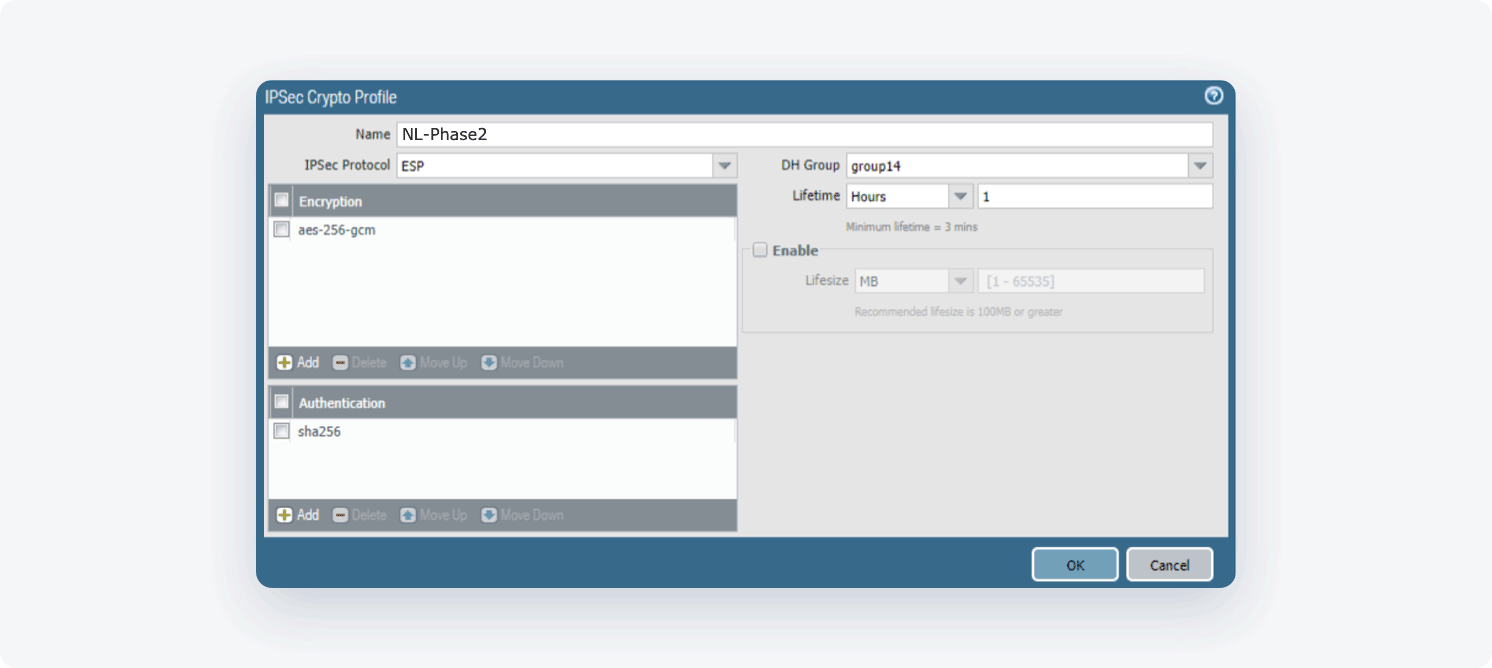
- Name: NordLayer-Phase2
- IPSec Protocol: ESP
- DH Group: 14
- Encryption: aes-256-cbc
- Lifetime: 1 Hour
- Authentication: sha256
- Open the Network tab. Select IPSec Tunnels, then Add and fill in the following information:
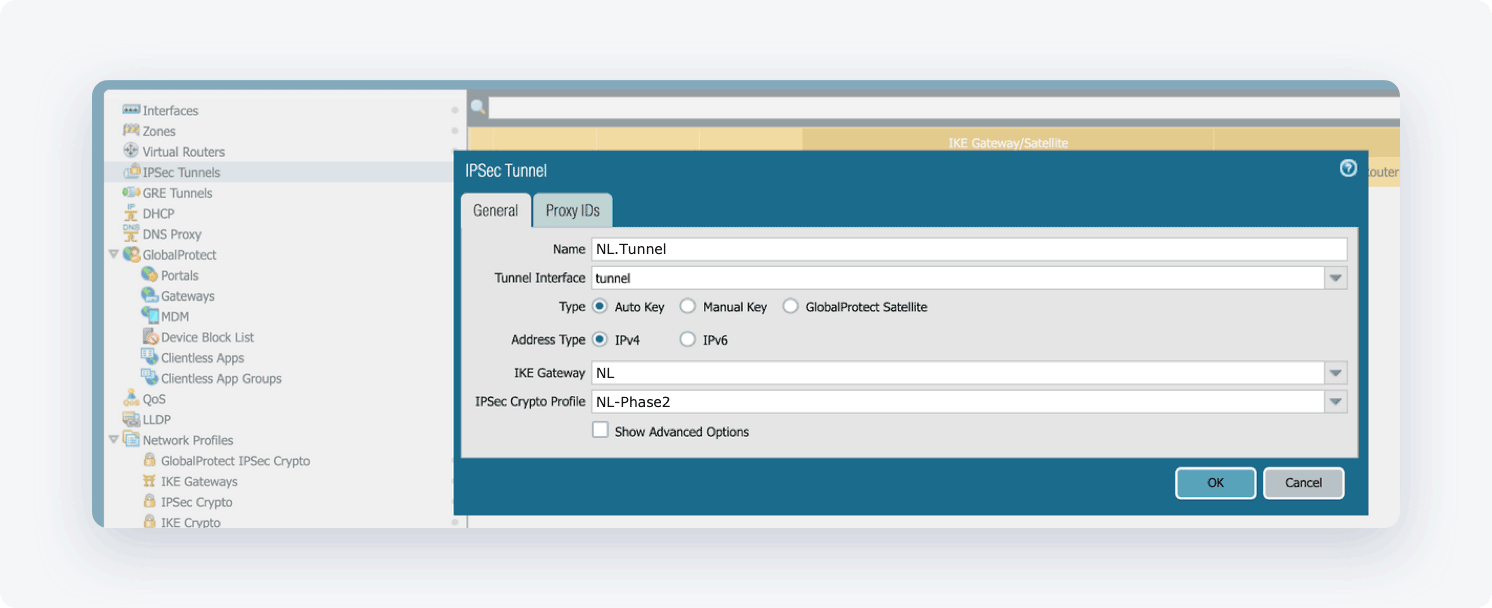
- Name: Choose the name of your own choice
- Tunnel Interface: Choose the appropriate interface
- Type: Auto Key
- Address Type: IPv4
- IKE Gateway: Choose the gateway that was defined earlier
- IPSec Crypto Profile: Choose the profile that was defined earlier
-
Open the Network tab
-
Select Virtual Routers, then select Static Routes and click Add. Fill in the following information:
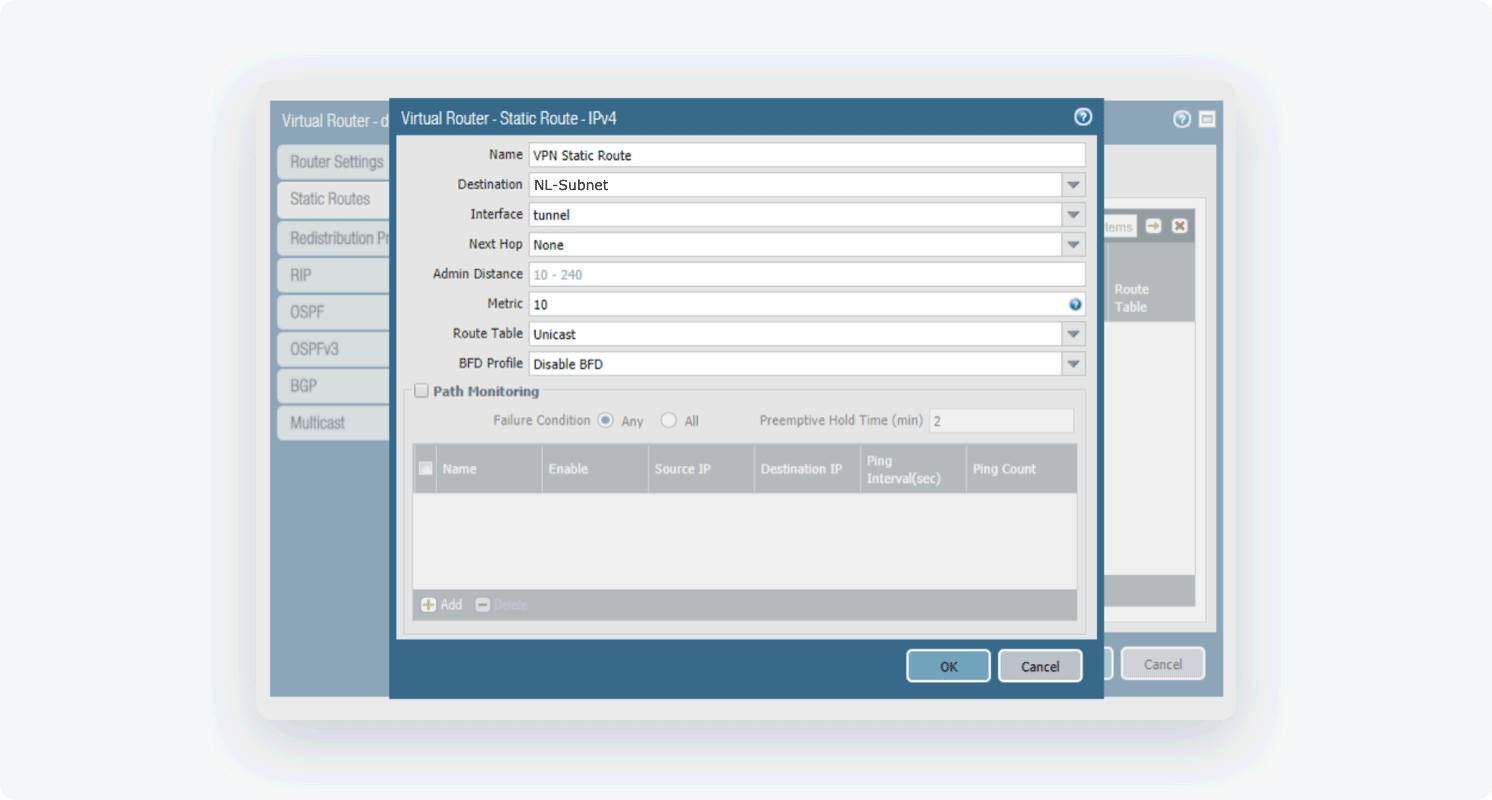
- Name: Choose the name of your own choice
- Destination: 10.6.0.0/20 (if such an object does not exist yet make sure to define it)
- Interface: Choose the appropriate interface
- Next Hop: None
- Metric: 10
- Route Table: Unicast
- BFD Profile: Disable BFD
- Open the Policies tab and select Security

By default, IKE negotiation and IPSec/ESP packets are allowed.

- If you see somewhat differently or if you wish to have more granular traffic control, select ADD, and create an appropriate rule
Ending note:
In order to finalize the site-to-site setup on our end, please provide these values via Site-to-site request from in the NordLayer Control Panel:
- Pre-shared key - you can generate it or we can provide it
- Encryption details (AES, SHA and DH group) - AES256, SHA256 and DH group 14 are recommended (also must support IKEv2)
- Remote gateway/router public IP (must be reachable while connected to the server with a dedicated IP)
- Remote subnet and mask (the subnet is used in your local network)
Note: In case you are experiencing different results, make sure that you have you carefully gone through all the steps. Having said that, in case the issue persists please feel free to contact our 24/7 customer support team.