Note: If your device/service supports SHA256 and DH group 14, it is recommended to use these settings instead.
Configuring at the Zyxel USG Interface
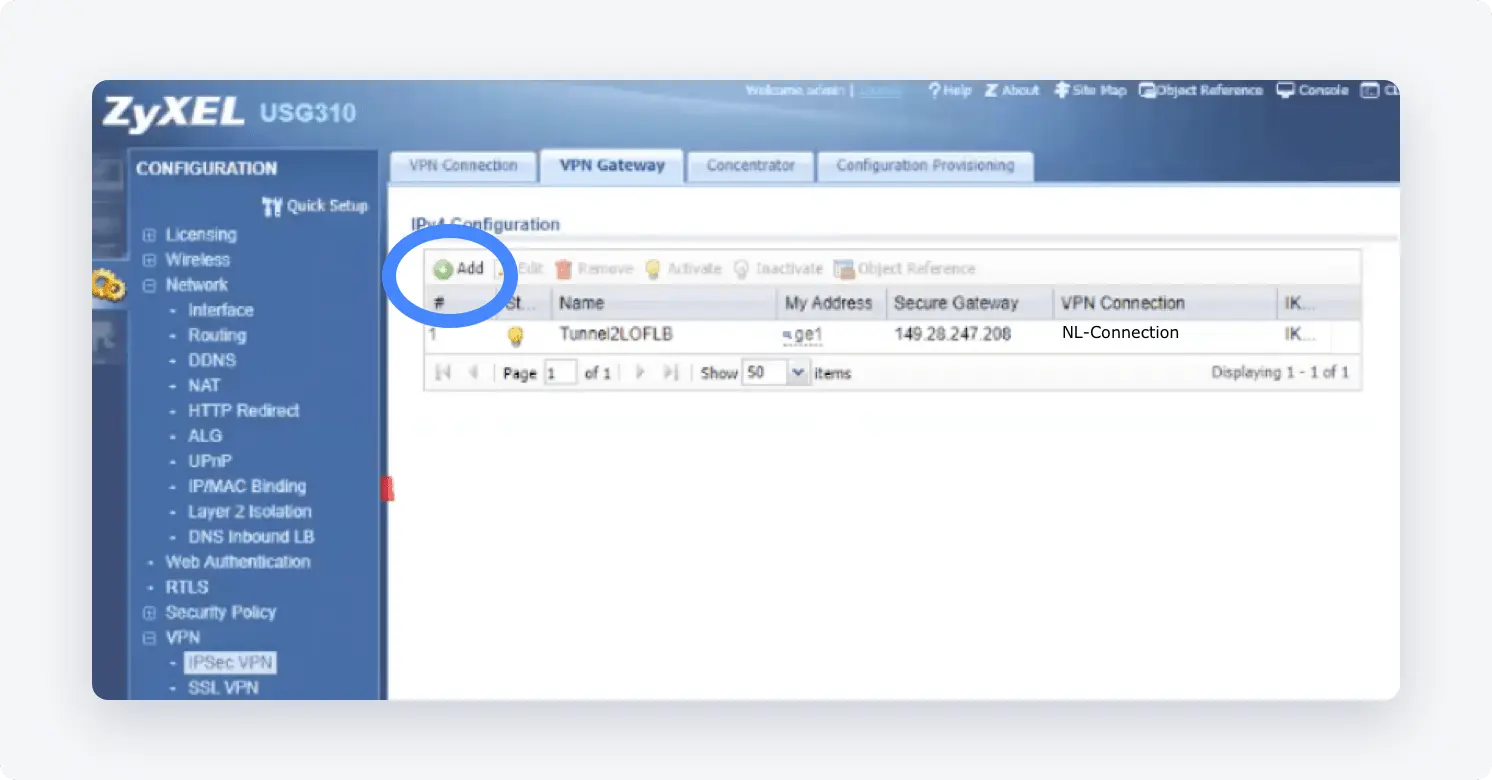
- Go to the ZyXel USG interface and add a VPN Gateway. (Configuration > VPN > IPSec VPN > VPN Gateway > Add)

-
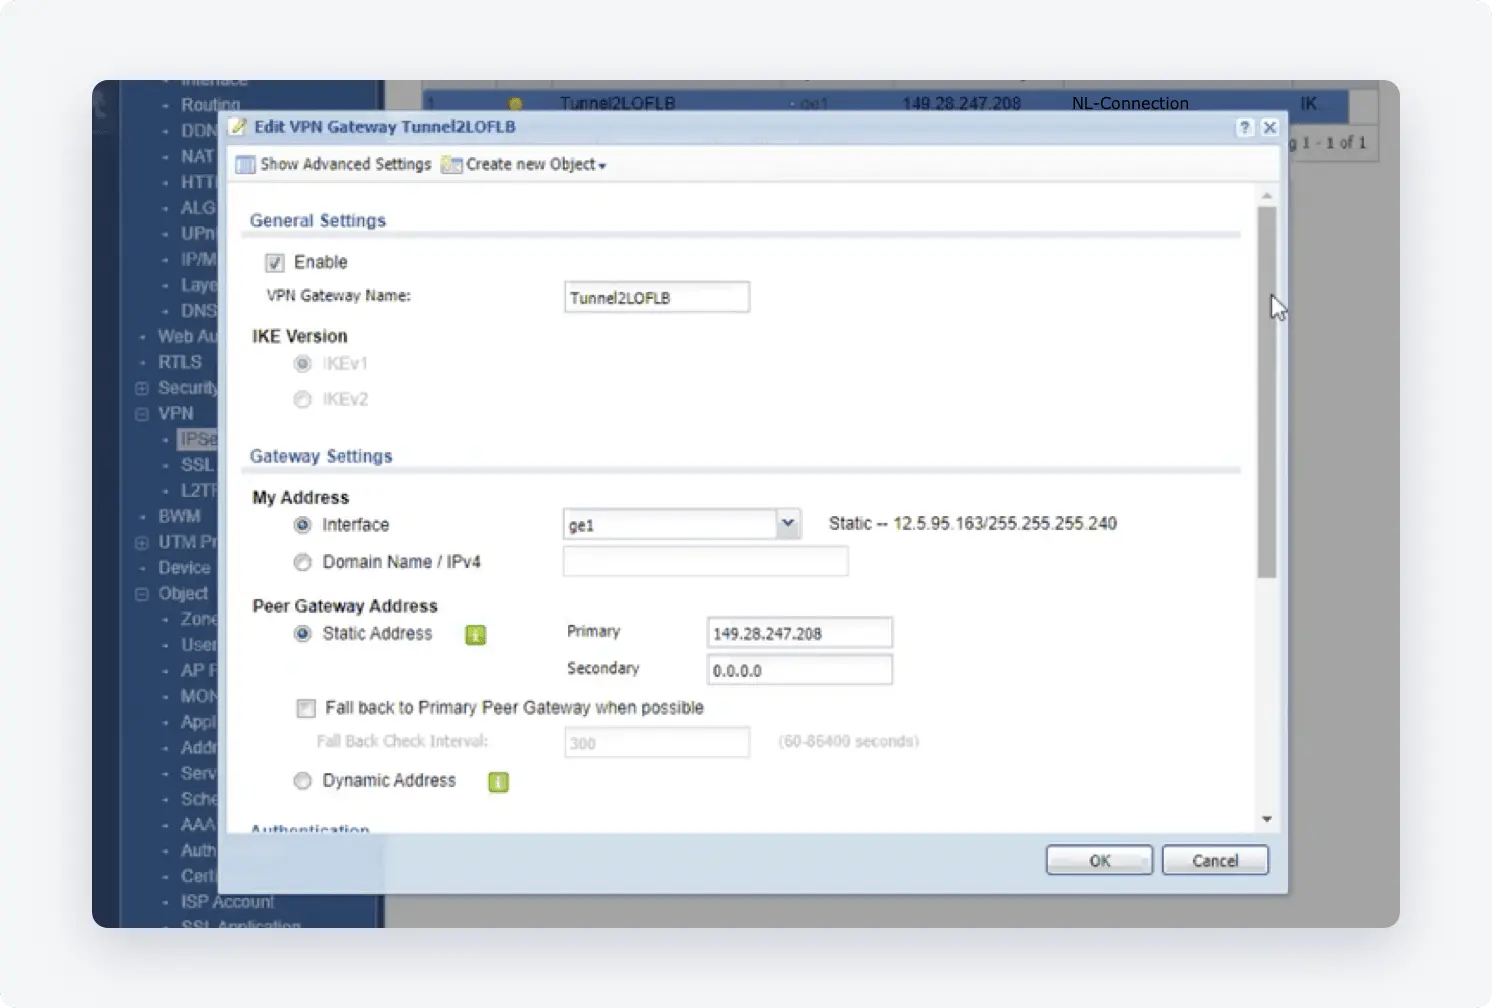
Enter the name of the VPN Gateway (NordLayer for example)
-
Choose the outgoing interface in “My Address” (i.e. WAN1 or your WAN Interface)
-
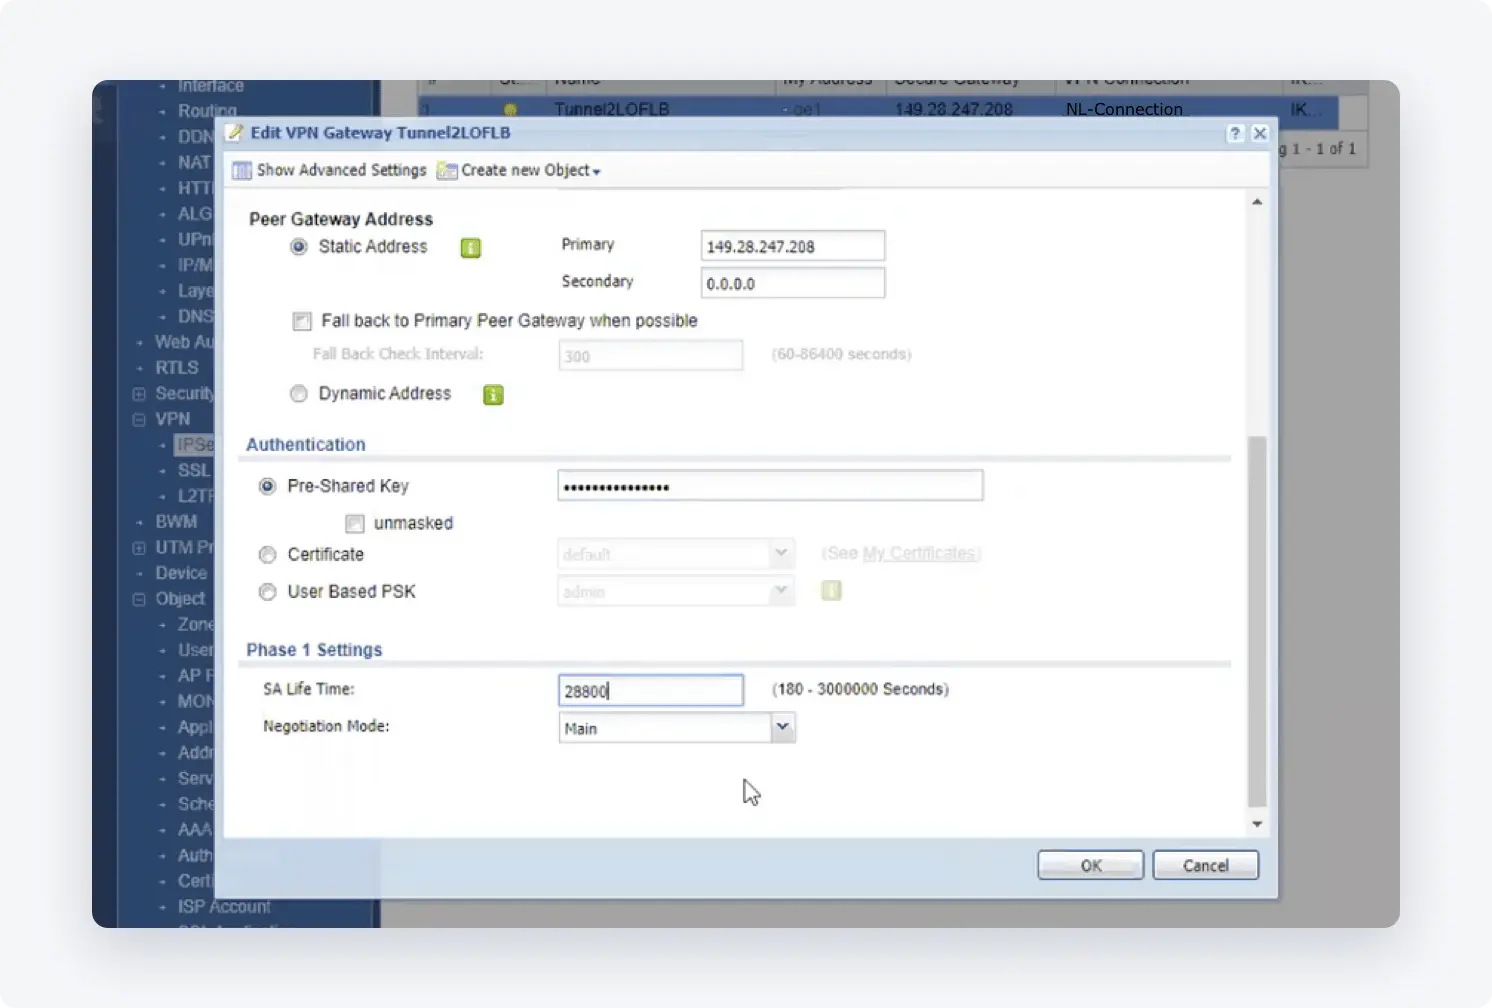
Configure the Peer Gateway Address according to the gateway IP of your NordLayer server with a dedicated IP

-
Enter the pre-shared key you have generated (we will also need this value on our end)
-
Set Phase 1 proposals (AES256 as encryption, SHA256 as authentication, and DH14 as a key group)

-
Add a VPN tunnel (Configuration > VPN > IPSec VPN > VPN Connection > Add)
-
Enable and name the rule
-
Select Site-to-Site and select the created VPN gateway
-
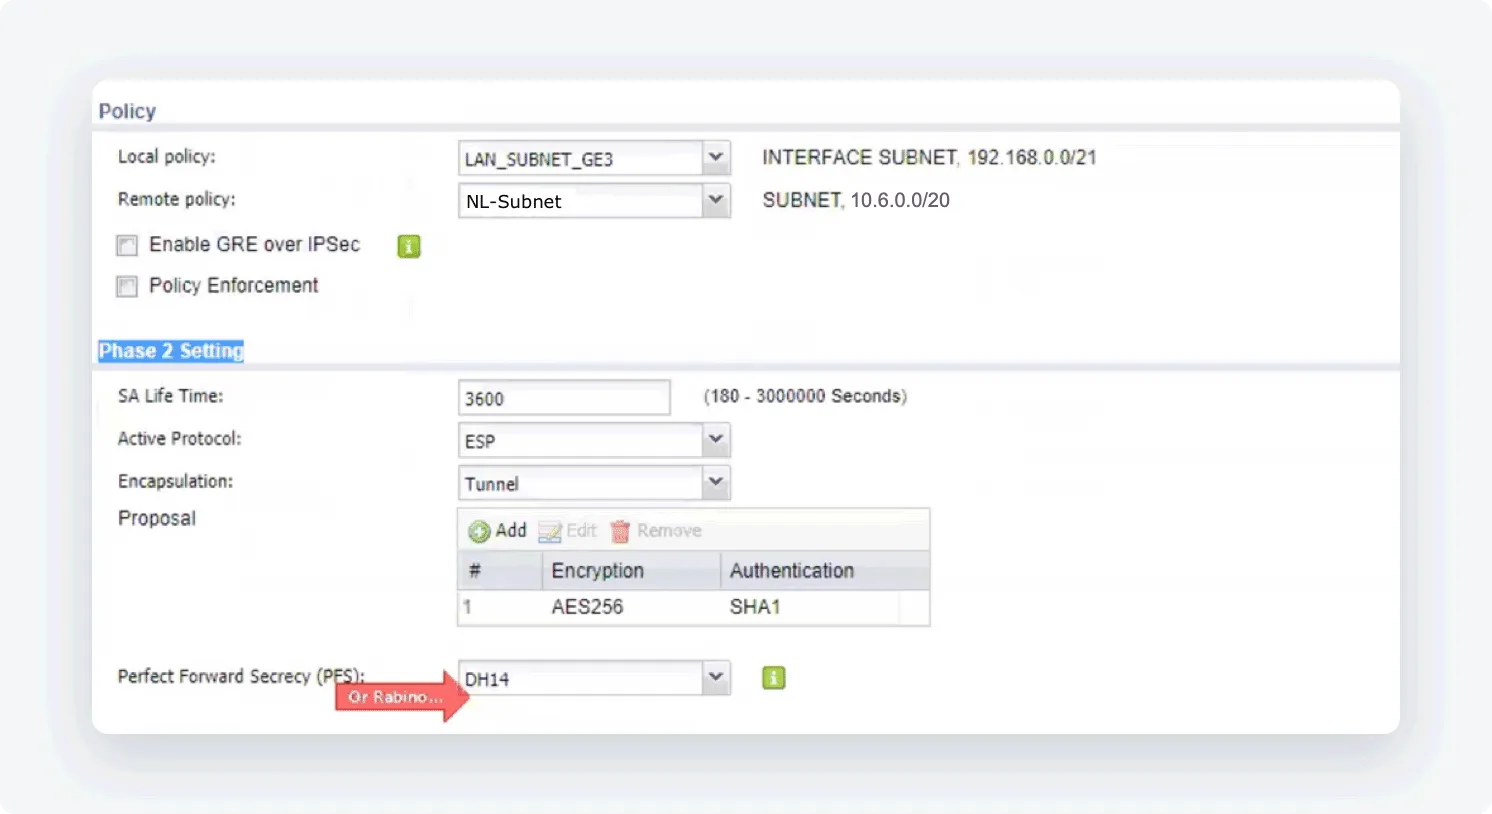
Set the local policy to your LAN subnet and remote policy to the NordLayer subnet

NOTE: Eventually, you need to create an address object for the remote network.
- Select Create new Object and choose IPv4 Address
NOTE: Please check first if the IP address of the remote subnet does not already exist on the local subnet to avoid double IP address configuration. When the remote subnet is similar to one local subnet you will only be able to reach the local network.*
- Select Show Advanced Settings and make sure that the Phase 2 settings are the same as the Phase 1 settings (i.e. AES256, SHA256), except the SA Tunnel lifetime, which is 28800 Phase 1 and 3600 for the Phase 2.
Ending note:
In order to finalize the site-to-site setup on our end, please provide these values via Site-to-site request from in the NordLayer Control Panel:
- Pre-shared key - you can generate it or we can provide it
- Encryption details (AES, SHA and DH group) - AES256, SHA256 and DH group 14 are recommended (also must support IKEv2)
- Remote gateway/router public IP (must be reachable while connected to the server with a dedicated IP)
- Remote subnet and mask (the subnet is used in your local network)
Note: In case you are experiencing different results, make sure that you have you carefully gone through all the steps. Having said that, in case the issue persists please feel free to contact our 24/7 customer support team.