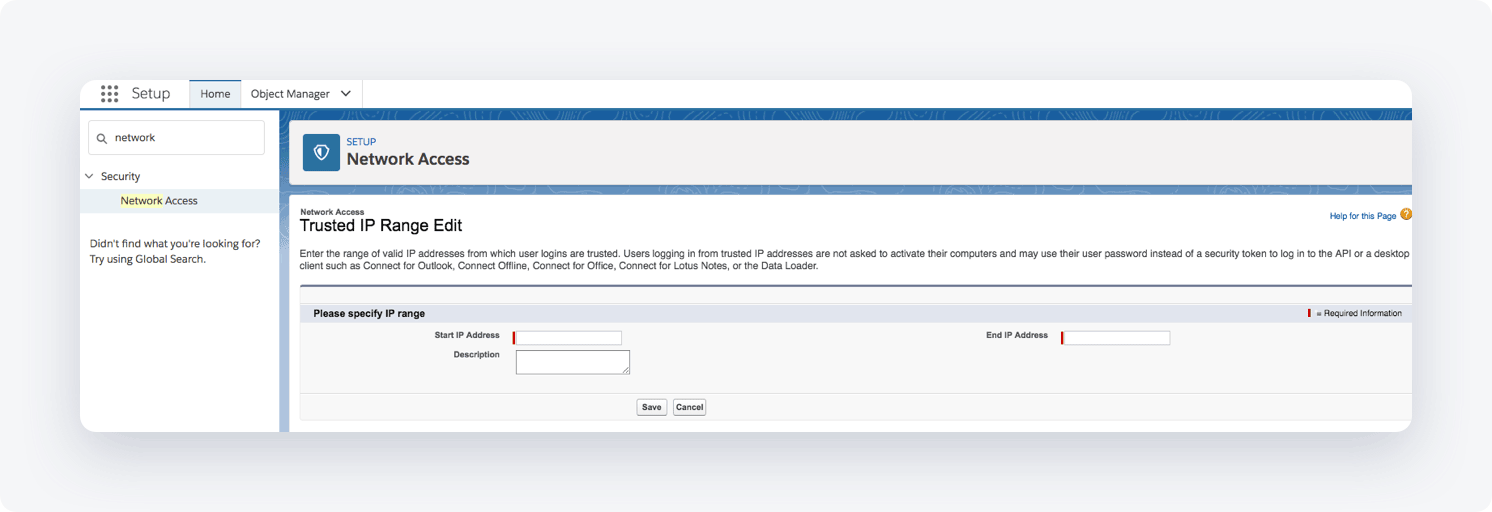
This article describes the process of how to set up IP address allowlist (whitelist) on SalesForce. Trusted IP ranges in Salesforce, by default, block unauthorized access as there are no location restrictions with the platform’s settings.
After specifying a Trusted IP range — only authorized NordLayer users with your dedicated server IP will have access to Salesforce resources.
Ensuring your IP addresses and endpoints are set up correctly will give you far more peace of mind about your layers of security.
Setting up SalesForce
- Navigate to the Setup section of Salesforce and in the Quick Find search box: type "Network Access" - without the parentheses.
- Select New and then fill in both the start and end of the IP range of NordLayer dedicated server IP address, then and add a description (optional).
- Select Save.

You've now successfully set up your first IP allowlist in Salesforce.
Note: In case you have any questions or are experiencing any issues, please feel free to contact our 24/7 customer support team.