NordLayer's custom integrations allow administrators to automatically disconnect users from gateways and log them out of the application based on notifications from third-party security tools.
When your security platform identifies a security event, the custom integration immediately triggers NordLayer to log out the affected user(s), prompting them to re-authenticate before regaining access. This helps ensure that only authorized individuals can access private gateways and sensitive company resources.
Customers can integrate NordLayer with built-in cybersecurity platforms (such as SentinelOne Singularity Platform), leverage third-party tools, or set up a custom-made solution to trigger forced NordLayer log-outs.
Your selected solution must support webhooks and be capable of sending the correctly formatted JSON payload as described below.
How to create custom integration
Follow these step-by-step instructions to create your custom NordLayer integration:
Step 1: Obtain Custom Integration API credentials from NordLayer
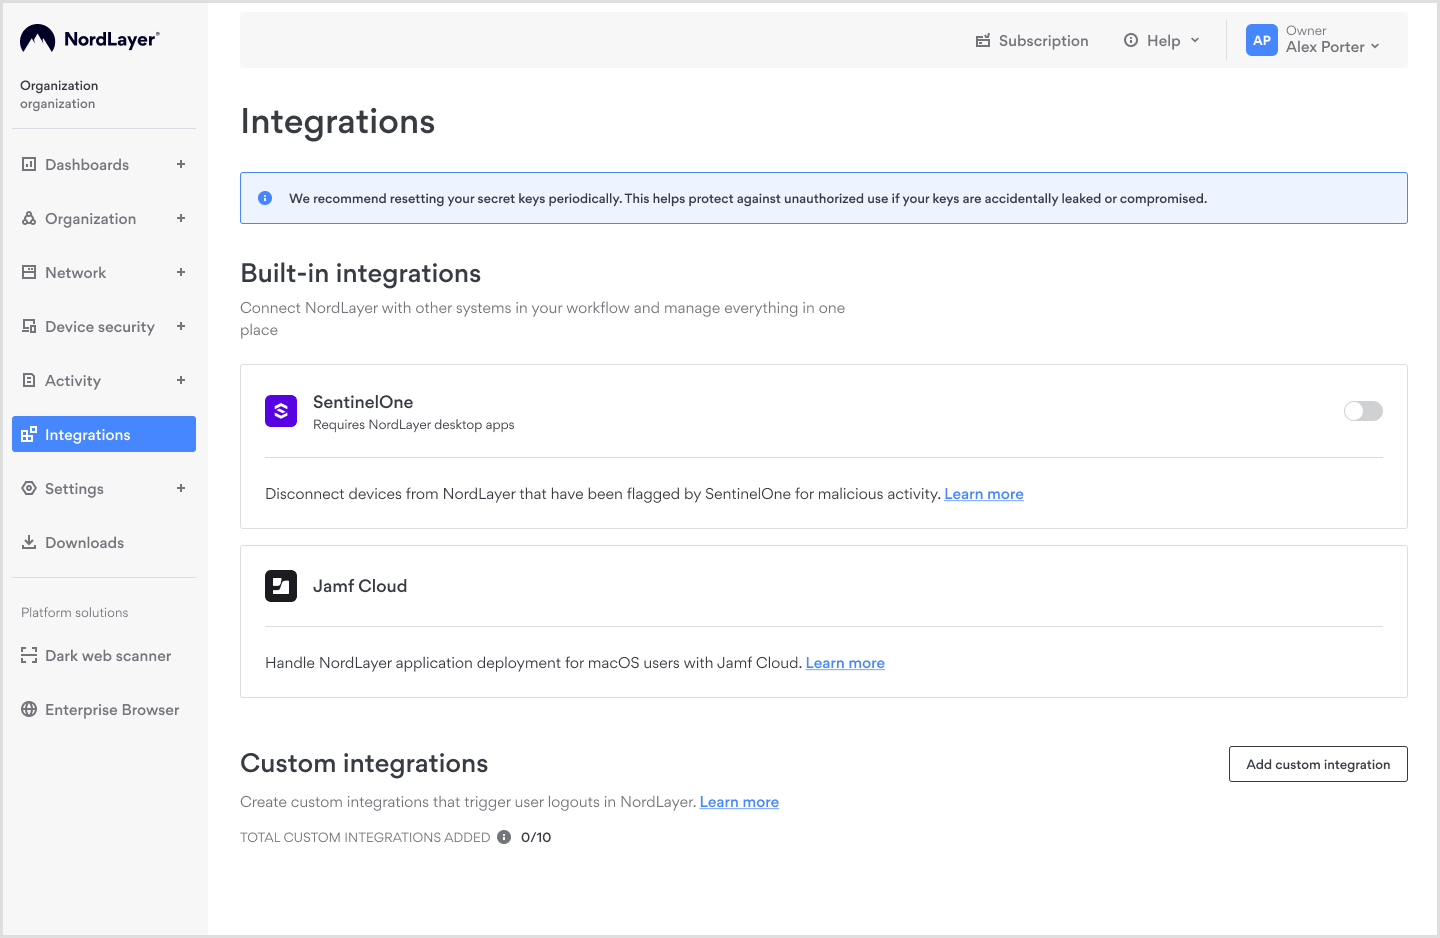
- Log into the NordLayer Control Panel, and click on Integrations from the left sidebar menu.

-
Under the Custom integrations section, click Add custom integration button.
-
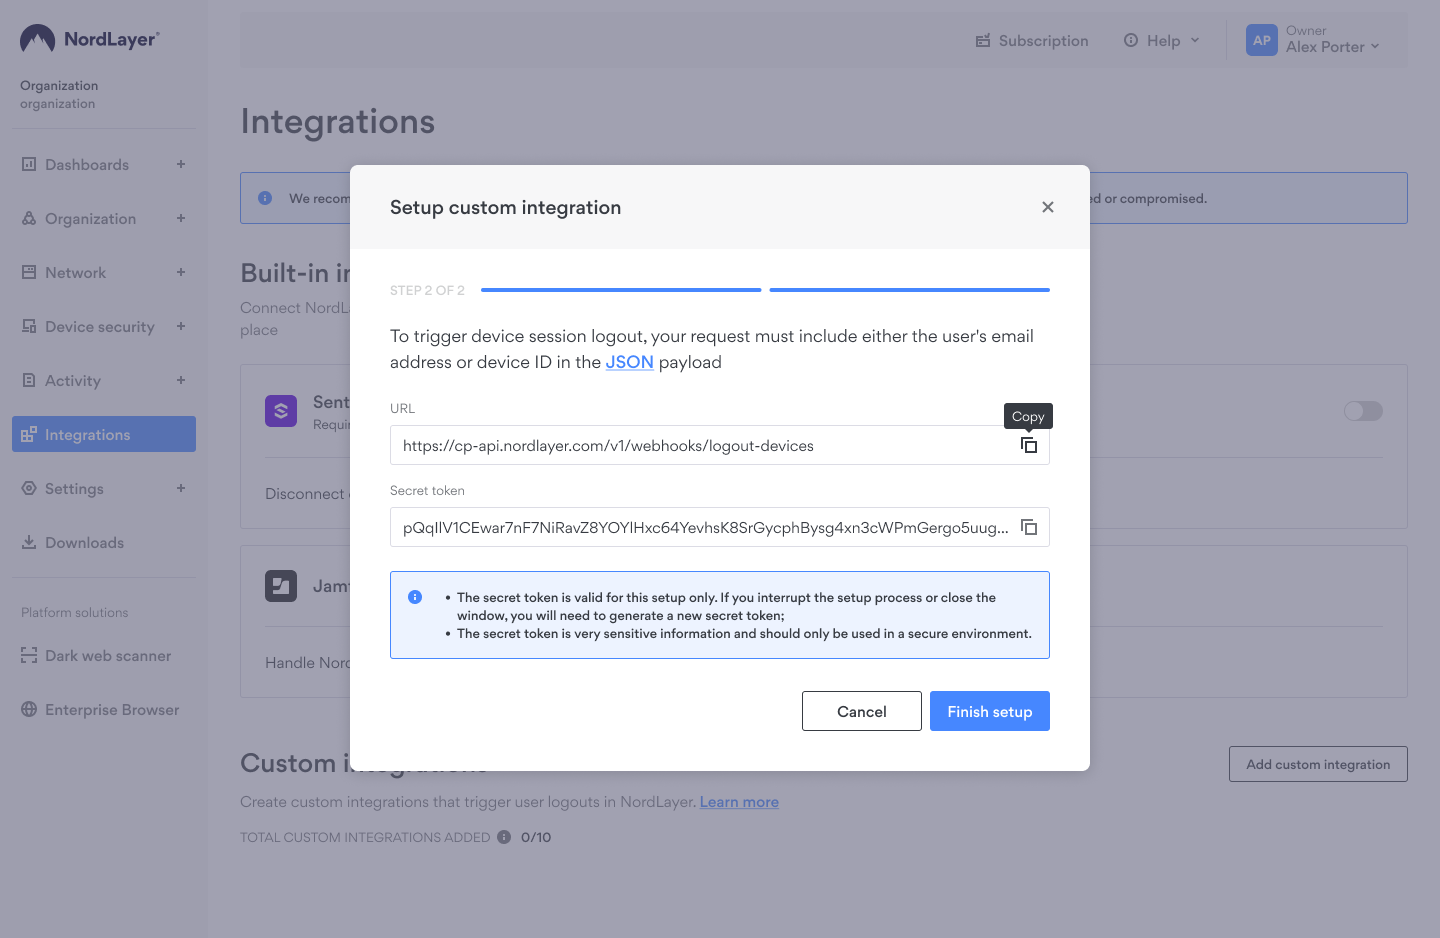
A configuration window will appear. Enter a name for your integration, then click Next.

- You will now see your integration details: URL and a Secret token. You will need both of these credentials in the next steps.
- Copy these credentials (Secret token and the URL).
Copy these credentials and store them in a secure location. You can only access these credentials once. If you close this window or attempt to reopen it later, new credentials will be generated, invalidating the previous ones.
Step 2: Triggering the Integration Request
Using your security solution or automation platform (for example, SentinelOne platform, third-party tool, or your own custom-built environment), configure the following:
- URL: Use the URL provided by NordLayer from the previous steps.
- Authentication: Include your Secret token received from NordLayer as the Bearer token in the HTTP request header:
Authorization: Bearer <YOUR_SECRET_TOKEN>
Content-Type: application/json
- Payload Structure: The payload must be sent as structured JSON. JSON file must include users email address or the Device ID field called “agentComputerName”.If a member email address is provided, NordLayer will log out the member from all devices. If a device name is provided, NordLayer will log out all members from all devices with the specified device name.
Example JSON payload format:
{
  "userDetails": {
    "userEmailAddress": "member@example.com"
  },
  "agentRealtimeInfo": {
    "agentComputerName": "DEVICE-NAME"
  }
}
- agentComputerName corresponds to the device's hostname, automatically detected by the NordLayer App on the machine.
To successfully trigger the integration, this field must exactly match the device name (hostname) detected by NordLayer.
Testing & verification
NordLayer does not display integration or webhook statuses within Control Panel. It is essential that you perform your own tests to confirm that your integration works:
- Trigger an event from your security platform or webhook sender.
- Verify that the specified NordLayer user's application logs out and disconnects immediately.

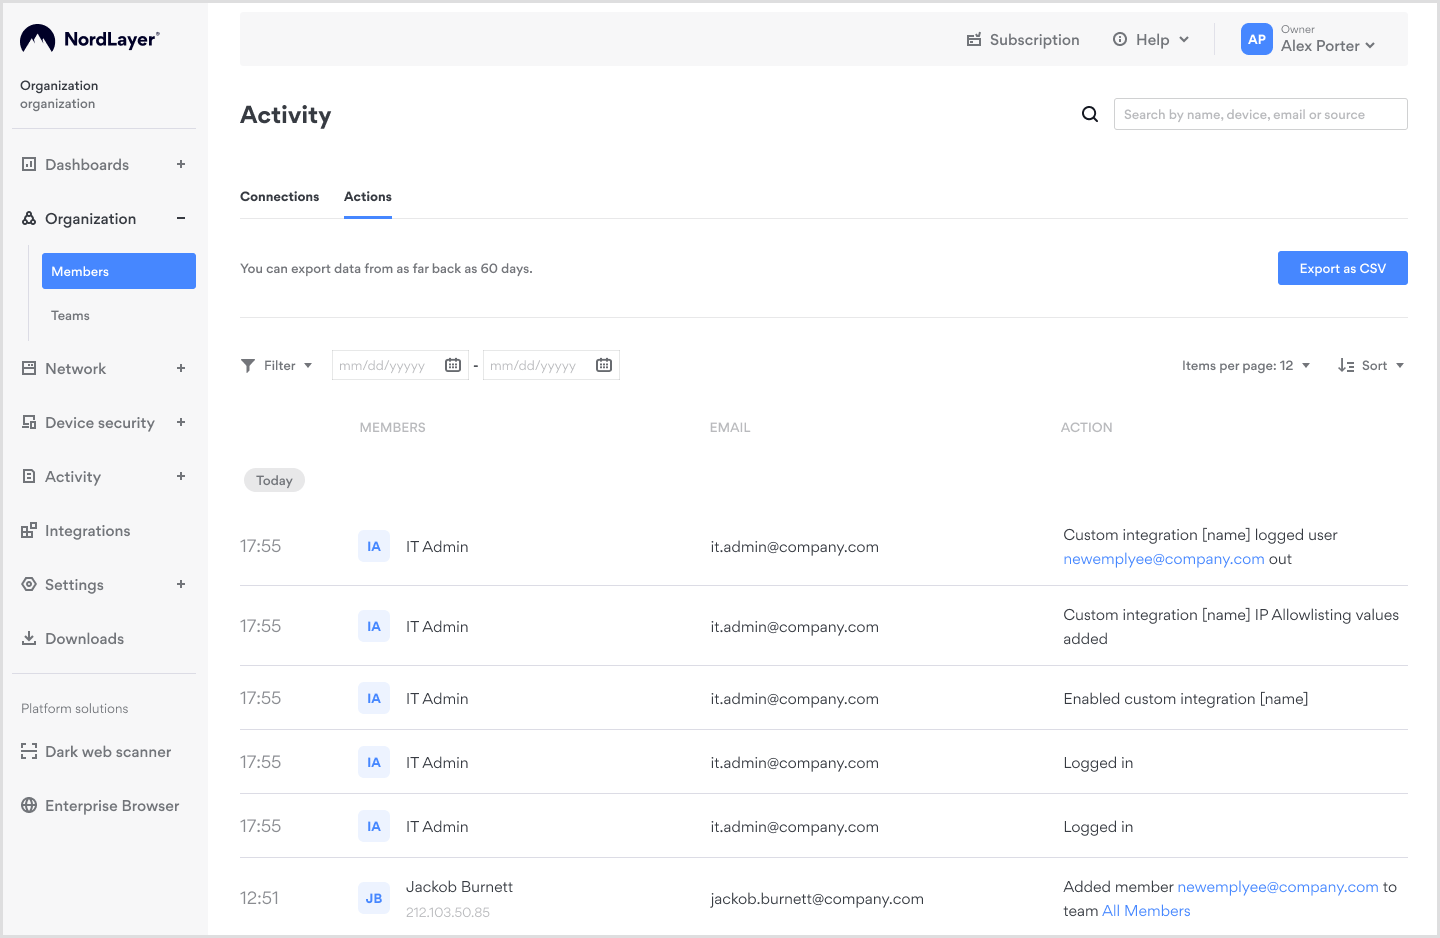
- Go to Control Panel, click on Activity tab in main left menu, choose Actions subpage. Check if it contains confirmation record about logged out user.
IP allowlisting
Custom integrations provide the option of restricting API access to require that requests come only from predefined IP addresses.
To set up IP allowlisting:
- Navigate to Integrations.
- Under Custom Integrations, click Add IP addresses.
- Enter the required IP addresses.
- Click Confirm.
After confirmation, only the predefined IP addresses will have API access to control this feature. This helps secure and limit who can access the feature controls.
Note: In case you have any questions or are experiencing any issues, please feel free to contact our 24/7 customer support team.