This guide explains how to integrate SentinelOne with NordLayer to enhance security. With this setup, any device flagged as malicious by SentinelOne will be automatically disconnected from the Gateway and logged out of the NordLayer application, minimizing the risk of unauthorized network access.
Guide on integrating NordLayer with SentinelOne
Step 1. Initiate the setup in the NordLayer Control Panel
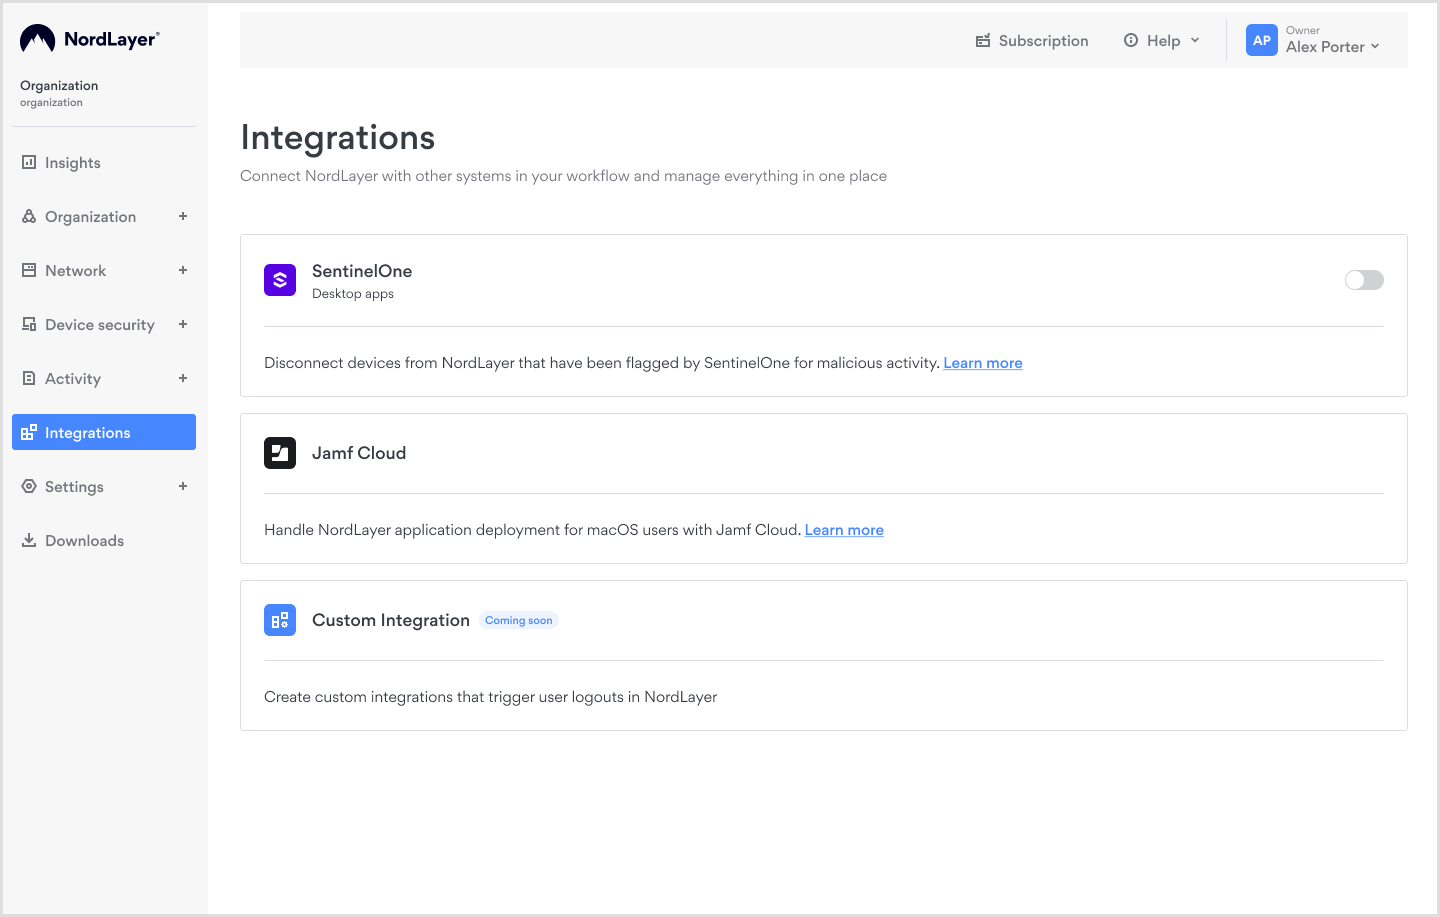
- Log into the NordLayer Control Panel and click the Integrations tab on the left side

- Toggle on the SentinelOne integration

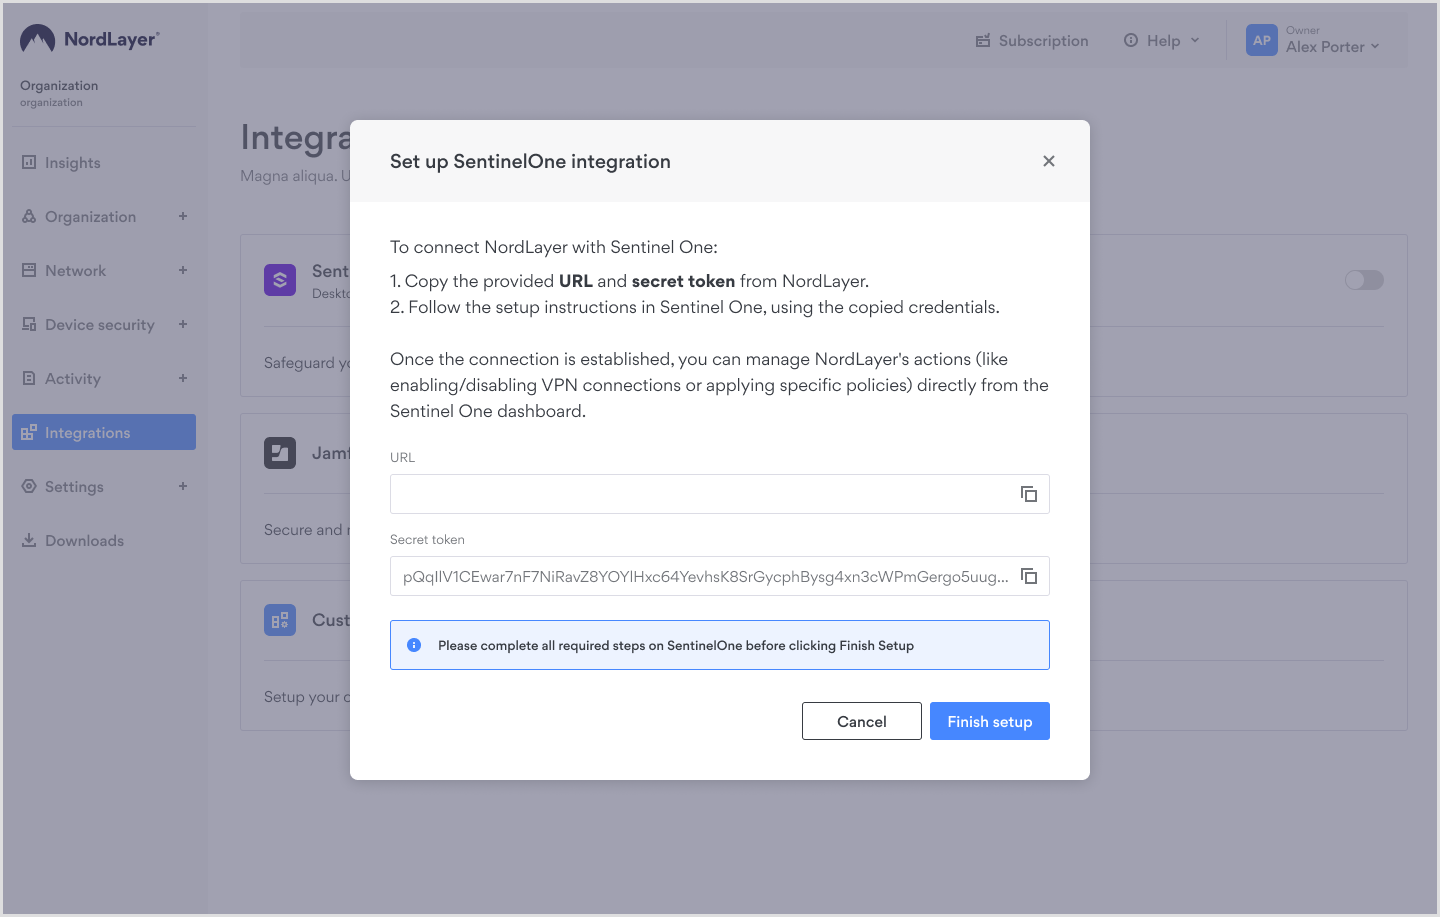
- A window will open with the URL and Secret token you’ll need to continue setup on SentinelOne dashboard.
Step 2. Continue the setup on SentinelOne
- Keep the NordLayer window open, and in a new tab, log in to SentinelOne

- Go to the Marketplace and find Singularity Webhook automation

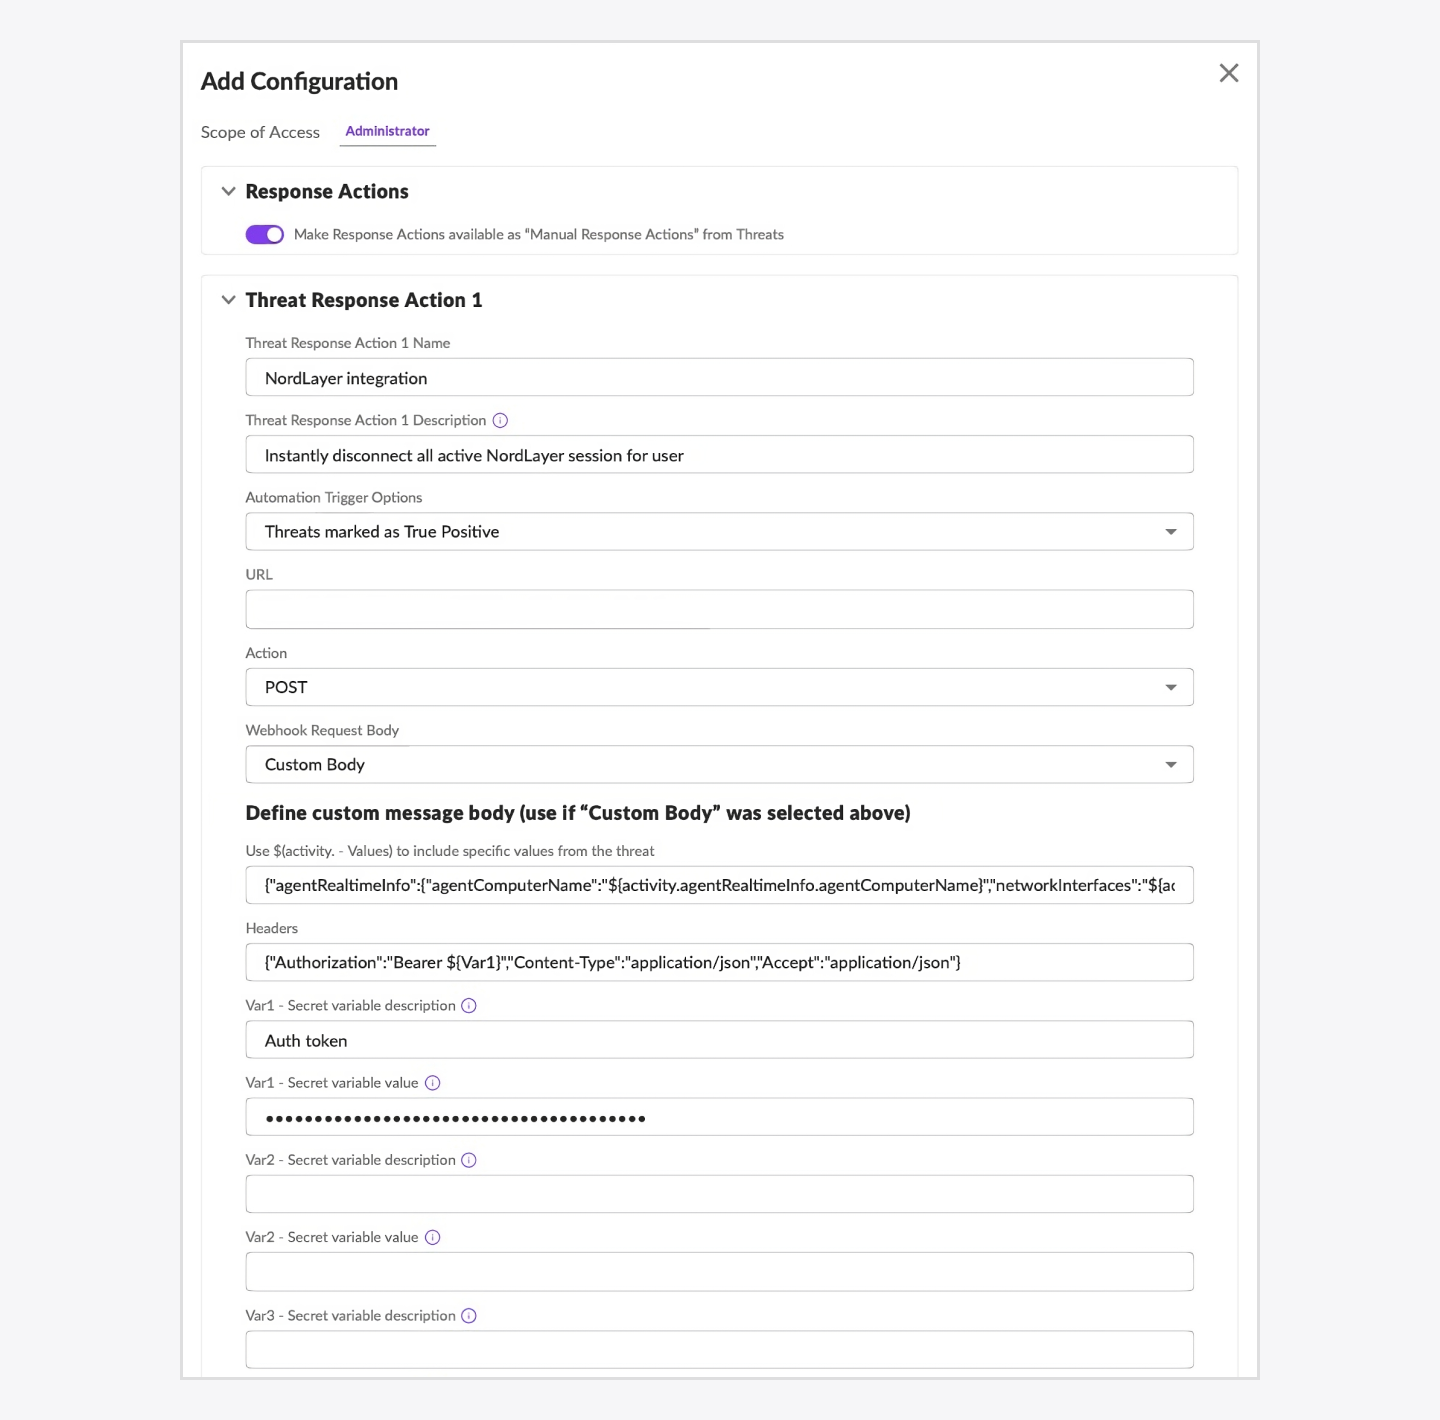
- Install the automation and click Add configuration
- Threat Response Action 1 Name: Name it NordLayer integration
- Threat Response Action 1 Description: Add a description noting it will instantly disconnect all active NordLayer sessions for users
- Automation Trigger Options: Select Threats marked as True Positive
- URL: Use the provided link from NordLayer Control panel integration setup
- Action: Select POST
- Webhook Request Body: Select Custom Body
- Activity values: Add this code for specific threat values:
{ "agentRealtimeInfo": { "agentComputerName": "${activity.agentRealtimeInfo.agentComputerName}", "networkInterfaces": "${activity.agentRealtimeInfo.networkInterfaces}" } }
- Headers: Add custom header:
{"Authorization":"Bearer ${Var1}","Content-Type":"application/json","Accept":"application/json"}
- Secret variable description: Enter: “Auth token”
- Secret token: Use the secret token from NordLayer Control panel integration setup
- After completing these settings, confirm by clicking Add configuration.
Step 3. Finalize the setup
- Once Webhook automation is added on the SentinelOne side, return to the NordLayer Control Panel

- Click Finish setup to complete the integration.
Once configured, the integration will work automatically, invalidating credentials for devices flagged as malicious by SentinelOne.
IP allowlisting
NordLayer includes an IP allowlisting feature. After enabling the integration, the allowlisting settings become available within its configuration.

Users can specify allowed IP addresses:
- If no IPs are selected, any IP is allowed.
- API calls are only allowed from specific IP addresses if they are added; API calls from non-listed IPs will be ignored by NordLayer.
- Users can manually enter a single IP address or a range of IPs.
- If the setting is disabled, all previously entered IPs are remembered.
- If the setting is disabled, editing IPs is not allowed.
Note: In case you have any questions or are experiencing any issues, please feel free to contact our 24/7 customer support team.