This guide will show you how to disable IPv6 address support on your Windows 8/10 device. If you have a Windows 7 operating system, check out this article instead.
- Click the Windows logo button on the bottom-right corner of your screen.
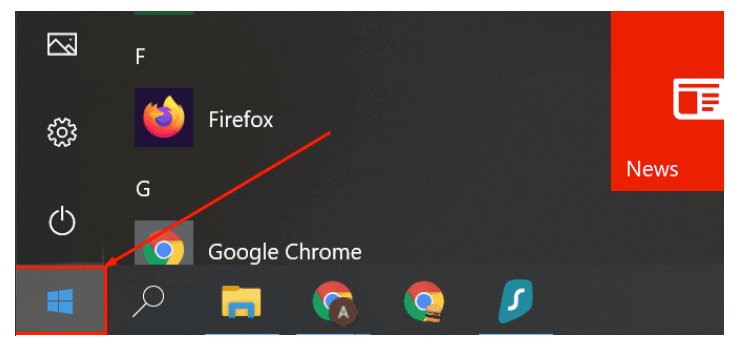
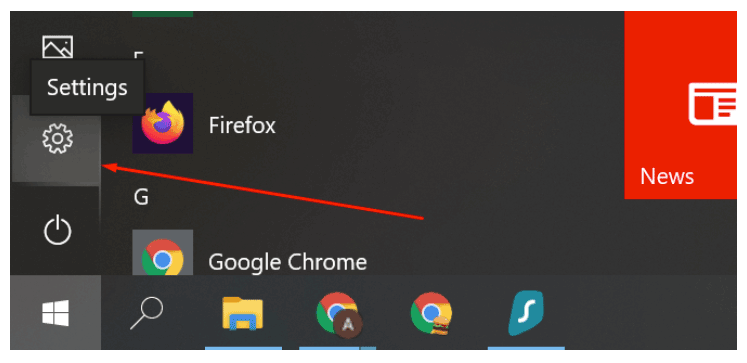
- Click on the Settings cogwheel in the start bar menu that pops up.
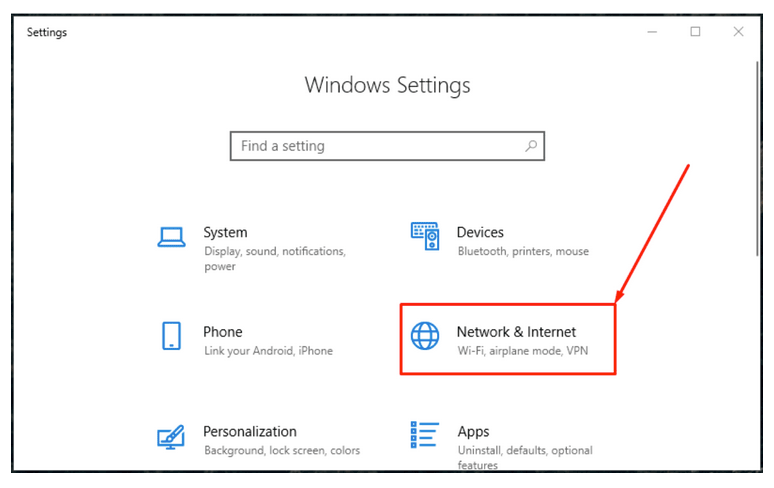
- In the Windows Settings window, click on Network & Internet.
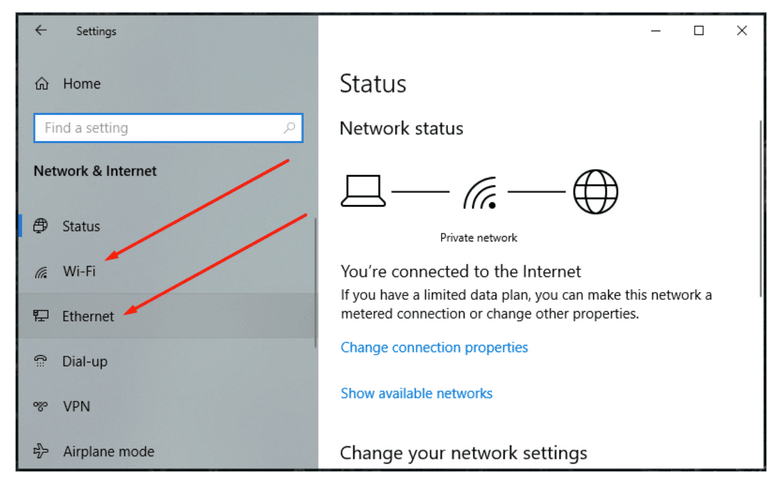
- On the left panel, choose Wi-Fi if you are using wireless internet or Ethernet if you are using a wired internet connection.
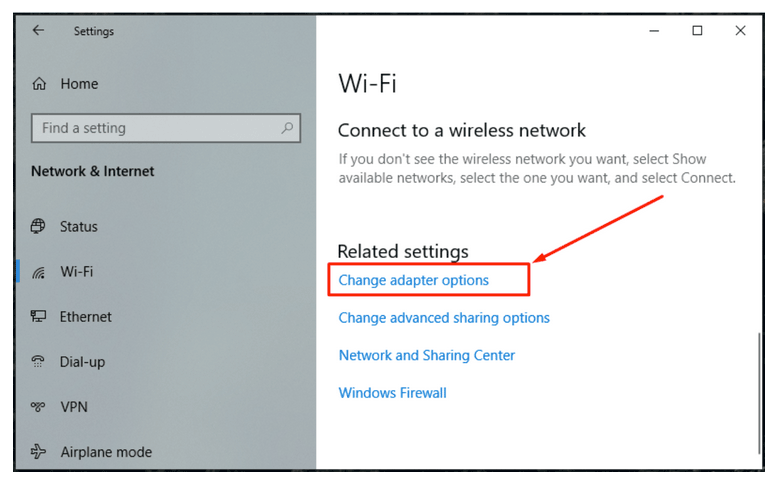
- Scroll down to the bottom and click Change adapter options.
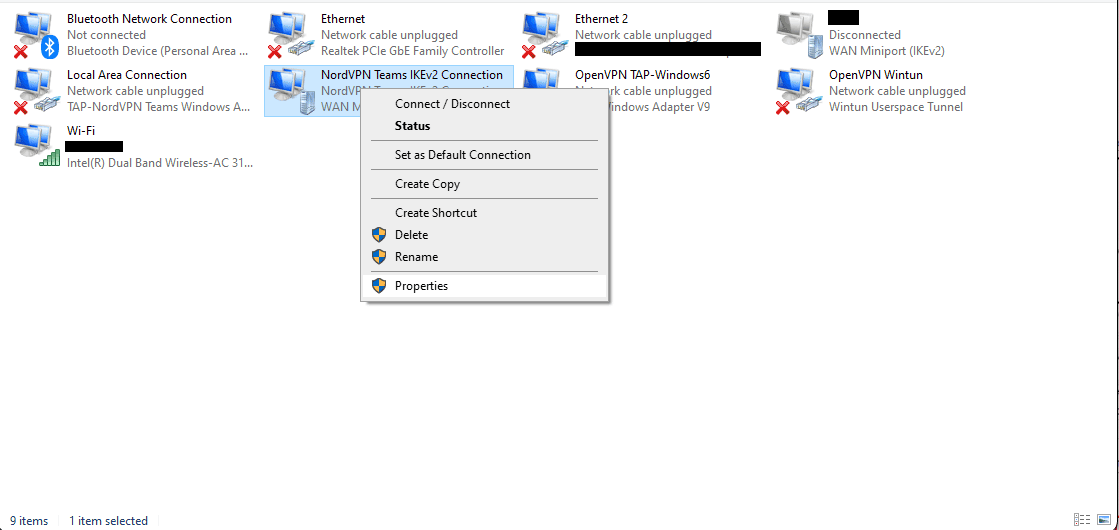
- Now you will see all TAP adapters on your PC. Right-click on the active TAP adapter, then click Properties.
- Untick the Internet Protocol Version 6 (TCP/IPv6) box and press OK.

- Repeat the process with other TAP adapters and reboot your computer.
Note: In case you have any questions or are experiencing any issues, please feel free to contact our 24/7 customer support team.