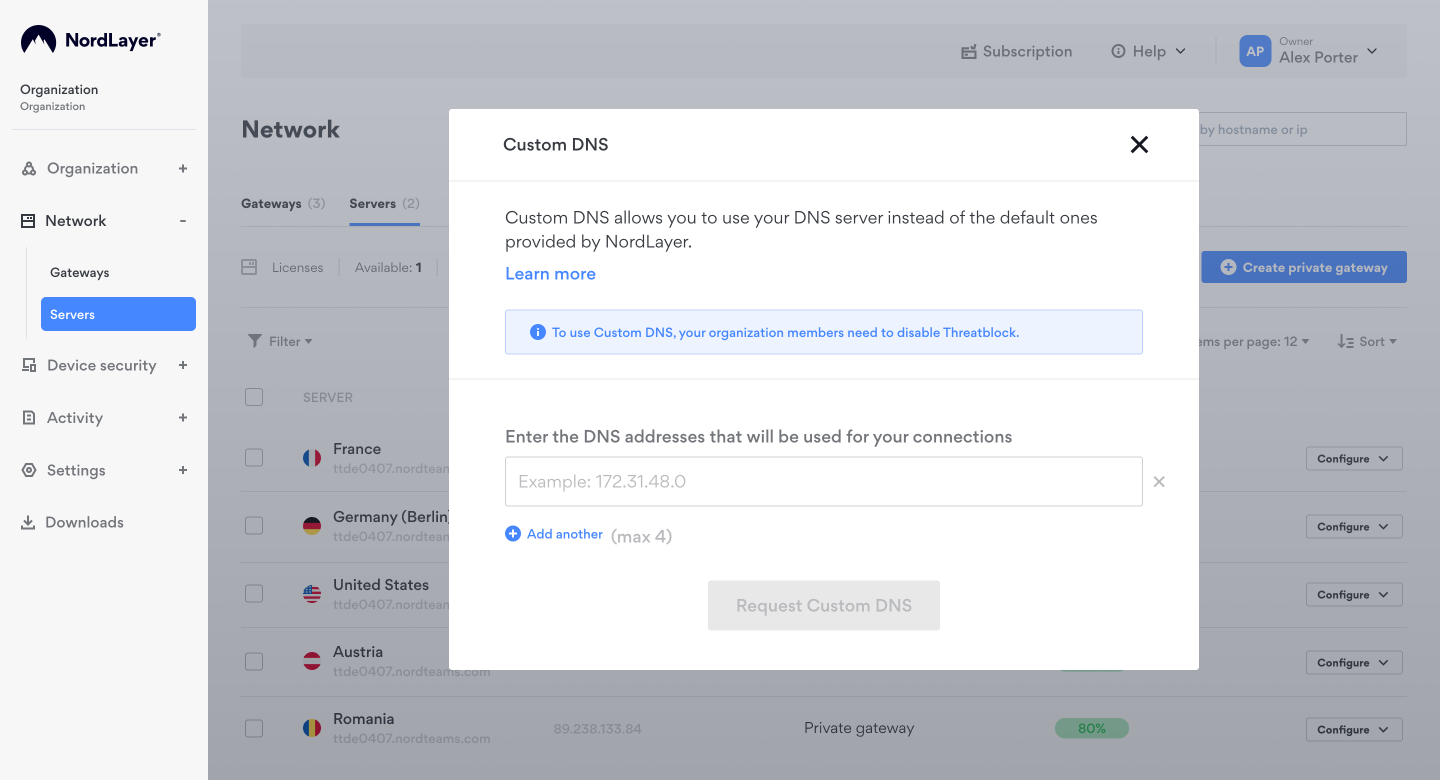
Custom DNS allows you to use your DNS server instead of the default ones provided by NordLayer. Learn more
Request form
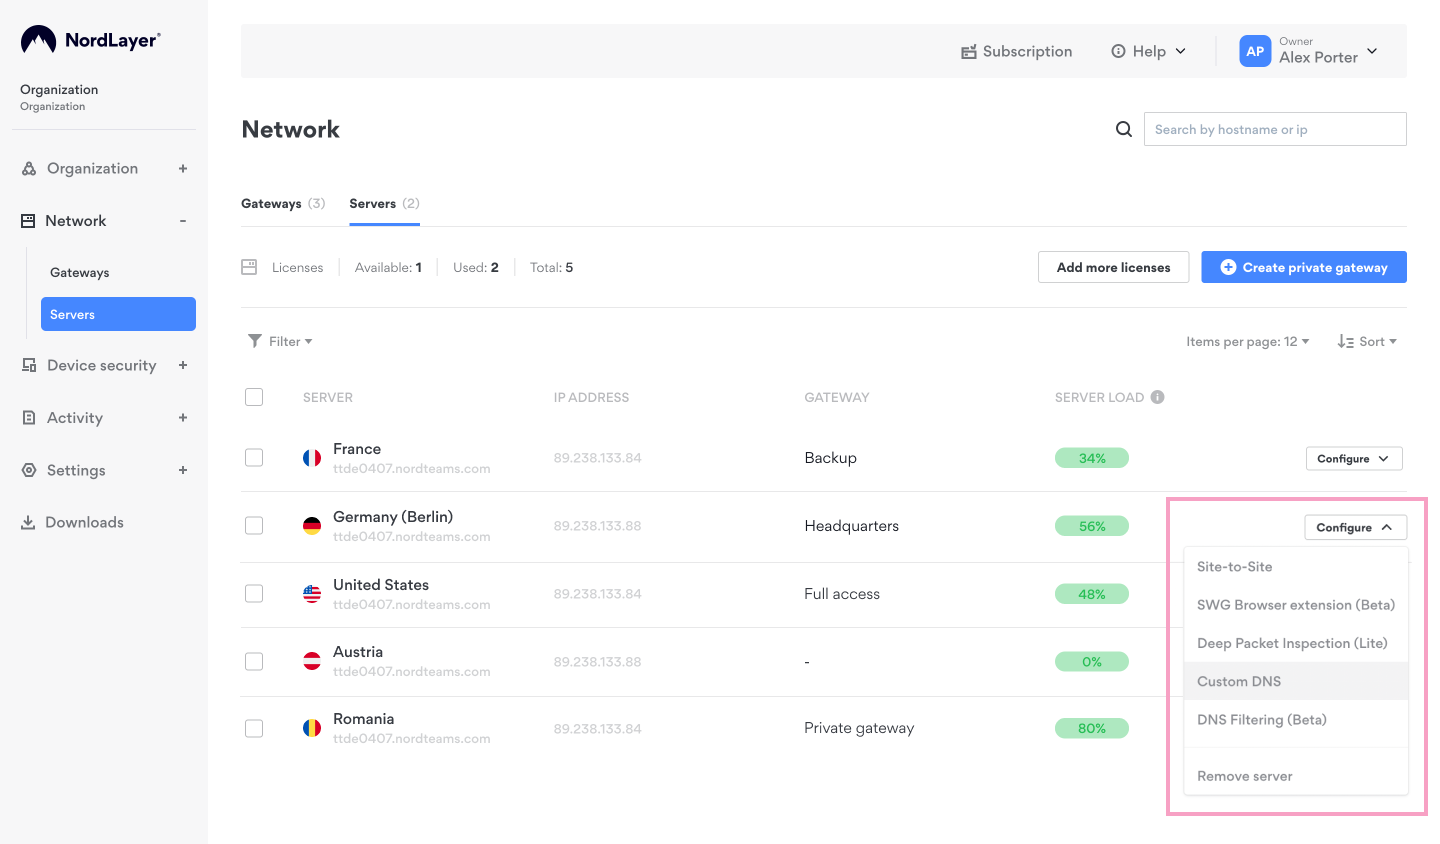
You can find the request form in the Control Panel, under Servers or Gateways tab.
Simply click on the button Configure on your preferred server with a dedicated IP and choose Custom DNS option on a dropdown menu.

Information
In order to proceed with the Custom DNS setup, you will need to enter the IP address of the DNS server that you would like to use (up to 4 DNS servers at the same time) in the order form.

Once you click on Request Custom DNS, please allow up to 24 hours for the feature to be enabled. You will get an email with the confirmation once it’s ready.
Adding a Custom DNS Suffix on Windows (optional)
If you need to preconfigure a DNS suffix for hostname resolution on your Windows operating system, follow these steps:
-
Open Network and Sharing Center
- Press Win + I to open the Settings menu.
- Navigate to Network & Internet → Advanced network settings → More network adapter options (under Related Settings).
-
Access Your Network Adapter Properties
- Locate the NordLynx adapter.
- Right-click on it and select Properties.
-
Modify IPv4 Settings
- In the Properties window, find Internet Protocol Version 4 (TCP/IPv4) in the list.
- Select it and click Properties.
-
Configure the Preferred DNS Server
In the IPv4 Properties window:
1. Select Use the following DNS server addresses.
2. Enter
192.168.1.50
as the Preferred DNS server.
-
Add a Custom DNS Suffix
- Click the Advanced... button.
- Switch to the DNS tab in the Advanced Settings window.
- Under Append these DNS suffixes (in order):
- Click Add...
- Enter your domain, e.g., NordLayer.com
- Confirm by clicking OK.
-
Save and Apply the Settings
- Click OK in all open windows to save your changes.
- Restart your network connection by disabling and re-enabling it to apply the new configuration.
Note: In case you have any questions or are experiencing any issues, please feel free to contact our 24/7 customer support team.