The Control Panel enables administrators to create private gateways, manage servers with dedicated IP addresses, and provide secure, efficient network access for teams.
Network overview
Gateways
A gateway serves as the connection point between a NordLayer server with a dedicated IP and an assigned team.
- Private Gateways: Each private gateway links a team to selected servers, enabling secure and segmented access.
- Team Assignments: Teams can be assigned to a gateway to control their access to internal resources.
Servers with a dedicated IP
A purchased server with a dedicated IP is assigned exclusively for your organization. This server's IP address will remain unchanged. It will be used to create a Virtual Private Gateway (VPN), allowing all users to connect through a single, unified IP address. Each dedicated server requires its own license. Administrators can increase the number of server licenses to align with their organization’s resource requirements. These servers are particularly useful for tasks like:
- Allowlisting IPs for secure access to applications and platforms.
- Site-to-site connections, which require stable and consistent server configurations.
- Strengthen your cloud network security with features like Cloud firewall, DNS filtering, Deep Packet Inspection, and others.
Server status
Gateways and servers have a status (e.g., Active, Suspended) that reflects their current operational state. Administrators can modify these states as needed to maintain network efficiency.
Server management
Accessing the Servers section
Navigate to Network -> Servers
In this section you can review the list of servers with a dedicated IP, including assigned teams and load information.
Adding Servers to a Gateway
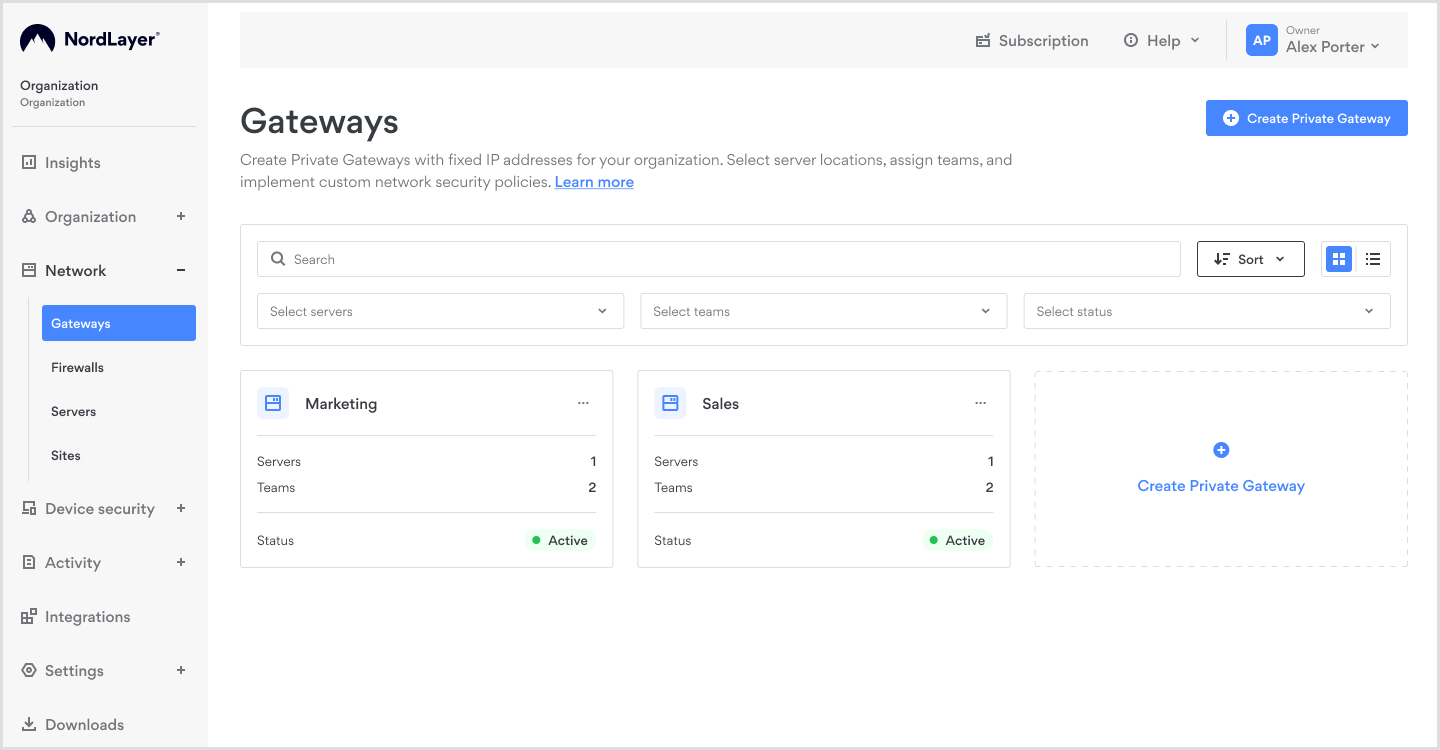
- Go to the Gateways section.
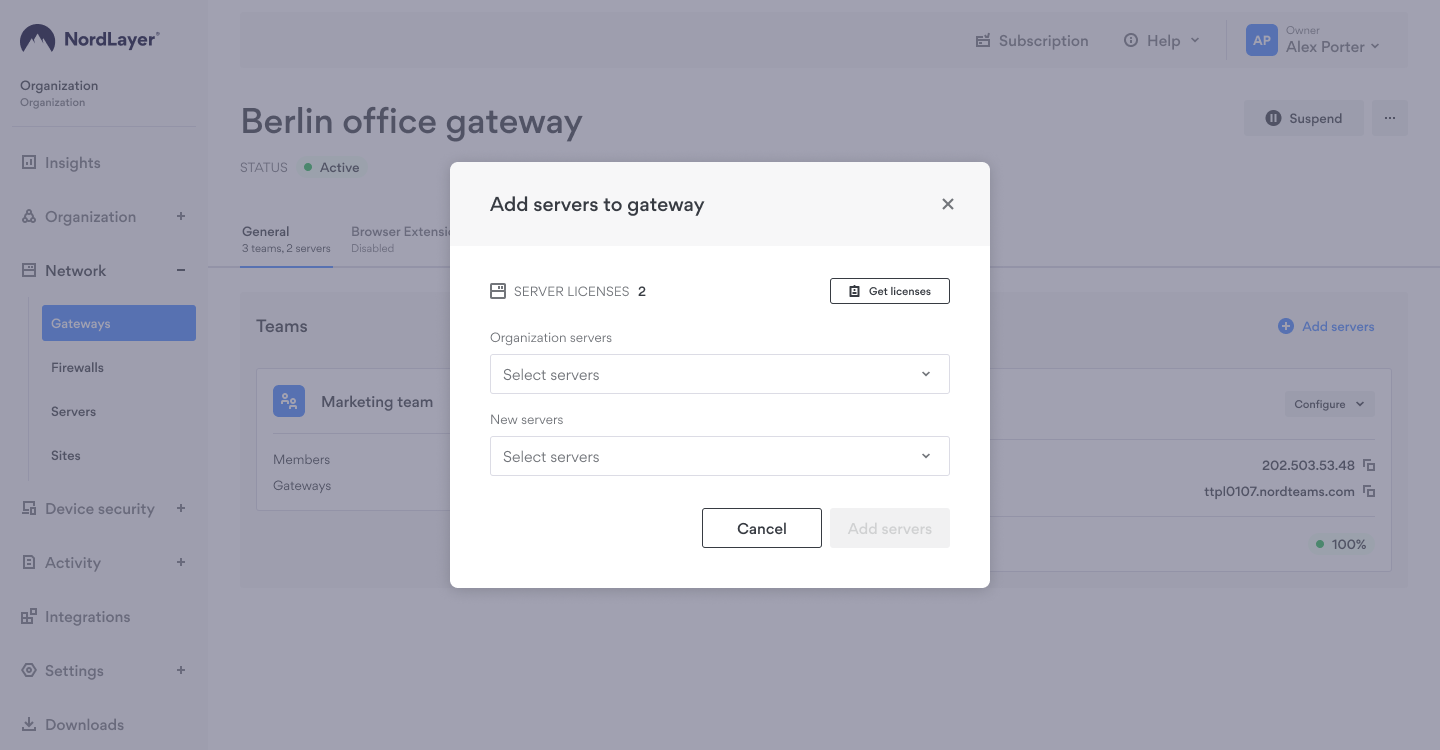
- Select a gateway and click Add servers.
Deleting a Server
- Navigate to the gateway containing the server to be removed.
- Click the Configure button near the server.
- Select Delete from the actions dropdown menu.
Gateways
Accessing the Gateways Section
Navigate to: Network -> Gateways.
Creating a Private Gateway
- Click Create Private Gateway.
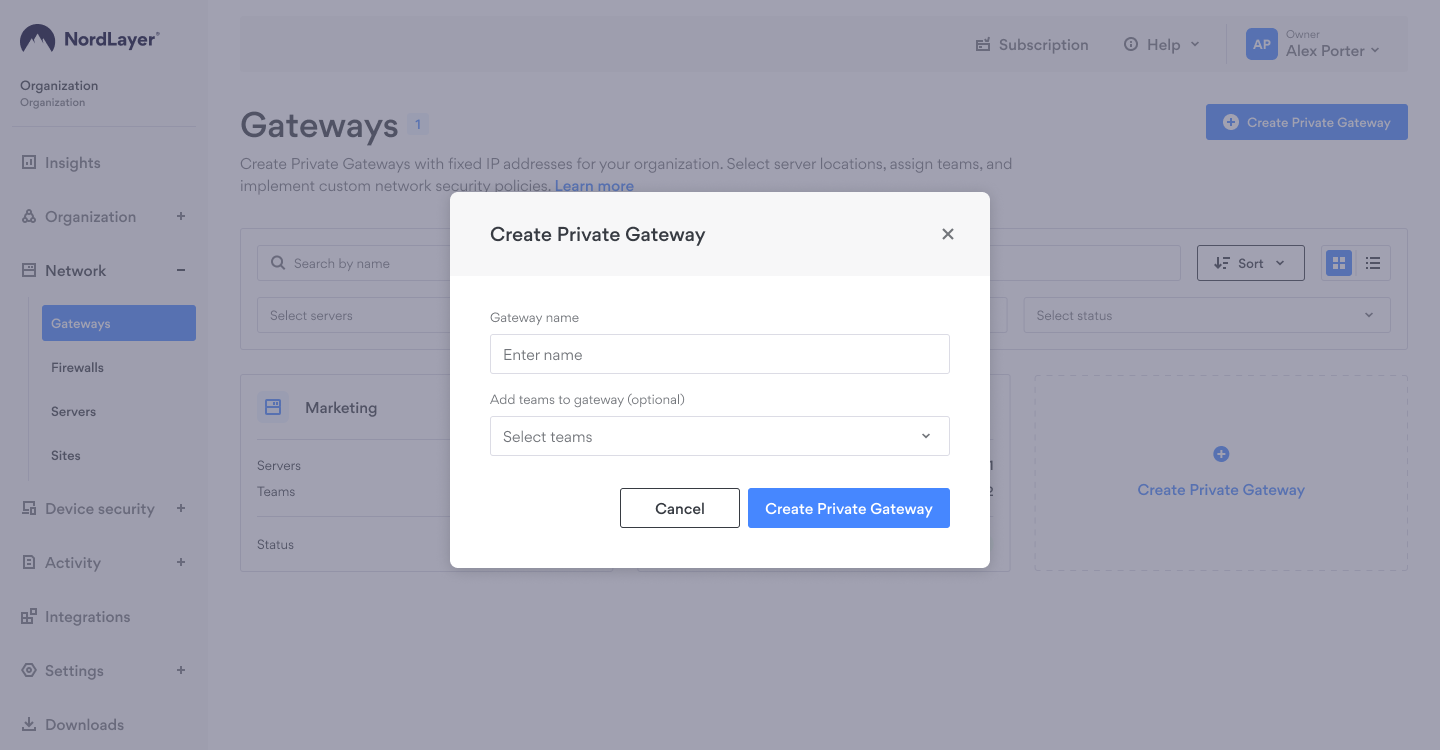
- Enter a name for the gateway and click Create Private Gateway.
Assigning Teams to Gateways
- Select the gateway to modify.
- Click Add teams.
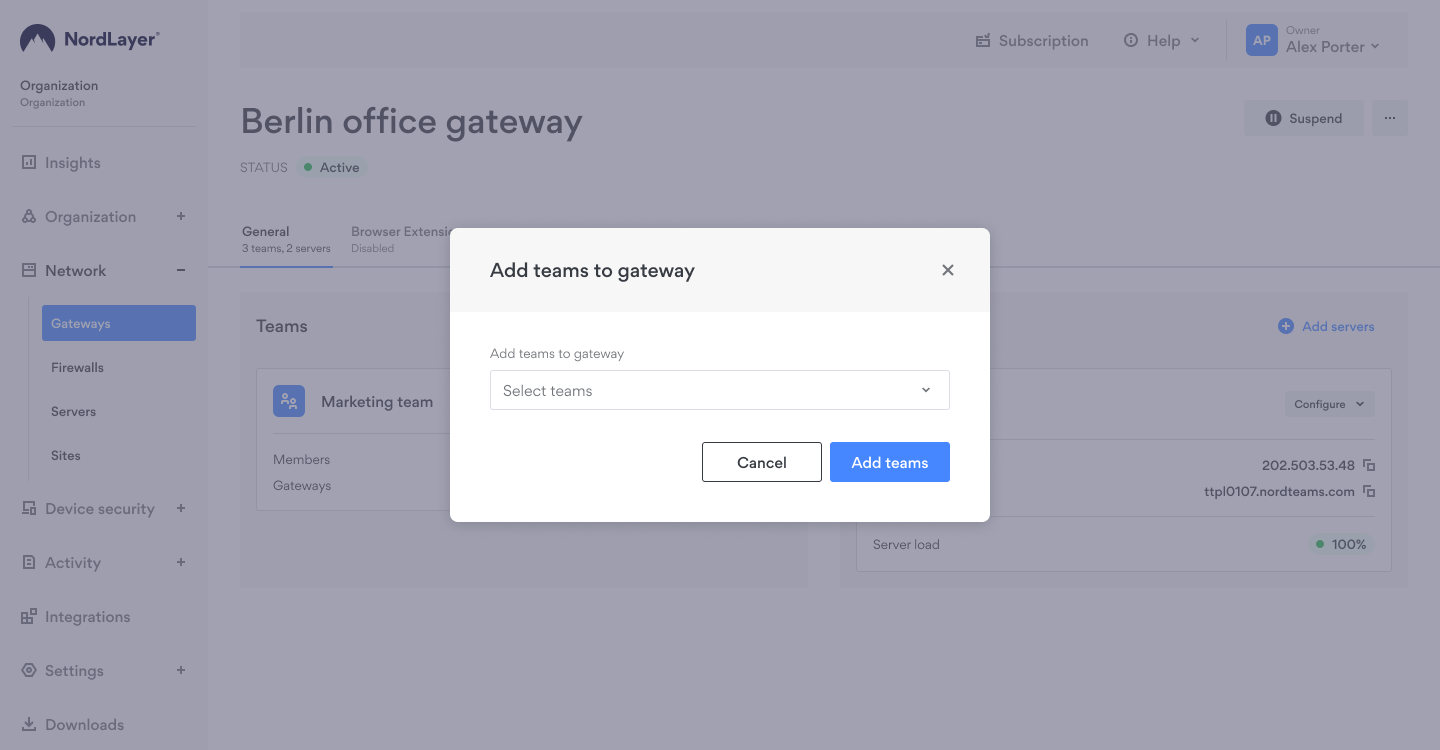
- Search for the team, then click Add teams.
Adding Servers to Gateways
- Select the gateway to modify.
- Click Add servers.
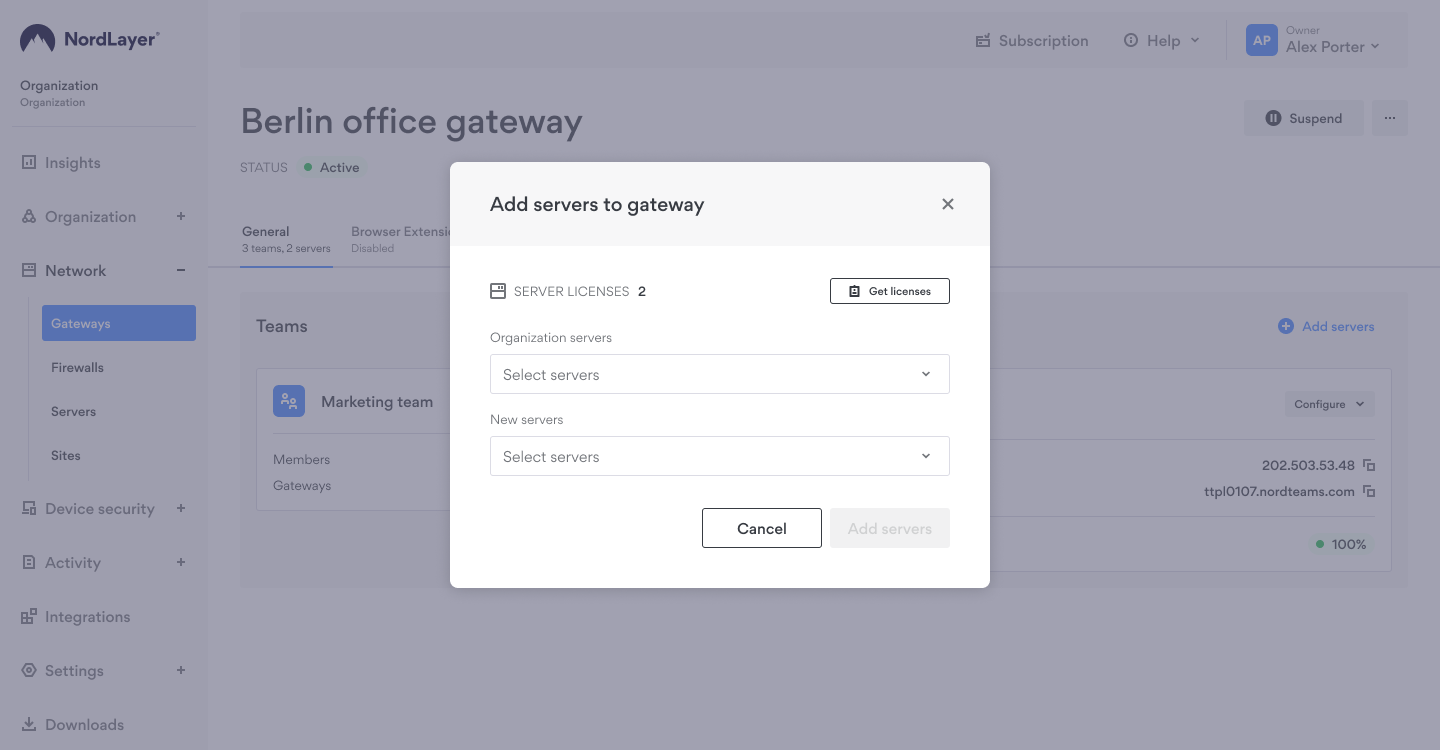
- Search for the server, then click Add servers.
Suspending or Activating a Gateway
Hover over the gateway, click the three-dot icon, and select Suspend or Activate.
Renaming a Gateway
- Hover over the gateway and click the three-dot icon.
- Select Rename, enter a new name, and click Save changes.
Deleting a Gateway
Hover over the gateway, click the three-dot icon, and select Delete.
We highly recommend adding more than one server to increase gateway uptime. For more information, read here.
Note: In case you have any questions or are experiencing any issues, please feel free to contact our 24/7 customer support team.